
ClamAV (Clam AntiVirus) is a powerful, open-source antivirus engine designed specifically for Unix-like systems, including Linux. As one of the most reliable antivirus solutions for Linux environments, ClamAV provides comprehensive malware detection capabilities through its command-line interface and daemon services.
This comprehensive guide will walk you through everything you need to know about using ClamAV commands on Linux, from basic installation to advanced scanning techniques and real-time protection setup.
What is ClamAV?
ClamAV is a free, cross-platform antivirus software toolkit that excels at detecting trojans, viruses, malware, and other malicious threats. Originally developed for mail servers, ClamAV has evolved into a versatile security solution suitable for various Linux applications including:
- File system scanning
- Email server protection
- Web server security
- Network gateway filtering
- Automated security monitoring
Installing ClamAV on Linux
Before diving into ClamAV commands, you need to install the software on your Linux system. The installation process varies depending on your Linux distribution.
Ubuntu/Debian Installation
sudo apt update
sudo apt install clamav clamav-daemon clamav-freshclam
CentOS/RHEL/Fedora Installation
# For CentOS/RHEL
sudo yum install epel-release
sudo yum install clamav clamav-update

# For Fedora
sudo dnf install clamav clamav-update clamd
Arch Linux Installation
sudo pacman -S clamavEssential ClamAV Commands
1. Updating Virus Definitions
Before running any scans, it’s crucial to update the virus definition database using the freshclam command:
sudo freshclamExpected Output:
ClamAV update process started at Tue Aug 26 03:52:15 2025
main.cvd database is up-to-date (version: 62, sigs: 6647427, f-level: 90, builder: sigmgr)
daily.cvd database is up-to-date (version: 27054, sigs: 2030070, f-level: 90, builder: raynman)
bytecode.cvd database is up-to-date (version: 334, sigs: 92, f-level: 63, builder: anvilleg)
Received 0 updated databases since last update
2. Basic File Scanning with clamscan
The clamscan command is the primary tool for scanning files and directories:
# Scan a single file
clamscan /path/to/file

# Scan a directory
clamscan /path/to/directory/

# Recursive directory scan
clamscan -r /path/to/directory/
Example Output:
$ clamscan -r /home/user/Downloads/
/home/user/Downloads/document.pdf: OK
/home/user/Downloads/image.jpg: OK
/home/user/Downloads/suspicious.exe: Win.Trojan.Agent-1234567 FOUND
/home/user/Downloads/archive.zip: OK

----------- SCAN SUMMARY -----------
Known viruses: 8677589
Engine version: 1.0.0
Scanned directories: 1
Scanned files: 4
Infected files: 1
Data scanned: 15.67 MB
Data read: 12.45 MB (compression ratio 0.79:1)
Time: 12.456 sec (0 m 12 s)
3. Advanced Scanning Options
Verbose Output
clamscan -v /path/to/scanRemove Infected Files
clamscan --remove /path/to/scanMove Infected Files to Quarantine
clamscan --move=/quarantine/directory /path/to/scanScan Only Specific File Types
# Scan only executable files
clamscan --include="\.exe$" -r /path/to/scan

# Scan compressed files
clamscan --scan-archive /path/to/scan
ClamAV Daemon (clamd) Configuration
For real-time protection and better performance, ClamAV offers a daemon service called clamd. This daemon runs continuously in the background and provides faster scanning capabilities.
Starting the ClamAV Daemon
# Enable and start the daemon
sudo systemctl enable clamav-daemon
sudo systemctl start clamav-daemon

# Check daemon status
sudo systemctl status clamav-daemon
Using clamdscan with Daemon
The clamdscan command communicates with the running daemon for faster scans:
# Basic daemon scan
clamdscan /path/to/scan

# Recursive daemon scan
clamdscan --multiscan --fdpass /path/to/scan
Performance Comparison Output:
$ time clamscan -r /home/user/Documents/
# Output: real 2m15.432s

$ time clamdscan --multiscan /home/user/Documents/
# Output: real 0m28.156s
Real-Time Protection Setup
ClamAV can be configured for real-time protection using clamonacc (ClamAV On-Access scanner):
# Install on-access scanner
sudo apt install clamav-daemon

# Configure and start on-access scanning
sudo clamonacc --config-file=/etc/clamav/clamd.conf
Configuration File Setup
Edit the ClamAV configuration file to enable on-access scanning:
sudo nano /etc/clamav/clamd.confKey configuration options:
# Enable on-access scanning
ScanOnAccess yes

# Directories to monitor
OnAccessIncludePath /home
OnAccessIncludePath /var/www

# Exclude paths
OnAccessExcludePath /proc
OnAccessExcludePath /sys

# Prevention mode
OnAccessPrevention yes
Automated Scanning with Cron Jobs
Set up automated scans using cron jobs for regular system security checks:
# Edit crontab
crontab -e

# Add daily scan at 2 AM
0 2 * * * /usr/bin/clamscan -r /home --quiet --infected --remove --log=/var/log/clamav/daily-scan.log

# Add weekly full system scan
0 3 * * 0 /usr/bin/clamscan -r / --quiet --infected --move=/quarantine --log=/var/log/clamav/weekly-scan.log
Advanced ClamAV Commands and Options
Database Information
# Check database version
sigtool --info /var/lib/clamav/main.cvd

# List all signatures
sigtool --list-sigs /var/lib/clamav/daily.cvd | head -10
Custom Signature Creation
Create custom signatures for specific threats:
# Create MD5 signature
sigtool --md5 suspicious_file > custom.hdb

# Create hex signature
echo "68656c6c6f:0:*:Custom.Malware.Test" >> custom.ndb
Memory and Performance Optimization
# Scan with memory limit
clamscan --max-filesize=100M --max-scansize=500M /path/to/scan

# Multi-threaded scanning
clamscan --threads=4 -r /path/to/scan
Log Analysis and Monitoring
ClamAV generates detailed logs that are essential for security monitoring:
Default Log Locations
# Freshclam logs
tail -f /var/log/clamav/freshclam.log

# Daemon logs
tail -f /var/log/clamav/clamav.log

# System logs
journalctl -u clamav-daemon -f
Log Analysis Commands
# Count infections found today
grep "$(date '+%Y-%m-%d')" /var/log/clamav/clamav.log | grep "FOUND" | wc -l

# Show most recent infections
grep "FOUND" /var/log/clamav/clamav.log | tail -10

# Analyze scan statistics
grep "SCAN SUMMARY" /var/log/clamav/clamav.log | tail -5
Troubleshooting Common ClamAV Issues
Database Update Failures
# Fix freshclam permissions
sudo chown -R clamav:clamav /var/lib/clamav/
sudo chmod 755 /var/lib/clamav/

# Manual database download
cd /tmp
wget http://database.clamav.net/main.cvd
sudo mv main.cvd /var/lib/clamav/
Performance Issues
# Check system resources during scan
top -p $(pgrep clamscan)

# Monitor memory usage
watch -n 1 'ps aux | grep clam'

# Adjust scanning parameters
clamscan --max-files=10000 --max-recursion=10 /path/to/scan
Integration with Other Security Tools
Integration with rsyslog
# Add to /etc/rsyslog.conf
local0.*    /var/log/clamav-custom.log

# Restart rsyslog
sudo systemctl restart rsyslog
Email Integration
# Scan and notify via email
#!/bin/bash
SCAN_RESULT=$(clamscan -r /home --infected --quiet)
if [ $? -eq 1 ]; then
    echo "$SCAN_RESULT" | mail -s "Virus Detection Alert" [email protected]
fi
Best Practices for ClamAV Usage
- Regular Updates: Schedule freshclam to update virus definitions multiple times daily
- Layered Security: Use ClamAV alongside other security tools like fail2ban and firewall rules
- Resource Management: Monitor system resources during large scans to avoid performance degradation
- Log Retention: Implement log rotation to manage disk space while maintaining security records
- Quarantine Policy: Establish clear procedures for handling quarantined files
Conclusion
ClamAV provides robust antivirus protection for Linux systems through its comprehensive command-line interface. From basic file scanning with clamscan to advanced real-time protection with clamd, ClamAV offers the flexibility and power needed for enterprise-level security implementations.
By mastering these ClamAV commands and implementing proper automation, you can significantly enhance your Linux system’s security posture. Regular updates, proper configuration, and continuous monitoring form the foundation of effective antivirus protection in Linux environments.
Remember to always keep your virus definitions updated, monitor system logs regularly, and adapt your scanning strategies based on your specific security requirements and system resources.
Related Posts
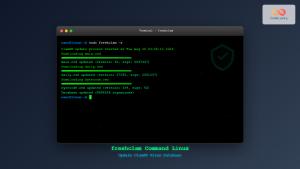
freshclam Command Linux: Complete Guide to Update ClamAV Antivirus Database
The freshclam command is an essential tool for maintaining up-to-date virus definitions in ClamAV, the popular open-source antivirus engine for...
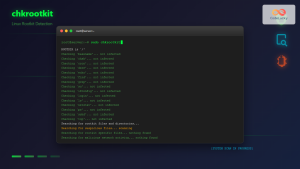
chkrootkit Command Linux: Complete Guide to Rootkit Detection and System Security
System security is paramount in Linux administration, and rootkits pose one of the most serious threats to system integrity. The...
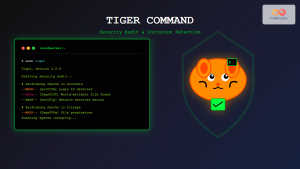
tiger Command Linux: Complete Security Audit and Intrusion Detection Guide
The tiger command is a powerful security auditing tool designed specifically for Unix-like systems, including Linux distributions. This comprehensive security...
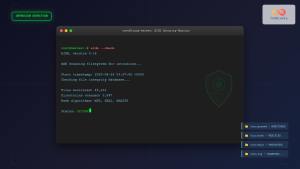
aide Command Linux: Complete Guide to Advanced Intrusion Detection Environment
The AIDE (Advanced Intrusion Detection Environment) command is a powerful security tool for Linux systems that monitors file and directory...
lynis Command Linux: Complete Security Auditing Tool Guide
The lynis command is a powerful, open-source security auditing tool designed specifically for Unix-based systems including Linux, macOS, and BSD....
samhain Linux: Complete Guide to Host-based Intrusion Detection System
Samhain is a powerful host-based intrusion detection system (HIDS) designed specifically for Linux and Unix-like systems. This comprehensive security tool...
Intrusion Detection System: Complete Guide to OS-Level Security Monitoring
Understanding Intrusion Detection Systems An Intrusion Detection System (IDS) is a critical security tool that monitors network traffic and system...
OSSEC Linux: Complete Guide to Host-based Intrusion Detection System for Enterprise Security
What is OSSEC Linux? OSSEC (Open Source Security Event Correlator) is a powerful, open-source Host-based Intrusion Detection System (HIDS) that...
rkhunter Command Linux: Complete Guide to Rootkit Detection and System Security
The rkhunter (Rootkit Hunter) is a powerful Unix-based security scanner designed to detect rootkits, backdoors, and local exploits on Linux...

tripwire Linux: Complete Guide to File Integrity Monitoring and Security
Tripwire is a powerful file integrity monitoring (FIM) tool that helps system administrators detect unauthorized changes to critical system files,...

whatsup Linux: Complete Network Monitoring and System Administration Guide
whatsup is a powerful network monitoring and system administration tool for Linux that provides real-time insights into network connectivity, system...

Munin Linux: Complete Guide to Network Resource Monitoring and Performance Analysis
Munin is a powerful networked resource monitoring tool for Linux systems that provides comprehensive insights into system performance, resource utilization,...


