
The cgdisk command is a powerful curses-based GPT (GUID Partition Table) partition editor for Linux systems. Unlike traditional command-line tools, cgdisk provides an interactive, menu-driven interface that makes GPT partition management more intuitive while maintaining the precision required for system administration tasks.
What is cgdisk Command?
cgdisk is part of the GPT fdisk (gdisk) package and serves as a curses-based frontend for GPT partition manipulation. It combines the power of command-line partitioning tools with a user-friendly text-based interface, making it ideal for both beginners and experienced system administrators who prefer visual feedback when managing disk partitions.
Key Features of cgdisk
- Interactive Interface: Menu-driven operations with keyboard navigation
- GPT Support: Native support for GUID Partition Tables
- Real-time Feedback: Visual representation of partition changes
- Safety Features: Built-in warnings and confirmation prompts
- UEFI Compatible: Perfect for modern UEFI systems
cgdisk Syntax and Basic Usage
The basic syntax for cgdisk is straightforward:
cgdisk [options] deviceCommon Options
| Option | Description |
|---|---|
-h |
Display help information |
-v |
Show version information |
device |
Target disk device (e.g., /dev/sda, /dev/nvme0n1) |
Installing cgdisk
Before using cgdisk, ensure it’s installed on your system:
Ubuntu/Debian:
sudo apt update
sudo apt install gdisk
CentOS/RHEL/Fedora:
sudo yum install gdisk
# or for newer versions
sudo dnf install gdisk
Arch Linux:
sudo pacman -S gptfdiskGetting Started with cgdisk
Let’s explore cgdisk with practical examples. First, let’s launch cgdisk on a disk:
sudo cgdisk /dev/sdbExample Output:
                                 GPT Partitions Tool v1.0.9
                                   /dev/sdb (8.0 GiB)

   Part. #     Size        Partition Type            Partition Name
________________________________________________________________
              8.0 GiB     free space

[ Align  ] [ Backup ] [ Delete ] [ Help   ] [ Info   ] [ Load   ]
[ naMe   ] [ New     ] [ Print  ] [ Quit   ] [ reCover] [ Sort   ]
[ Verify ] [ Write   ]

                        Press the highlighted key for action
cgdisk Interface Navigation
The cgdisk interface consists of several key areas:
Main Display Elements
- Header: Shows tool version and disk information
- Partition Table: Lists all partitions with details
- Command Menu: Available actions at the bottom
- Status Bar: Instructions and feedback
Navigation Keys
| Key | Function |
|---|---|
| ↑/↓ Arrow Keys | Navigate between partitions |
| Tab | Move between interface elements |
| Enter | Execute highlighted command |
| Highlighted Letter | Quick command execution |
Creating New Partitions
Let’s create a new partition using cgdisk’s interactive interface:
Step-by-Step Partition Creation
- Launch cgdisk:
sudo cgdisk /dev/sdb- Select “New” option: Press ‘n’ or navigate to [New]
- Specify partition details:
First sector (2048-16777182, default = 2048): [Enter for default]
Size in sectors or {KMGTPE} (default = 16775135): +2G
Current type is 'Linux filesystem'
Hex code or GUID (L to show codes, Enter = 8300): [Enter for Linux filesystem]
Current partition name is ''
Enter new partition name, or press Enter to use the current name: MyData
Result Display:
                                 GPT Partitions Tool v1.0.9
                                   /dev/sdb (8.0 GiB)

   Part. #     Size        Partition Type            Partition Name
________________________________________________________________
   1           2.0 GiB     Linux filesystem          MyData
              6.0 GiB     free space
Common Partition Types and Codes
cgdisk supports numerous partition types. Here are the most commonly used ones:
| Code | Type | Description |
|---|---|---|
| 8300 | Linux filesystem | Standard Linux data partition |
| 8200 | Linux swap | Linux swap partition |
| ef00 | EFI System | EFI system partition for UEFI boot |
| 8e00 | Linux LVM | Linux Logical Volume Manager |
| fd00 | Linux RAID | Linux software RAID partition |
Advanced cgdisk Operations
Modifying Existing Partitions
Let’s modify an existing partition’s properties:
- Select the partition: Use arrow keys to highlight the target partition
- Access Info menu: Press ‘i’ to view detailed information
Partition GUID code: C12A7328-F81F-11D2-BA4B-00A0C93EC93B (EFI System)
Partition unique GUID: 12345678-1234-5678-9ABC-DEF012345678
First sector: 2048 (at 1024.0 KiB)
Last sector: 1050623 (at 513.0 MiB)
Partition size: 1048576 sectors (512.0 MiB)
Attribute flags: 0000000000000000
Partition name: 'EFI System Partition'
Changing Partition Names
To change a partition name:
- Select the partition
- Press ‘m’ for naMe option
- Enter the new name
Enter new partition name, or press Enter to use the current name: Boot-PartitionCreating a Complete Partition Scheme
Let’s create a typical Linux installation partition scheme:
Example: Setting up EFI + Root + Home + Swap
# Launch cgdisk
sudo cgdisk /dev/sdb

# Create EFI System Partition (512MB)
New → First sector: [default] → Size: +512M → Type: ef00 → Name: EFI

# Create Root Partition (30GB)
New → First sector: [default] → Size: +30G → Type: 8300 → Name: Root

# Create Home Partition (remaining space - 4GB for swap)
New → First sector: [default] → Size: -4G → Type: 8300 → Name: Home

# Create Swap Partition (4GB)
New → First sector: [default] → Size: [default] → Type: 8200 → Name: Swap
Resulting Partition Table:
                                 GPT Partitions Tool v1.0.9
                                   /dev/sdb (64.0 GiB)

   Part. #     Size        Partition Type            Partition Name
________________________________________________________________
   1         512.0 MiB     EFI System                EFI
   2          30.0 GiB     Linux filesystem          Root
   3          29.5 GiB     Linux filesystem          Home
   4           4.0 GiB     Linux swap                Swap
cgdisk Safety Features
Verification and Backup
cgdisk includes several safety mechanisms:
Verify Command (‘v’)
Checks partition table integrity:
No problems found. 65535 free sectors (32.0 MiB) available in 1
segments, the largest of which is 65535 (32.0 MiB) in size.
Backup Command (‘b’)
Creates a backup of the current partition table:
Enter backup filename to save: backup_partition_table.gpt
The backup GPT data have been saved to backup_partition_table.gpt
Error Handling and Troubleshooting
Common Issues and Solutions
Issue: “Device is busy” Error
Error: Device /dev/sdb is busySolution:
# Unmount all partitions on the device
sudo umount /dev/sdb*

# Check for active processes
sudo lsof | grep /dev/sdb

# Kill processes if necessary
sudo fuser -k /dev/sdb
Issue: Partition Alignment Warnings
Warning: Partition 1 does not end on a sector boundary.Solution: Use the Align command (‘a’) to fix alignment issues automatically.
Recovery Operations
If you need to recover a damaged partition table:
- Use the reCover command (‘r’):
                         recovery/transformation menu

b   use backup GPT header (rebuilding main)
c   load backup partition table from disk (rebuilding main)
d   use main GPT header (rebuilding backup)
e   load main partition table from disk (rebuilding backup)
f   load MBR and build fresh GPT from it
g   convert GPT into MBR and exit
h   make hybrid MBR
i   show detailed information on a partition
l   load partition data from a backup file
m   return to main menu
o   print protective MBR data
p   print the partition table
q   quit without saving changes
t   transform BSD disklabel partition
v   verify disk
w   write table to disk and exit
x   extra functionality (experts only)
?   print this menu
Best Practices for cgdisk Usage
Pre-operation Checklist
- Always backup important data before partitioning
- Unmount target partitions before modification
- Verify disk identification to avoid wrong device operations
- Use verification commands before writing changes
Recommended Workflow
- Plan your partition layout on paper first
- Launch cgdisk and examine the current state
- Create backup of existing partition table
- Make changes incrementally and verify each step
- Use Print command (‘p’) to review before writing
- Write changes only when satisfied with the layout
Comparing cgdisk with Other Tools
| Feature | cgdisk | fdisk | gdisk | parted |
|---|---|---|---|---|
| Interface | Curses-based | Command-line | Command-line | Both |
| GPT Support | Native | Limited | Native | Full |
| User-Friendliness | High | Medium | Medium | High |
| Scripting | No | Yes | Limited | Yes |
Advanced Features and Expert Mode
Expert Functionality
Access expert mode through the recovery menu (‘r’ → ‘x’):
                            Expert command menu

a   set attributes
c   change partition GUID
d   display the sector alignment value
e   relocate backup data structures to the end of the disk
g   change disk GUID
h   recompute CHS values in protective/hybrid MBR
i   show detailed information on a partition
l   set the sector alignment value
m   return to main menu
n   create a new protective MBR
o   print protective MBR data
p   print the partition table
q   quit without saving changes
r   recovery and transformation options
s   resize partition table
t   transpose two partition table entries
u   Replicate partition table on new device
v   verify disk
w   write table to disk and exit
z   zap (destroy) GPT data structures and exit
?   print this menu
Setting Partition Attributes
Modify partition attributes for special behaviors:
# In expert mode, select 'a' for attributes
Current attributes are: 0000000000000000
Set fields are:
  0 (system partition)
  1 (hide from EFI)
  2 (legacy BIOS bootable)
 60 (read-only)
 62 (hidden)
 63 (do not automount)

Toggle which attribute field (0-63, 64 or  to exit): 0
Have enabled the 'system partition' attribute.
Attribute value is 0000000000000001.
Practical Use Cases
Use Case 1: Setting up UEFI Boot Drive
sudo cgdisk /dev/nvme0n1

# Create partitions:
# 1. EFI System Partition (512MB, ef00)
# 2. Boot partition (1GB, 8300)
# 3. Root partition (remaining, 8300)

# Set EFI partition attributes in expert mode
# Enable system partition and EFI system partition attributes
Use Case 2: Preparing Drive for Linux RAID
sudo cgdisk /dev/sdc

# Create RAID partitions with type fd00
# Name them consistently (raid1, raid2, etc.)
# Ensure all partitions have identical sizes
Integration with File Systems
After creating partitions with cgdisk, format them appropriately:
# Format EFI partition
sudo mkfs.fat -F32 /dev/sdb1

# Format ext4 partitions
sudo mkfs.ext4 /dev/sdb2
sudo mkfs.ext4 /dev/sdb3

# Setup swap
sudo mkswap /dev/sdb4
Conclusion
The cgdisk command provides a powerful yet user-friendly interface for GPT partition management in Linux. Its curses-based interface bridges the gap between command-line efficiency and graphical ease-of-use, making it an excellent choice for system administrators and advanced users who need precise control over disk partitioning.
By mastering cgdisk’s interactive interface, safety features, and advanced capabilities, you can confidently manage modern GPT-based storage systems while minimizing the risk of data loss through its built-in verification and backup mechanisms.
Whether you’re setting up new systems, reorganizing existing storage, or preparing drives for specific use cases like RAID or LVM, cgdisk offers the flexibility and reliability needed for professional disk management tasks.
Related Posts
sgdisk Command Linux: Complete Guide to Script-Friendly GPT Partition Management
The sgdisk command is a powerful script-friendly alternative to the interactive gdisk utility for managing GPT (GUID Partition Table) partitions...
cfdisk Command Linux: Complete Guide to Curses-based Partition Management
The cfdisk command is a powerful, user-friendly partition table editor for Linux systems that provides a curses-based interface for managing...
gdisk Command Linux: Complete Guide to GPT Partition Table Management
The gdisk command is a powerful GPT (GUID Partition Table) partition editor for Linux systems that provides advanced capabilities for...
sfdisk Command Linux: Complete Guide to Scriptable Partition Table Editor
The sfdisk command is a powerful and scriptable partition table editor in Linux that provides advanced functionality for managing disk...
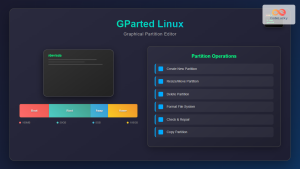
gparted Command Linux: Complete Guide to Graphical Partition Management
The gparted command in Linux provides access to one of the most powerful and user-friendly graphical partition editors available for...
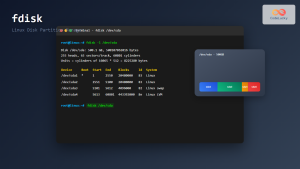
fdisk Command Linux: Complete Guide to Disk Partition Management
The fdisk command is one of the most powerful and essential tools for disk partition management in Linux systems. Whether...
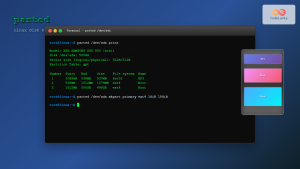
parted Command Linux: Complete Guide to Disk Partition Management
The parted command is a powerful disk partition manipulation program in Linux that allows you to create, resize, move, and...
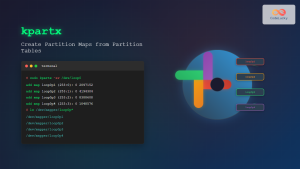
kpartx Command Linux: Create and Manage Partition Maps with Complete Examples
The kpartx command is a powerful Linux utility that creates device maps from partition tables, enabling you to access partitions...
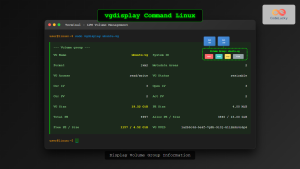
vgdisplay Command Linux: Complete Guide to Display Volume Group Information
The vgdisplay command is an essential tool in Linux systems for displaying detailed information about Volume Groups (VGs) in Logical...
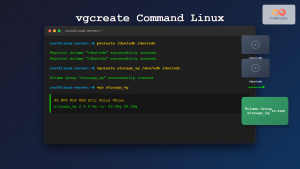
vgcreate Command Linux: Complete Guide to Volume Group Creation
The vgcreate command is a fundamental tool in Linux Logical Volume Manager (LVM) that allows system administrators to create volume...
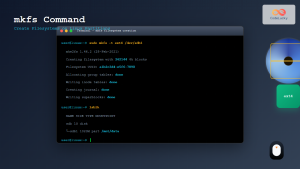
mkfs Command Linux: Complete Guide to Creating Filesystems on Partitions
The mkfs command in Linux is a fundamental tool for creating filesystems on disk partitions. Whether you're setting up a...
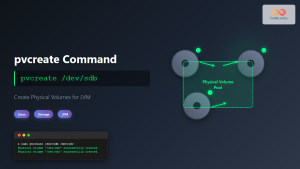
pvcreate Command Linux: Complete Guide to Creating Physical Volumes for LVM
The pvcreate command is a fundamental tool in Linux Logical Volume Management (LVM) that initializes storage devices as physical volumes....


