
Centreon is a powerful, open-source IT infrastructure monitoring platform built on top of Nagios Core. It provides a comprehensive web-based interface for monitoring networks, systems, applications, and services across your entire IT infrastructure. This guide covers everything you need to know about installing, configuring, and using Centreon on Linux systems.
What is Centreon?
Centreon is an enterprise-grade monitoring solution that combines the reliability of Nagios with a modern, user-friendly interface. It offers real-time monitoring, alerting, reporting, and performance analysis capabilities that help system administrators maintain optimal infrastructure performance.
Key Features of Centreon
- Web-based Interface: Modern, intuitive dashboard for monitoring management
- Real-time Monitoring: Continuous monitoring of hosts, services, and applications
- Advanced Alerting: Customizable notification systems via email, SMS, and webhooks
- Performance Analytics: Detailed graphs and reports for capacity planning
- Auto-discovery: Automatic detection and configuration of network devices
- Plugin Ecosystem: Extensive library of monitoring plugins
- High Availability: Support for redundant monitoring architectures
System Requirements
Before installing Centreon, ensure your Linux system meets the following requirements:
Minimum Hardware Requirements:
- CPU: 2 cores (4+ recommended for production)
- RAM: 4 GB (8+ GB recommended)
- Storage: 20 GB free space (SSD recommended)
- Network: Reliable network connectivity
Supported Operating Systems:
- CentOS 7/8, RHEL 7/8
- Ubuntu 18.04/20.04 LTS
- Debian 9/10
- openSUSE Leap 15
Installing Centreon on Linux
Installation on CentOS/RHEL
Follow these steps to install Centreon on CentOS or RHEL systems:
Step 1: Add Centreon Repository
# Install the Centreon repository
curl -L https://yum.centreon.com/standard/21.10/el7/stable/noarch/RPMS/centreon-release-21.10-1.el7.centos.noarch.rpm -o centreon-release.rpm
sudo yum install -y centreon-release.rpm

# Update package cache
sudo yum update -y
Step 2: Install Centreon Central Server
# Install Centreon and dependencies
sudo yum install -y centreon centreon-database

# Install MariaDB server
sudo yum install -y mariadb-server mariadb
sudo systemctl enable mariadb
sudo systemctl start mariadb

# Secure MariaDB installation
sudo mysql_secure_installation
Step 3: Configure Database
# Create Centreon databases
mysql -u root -p
CREATE DATABASE centreon;
CREATE DATABASE centreon_storage;
CREATE USER 'centreon'@'localhost' IDENTIFIED BY 'centreon_password';
GRANT ALL PRIVILEGES ON centreon.* TO 'centreon'@'localhost';
GRANT ALL PRIVILEGES ON centreon_storage.* TO 'centreon'@'localhost';
FLUSH PRIVILEGES;
EXIT;
Installation on Ubuntu/Debian
For Ubuntu or Debian systems, use the following installation process:
Step 1: Add Repository and Install
# Download and add Centreon repository key
wget -O- https://apt-key.centreon.com | sudo apt-key add -

# Add Centreon repository
echo "deb https://apt.centreon.com/repository/21.10/ $(lsb_release -sc) main" | sudo tee /etc/apt/sources.list.d/centreon.list

# Update package list
sudo apt update

# Install Centreon
sudo apt install -y centreon centreon-database mariadb-server
Initial Configuration
Web-based Setup Wizard
After installation, complete the setup using Centreon’s web interface:
- Open your web browser and navigate to
http://your-server-ip/centreon - Follow the setup wizard to configure database connections
- Create the admin user account
- Configure monitoring engine settings
Note: The default credentials for the initial setup are typically admin/centreon, but you’ll be prompted to change these during the first login.
Configure Apache Virtual Host
# Create Apache virtual host for Centreon
sudo cat << 'EOF' > /etc/httpd/conf.d/10-centreon.conf
<VirtualHost *:80>
    ServerName centreon.yourdomain.com
    DocumentRoot /usr/share/centreon/www/
    DirectoryIndex index.php

    <Directory "/usr/share/centreon/www">
        Options Indexes FollowSymLinks
        AllowOverride All
        Order allow,deny
        Allow from all
        Require all granted
    </Directory>
</VirtualHost>
EOF

# Restart Apache
sudo systemctl restart httpd
Configuring Monitoring
Adding Hosts for Monitoring
To monitor hosts with Centreon, follow these steps:
1. Using the Web Interface
- Navigate to Configuration → Hosts → Hosts
- Click Add to create a new host
- Fill in the host details:
Host Name: web-server-01
Alias: Web Server 01
IP Address: 192.168.1.100
Templates: OS-Linux-SNMP-custom
Check Command: check_host_alive
Check Period: 24x7
Max Check Attempts: 3
2. Using Host Templates
Centreon provides pre-configured templates for common scenarios:
- OS-Linux-SNMP-custom: Linux servers with SNMP monitoring
- OS-Windows-SNMP-custom: Windows servers
- Net-SNMP-custom: Network devices
- App-Web-Apache-custom: Apache web servers
Configuring Services
Services represent specific checks performed on hosts:
# Example service configuration for CPU monitoring
Service Description: CPU
Check Command: check_nrpe!check_cpu
Normal Check Interval: 5 minutes
Retry Check Interval: 1 minute
Max Check Attempts: 3
Active Checks Enabled: Yes
Passive Checks Enabled: Yes
Monitoring Examples
Example 1: Monitoring Linux Server CPU Usage
Configure CPU monitoring for a Linux server using NRPE:
On the Monitored Host:
# Install NRPE and plugins
sudo yum install -y nrpe nagios-plugins-all

# Configure NRPE
sudo vim /etc/nagios/nrpe.cfg

# Add this line to allow Centreon server
allowed_hosts=127.0.0.1,192.168.1.50

# Add CPU check command
command[check_cpu]=/usr/lib64/nagios/plugins/check_cpu -w 80 -c 90

# Start NRPE service
sudo systemctl enable nrpe
sudo systemctl start nrpe
On the Centreon Server:
# Test the connection
/usr/lib/centreon/plugins/check_nrpe -H 192.168.1.100 -c check_cpu

# Expected output:
CPU OK - idle=85.2% user=8.1% nice=0.0% sys=6.7% iowait=0.0% irq=0.0% softirq=0.0%
Example 2: Network Device SNMP Monitoring
Monitor a network switch using SNMP:
# Test SNMP connectivity
snmpwalk -v2c -c public 192.168.1.10 1.3.6.1.2.1.1.5.0

# Configure in Centreon Web Interface:
Host Name: switch-01
IP Address: 192.168.1.10
SNMP Version: 2c
SNMP Community: public
Template: Net-SNMP-custom
Example 3: Web Service Monitoring
Monitor HTTP services and response times:
# Test HTTP check manually
/usr/lib/centreon/plugins/check_http -H www.example.com -p 80 -u /

# Service configuration:
Service Description: HTTP
Check Command: check_http!-H $HOSTADDRESS$ -p 80 -w 3 -c 5
Warning Threshold: 3 seconds
Critical Threshold: 5 seconds
Advanced Configuration
Setting Up Notifications
Configure email notifications for alerts:
1. Configure Email Settings
# Configure Postfix for email delivery
sudo yum install -y postfix
sudo systemctl enable postfix
sudo systemctl start postfix

# Test email functionality
echo "Test email from Centreon" | mail -s "Test" [email protected]
2. Create Notification Commands
In Centreon web interface, go to Configuration → Commands → Notifications:
Command Name: notify-host-by-email
Command Line: /usr/bin/printf "%b" "Notification Type: $NOTIFICATIONTYPE$\n\nHost: $HOSTNAME$\nState: $HOSTSTATE$\nAddress: $HOSTADDRESS$\nInfo: $HOSTOUTPUT$\n\nDate/Time: $LONGDATETIME$\n" | /bin/mail -s "Host $HOSTSTATE$ alert for $HOSTNAME$!" $CONTACTEMAIL$
Performance Tuning
Optimize Centreon for better performance:
Database Optimization
# Optimize MySQL/MariaDB configuration
sudo vim /etc/my.cnf.d/centreon.cnf

[mysqld]
innodb_buffer_pool_size = 2G
innodb_log_file_size = 512M
query_cache_size = 128M
max_connections = 500
table_open_cache = 4000

# Restart MariaDB
sudo systemctl restart mariadb
Monitoring Engine Tuning
# Adjust Nagios engine settings
sudo vim /etc/centreon-engine/centengine.cfg

# Increase concurrent checks
max_concurrent_checks=200

# Optimize check result processing
check_result_reaper_frequency=10
max_check_result_reaper_time=30

# Restart monitoring engine
sudo systemctl restart centengine
Monitoring Dashboard Usage
Understanding the Main Dashboard
The Centreon dashboard provides several key views:
- Tactical Overview: High-level status summary of all monitored objects
- Host Status: Real-time status of all monitored hosts
- Service Status: Detailed view of service checks and their states
- Performance Charts: Graphical representation of performance metrics
Using Filters and Views
Efficiently navigate large monitoring environments:
# Common filter examples:
- Host Group: "Linux Servers"
- Service State: "Critical"
- Host State: "Down"
- Last Check: "< 5 minutes"
Troubleshooting Common Issues
Connectivity Problems
Diagnose and resolve common connectivity issues:
# Test network connectivity
ping 192.168.1.100

# Test NRPE connection
telnet 192.168.1.100 5666

# Test SNMP connectivity
snmpwalk -v2c -c public 192.168.1.100 1.3.6.1.2.1.1.1.0

# Check firewall settings
sudo firewall-cmd --list-all
sudo iptables -L
Service Check Issues
Debug failing service checks:
# Check Centreon Engine logs
sudo tail -f /var/log/centreon-engine/centengine.log

# Test commands manually
sudo -u centreon-engine /usr/lib/centreon/plugins/check_ping -H 192.168.1.100 -w 3000.0,80% -c 5000.0,100%

# Verify plugin permissions
ls -la /usr/lib/centreon/plugins/
Best Practices
Security Hardening
- Use HTTPS: Configure SSL certificates for web interface
- Strong Authentication: Implement LDAP or Active Directory integration
- Network Segmentation: Place monitoring server in dedicated network segment
- Regular Updates: Keep Centreon and underlying OS updated
Monitoring Strategy
- Start Simple: Begin with basic host and service checks
- Use Templates: Leverage host and service templates for consistency
- Monitor Dependencies: Configure parent-child relationships
- Set Appropriate Thresholds: Avoid alert fatigue with realistic warning levels
Backup and Recovery
# Backup Centreon configuration
sudo tar -czf centreon-backup-$(date +%Y%m%d).tar.gz \
  /etc/centreon \
  /etc/centreon-engine \
  /etc/centreon-broker

# Backup databases
mysqldump -u root -p centreon > centreon-db-$(date +%Y%m%d).sql
mysqldump -u root -p centreon_storage > centreon-storage-$(date +%Y%m%d).sql
Conclusion
Centreon provides a comprehensive monitoring solution that scales from small environments to enterprise infrastructures. Its combination of powerful monitoring capabilities, intuitive web interface, and extensive customization options makes it an excellent choice for IT infrastructure monitoring on Linux systems.
By following this guide, you now have the knowledge to install, configure, and effectively use Centreon for monitoring your IT infrastructure. Remember to start with basic monitoring and gradually expand your monitoring scope as you become more familiar with the platform.
Regular maintenance, proper configuration management, and adherence to monitoring best practices will ensure your Centreon installation provides reliable infrastructure monitoring for years to come.
Related Posts
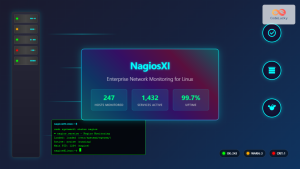
nagiosxi Linux: Complete Enterprise Network Monitoring Guide with Commands and Configuration
NagiosXI represents the pinnacle of enterprise network monitoring solutions on Linux systems, offering comprehensive infrastructure oversight with advanced alerting, reporting,...
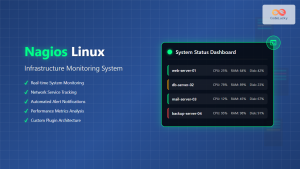
nagios Linux: Complete Infrastructure Monitoring System Setup Guide
Introduction to Nagios Nagios is one of the most popular open-source infrastructure monitoring systems available for Linux environments. Originally developed...
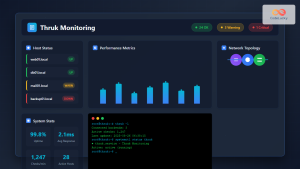
thruk Linux: Comprehensive Monitoring Web Interface for Network Infrastructure
Thruk is a powerful web-based monitoring interface designed primarily for Nagios and compatible monitoring systems. As a comprehensive frontend solution,...
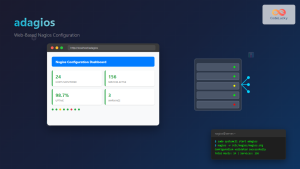
adagios Linux: Complete Guide to Web-Based Nagios Configuration Management
Managing Nagios configurations can be complex and time-consuming, especially when dealing with multiple hosts and services. adagios revolutionizes this process...
icinga Linux: Complete Network Monitoring System Guide for System Administrators
Icinga is a powerful open-source network monitoring system that helps system administrators monitor network resources, notify users of outages, and...
check_mk Linux: Complete Guide to Nagios-Based System Monitoring
check_mk is a powerful monitoring system built on top of Nagios that simplifies infrastructure monitoring with automated service discovery and...
Groundwork Linux: Complete Guide to IT Infrastructure Monitoring and System Health Management
What is Groundwork Linux? Groundwork Linux is a comprehensive open-source IT infrastructure monitoring platform built specifically for Linux environments. It...
Zenoss Linux: Complete Guide to IT Infrastructure Monitoring and Management
What is Zenoss and Why Use it on Linux? Zenoss is a powerful, open-source IT infrastructure monitoring platform that provides...
op5 Linux: Complete Network Monitoring Solution Guide
op5 Linux is a comprehensive network monitoring solution built on top of the proven Nagios monitoring engine. This enterprise-grade platform...
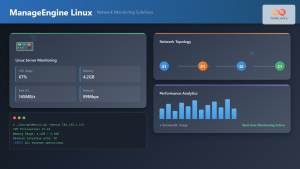
ManageEngine Linux: Complete Network Monitoring Solutions Guide
Network monitoring is crucial for maintaining optimal performance and security in Linux environments. ManageEngine provides powerful network monitoring solutions specifically...
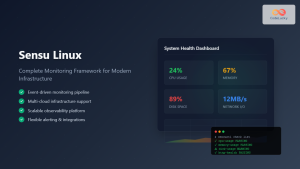
Sensu Linux: Complete Monitoring Framework Guide for System Administrators
Sensu is a powerful, open-source monitoring framework designed to monitor servers, services, application health, and business KPIs. Built with modern...
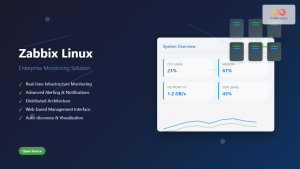
Zabbix Linux: Complete Enterprise Monitoring Solution for System Administrators
Zabbix stands as one of the most powerful and comprehensive open-source monitoring solutions available for Linux environments. This enterprise-grade monitoring...


