
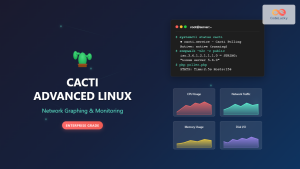
Cacti is a comprehensive network graphing solution designed to harness the power of RRDtool’s data storage and graphing functionality. Built on PHP and MySQL, Cacti provides an intuitive web-based interface for monitoring network devices, servers, and applications through SNMP polling and custom scripts.
What is Cacti?
Cacti serves as a frontend to RRDtool, storing all necessary information to create graphs and populate them with data in a MySQL database. The tool excels at:
- Network device monitoring via SNMP
- Server performance tracking
- Custom data collection through scripts
- Automated graph generation
- User management and access control
- Plugin ecosystem for extended functionality
System Requirements
Before installing Cacti, ensure your Linux system meets these requirements:
| Component | Requirement | Notes |
|---|---|---|
| Operating System | Linux (any distribution) | RHEL, CentOS, Ubuntu, Debian |
| Web Server | Apache 2.x or Nginx | With PHP support |
| PHP | 7.4+ (8.1+ recommended) | With required extensions |
| Database | MySQL 5.7+ or MariaDB 10.2+ | InnoDB storage engine |
| RRDtool | 1.7.0+ | Core graphing engine |
| SNMP | Net-SNMP 5.8+ | For device polling |
Installation on Ubuntu/Debian
Step 1: Update System and Install Dependencies
# Update package repository
sudo apt update && sudo apt upgrade -y

# Install required packages
sudo apt install -y apache2 mysql-server php php-mysql php-xml php-ldap \
php-mbstring php-gd php-gmp php-zip php-posix php-snmp php-intl \
rrdtool snmp snmp-mibs-downloader help2man
Step 2: Configure MySQL Database
# Secure MySQL installation
sudo mysql_secure_installation

# Login to MySQL
sudo mysql -u root -p

# Create database and user
CREATE DATABASE cacti;
CREATE USER 'cactiuser'@'localhost' IDENTIFIED BY 'strong_password_here';
GRANT ALL PRIVILEGES ON cacti.* TO 'cactiuser'@'localhost';
FLUSH PRIVILEGES;

# Import timezone data
mysql_tzinfo_to_sql /usr/share/zoneinfo | mysql -u root -p mysql

# Grant timezone access to cacti user
GRANT SELECT ON mysql.time_zone_name TO 'cactiuser'@'localhost';
FLUSH PRIVILEGES;
EXIT;
Step 3: Download and Install Cacti
# Navigate to web directory
cd /tmp

# Download latest Cacti release
wget https://www.cacti.net/downloads/cacti-latest.tar.gz

# Extract and move to web directory
tar -zxf cacti-latest.tar.gz
sudo mv cacti-* /var/www/html/cacti

# Set proper ownership
sudo chown -R www-data:www-data /var/www/html/cacti/
sudo chmod -R 755 /var/www/html/cacti/
Step 4: Import Database Schema
# Import Cacti database schema
mysql -u cactiuser -p cacti < /var/www/html/cacti/cacti.sql
Installation on CentOS/RHEL
Enable EPEL Repository
# Install EPEL repository
sudo yum install -y epel-release

# Update system
sudo yum update -y
Install Required Packages
# Install web server and database
sudo yum install -y httpd mariadb mariadb-server

# Install PHP and extensions
sudo yum install -y php php-mysql php-xml php-ldap php-mbstring \
php-gd php-gmp php-zip php-posix php-snmp php-intl

# Install monitoring tools
sudo yum install -y rrdtool net-snmp net-snmp-utils help2man
Start and Enable Services
# Start and enable Apache
sudo systemctl start httpd
sudo systemctl enable httpd

# Start and enable MariaDB
sudo systemctl start mariadb
sudo systemctl enable mariadb

# Configure firewall
sudo firewall-cmd --permanent --add-service=http
sudo firewall-cmd --permanent --add-service=https
sudo firewall-cmd --reload
Configuration
Configure PHP Settings
Edit PHP configuration for optimal Cacti performance:
# Edit PHP configuration
sudo nano /etc/php/7.4/apache2/php.ini

# Add or modify these settings:
memory_limit = 512M
max_execution_time = 300
date.timezone = America/New_York
session.use_strict_mode = 1
session.cookie_httponly = 1
session.cookie_secure = 1
Configure Cacti Settings
# Copy and edit configuration file
sudo cp /var/www/html/cacti/include/config.php.dist \
/var/www/html/cacti/include/config.php

# Edit database configuration
sudo nano /var/www/html/cacti/include/config.php
Update the database configuration section:
$database_type     = 'mysql';
$database_default  = 'cacti';
$database_hostname = 'localhost';
$database_username = 'cactiuser';
$database_password = 'strong_password_here';
$database_port     = '3306';
$database_retries  = 5;
$database_ssl      = false;
$database_ssl_key  = '';
$database_ssl_cert = '';
$database_ssl_ca   = '';
Create Log Directory
# Create log directory
sudo mkdir -p /var/log/cacti
sudo chown -R www-data:www-data /var/log/cacti/
sudo chmod -R 755 /var/log/cacti/
Web Installation Wizard
Complete the installation through the web interface:
- Navigate to
http://your-server-ip/cacti - Accept the GPL license agreement
- Verify all dependency checks pass (green checkmarks)
- Configure database connection (should auto-detect)
- Select installation type: “New Primary Server”
- Configure directory permissions
- Set up the admin account
- Configure email settings for alerts
Setting Up Data Collection
Configure Cron Job
Cacti requires a cron job for data collection:
# Edit crontab for web server user
sudo crontab -u www-data -e

# Add this line for 5-minute polling
*/5 * * * * /usr/bin/php /var/www/html/cacti/poller.php > /dev/null 2>&1
Alternative: Systemd Timer (Modern Approach)
Create systemd service and timer files:
# Create service file
sudo nano /etc/systemd/system/cacti-poller.service
Service file content:
[Unit]
Description=Cacti Poller
After=network.target mysql.service

[Service]
Type=oneshot
User=www-data
ExecStart=/usr/bin/php /var/www/html/cacti/poller.php
WorkingDirectory=/var/www/html/cacti
# Create timer file
sudo nano /etc/systemd/system/cacti-poller.timer
Timer file content:
[Unit]
Description=Run Cacti Poller every 5 minutes
Requires=cacti-poller.service

[Timer]
OnCalendar=*:0/5
Persistent=true

[Install]
WantedBy=timers.target
Enable the timer:
# Enable and start the timer
sudo systemctl enable cacti-poller.timer
sudo systemctl start cacti-poller.timer

# Check timer status
sudo systemctl status cacti-poller.timer
Adding Devices for Monitoring
SNMP Configuration
Before adding devices, ensure SNMP is properly configured:
# Test SNMP connectivity
snmpwalk -v2c -c public target-device-ip 1.3.6.1.2.1.1.1.0

# Expected output:
SNMPv2-MIB::sysDescr.0 = STRING: Linux hostname 5.4.0-74-generic
Adding Network Devices
- Navigate to Console → Create → New Device
- Fill in device information:
- Description: Friendly name
- Hostname: IP address or FQDN
- Host Template: Select appropriate template
- SNMP Version: Usually v2c
- SNMP Community: Default is “public”
- Click Create to save the device
- Click Create Graphs for this Device
- Select desired graph templates and data queries
Example: Monitoring a Linux Server
For monitoring a Linux server via SNMP:
# Install SNMP daemon on target server
sudo apt install snmpd

# Configure SNMP daemon
sudo nano /etc/snmp/snmpd.conf

# Add these lines:
agentAddress udp:161
rocommunity public localhost
rocommunity public 192.168.1.0/24  # Your monitoring network

# Restart SNMP service
sudo systemctl restart snmpd
sudo systemctl enable snmpd
Custom Graph Templates
Creating Custom Data Templates
To monitor custom metrics:
- Navigate to Console → Templates → Data Templates
- Click Add to create new template
- Configure template settings:
- Name: Descriptive template name
- Data Source: Define data collection method
- RRD Step: Polling interval (usually 300 seconds)
Example: Custom Script Monitoring
Create a custom script to monitor disk usage:
#!/bin/bash
# Save as: /var/www/html/cacti/scripts/disk_usage.sh

df -h / | awk 'NR==2 {print $5}' | sed 's/%//'
Make the script executable:
sudo chmod +x /var/www/html/cacti/scripts/disk_usage.sh
sudo chown www-data:www-data /var/www/html/cacti/scripts/disk_usage.sh
Advanced Configuration
Performance Optimization
Optimize MySQL for Cacti:
# Edit MySQL configuration
sudo nano /etc/mysql/mysql.conf.d/mysqld.cnf

# Add under [mysqld] section:
innodb_buffer_pool_size = 1G
innodb_log_file_size = 256M
innodb_log_buffer_size = 64M
innodb_flush_log_at_trx_commit = 2
max_connections = 200
thread_cache_size = 8
query_cache_size = 128M
tmp_table_size = 128M
max_heap_table_size = 128M
Enable Boost Plugin
The Boost plugin improves performance by caching RRD updates:
- Navigate to Console → Configuration → Settings
- Click on Boost tab
- Enable Image Caching
- Set appropriate cache directory:
/var/www/html/cacti/cache/boost/ - Configure boost settings for your environment
SSL Configuration
Secure Cacti with SSL:
# Enable SSL module
sudo a2enmod ssl

# Create virtual host configuration
sudo nano /etc/apache2/sites-available/cacti-ssl.conf
SSL virtual host configuration:
<VirtualHost *:443>
    ServerName cacti.yourdomain.com
    DocumentRoot /var/www/html/cacti

    SSLEngine on
    SSLCertificateFile /path/to/your/certificate.crt
    SSLCertificateKeyFile /path/to/your/private.key

    <Directory "/var/www/html/cacti">
        AllowOverride All
        Require all granted
    </Directory>
</VirtualHost>
Troubleshooting Common Issues
Poller Not Running
Check poller status and logs:
# Check if poller is running
ps aux | grep poller.php

# Check system logs
tail -f /var/log/cacti/cacti.log

# Check poller statistics
grep -i "poller" /var/log/cacti/cacti.log | tail -20
Permission Issues
Fix common permission problems:
# Fix ownership
sudo chown -R www-data:www-data /var/www/html/cacti/

# Fix directory permissions
find /var/www/html/cacti/ -type d -exec chmod 755 {} \;

# Fix file permissions
find /var/www/html/cacti/ -type f -exec chmod 644 {} \;

# Make scripts executable
chmod +x /var/www/html/cacti/scripts/*
Database Connection Issues
Verify database connectivity:
# Test database connection
mysql -u cactiuser -p -h localhost cacti

# Check MySQL process list
mysql -u root -p -e "SHOW PROCESSLIST;"

# Verify database permissions
mysql -u root -p -e "SHOW GRANTS FOR 'cactiuser'@'localhost';"
Monitoring Best Practices
Device Organization
- Use descriptive names: Include location, function, and model
- Create device groups: Organize by network segments or functions
- Standardize templates: Use consistent graph templates across similar devices
- Document configurations: Maintain device inventory and settings
Graph Management
- Create meaningful graph titles: Include units and time ranges
- Set appropriate thresholds: Configure alerting for critical metrics
- Use graph aggregation: Combine related metrics for overview dashboards
- Regular cleanup: Remove obsolete devices and graphs
Performance Considerations
- Monitor poller performance: Ensure polling completes within intervals
- Optimize polling frequency: Balance detail vs. system load
- Use appropriate data retention: Balance storage vs. historical needs
- Regular maintenance: Clean up old data and optimize database
Backup and Recovery
Database Backup
# Create automated backup script
sudo nano /usr/local/bin/cacti-backup.sh
Backup script content:
#!/bin/bash
BACKUP_DIR="/backup/cacti"
DATE=$(date +%Y%m%d_%H%M%S)

# Create backup directory
mkdir -p $BACKUP_DIR

# Backup database
mysqldump -u cactiuser -p'password' cacti > $BACKUP_DIR/cacti_db_$DATE.sql

# Backup RRD files
tar -czf $BACKUP_DIR/cacti_rrd_$DATE.tar.gz /var/www/html/cacti/rra/

# Backup configuration
cp /var/www/html/cacti/include/config.php $BACKUP_DIR/config_$DATE.php

# Keep only last 30 days of backups
find $BACKUP_DIR -name "*.sql" -mtime +30 -delete
find $BACKUP_DIR -name "*.tar.gz" -mtime +30 -delete
find $BACKUP_DIR -name "*.php" -mtime +30 -delete

echo "Backup completed: $DATE"
Schedule Regular Backups
# Add to crontab
sudo crontab -e

# Daily backup at 2 AM
0 2 * * * /usr/local/bin/cacti-backup.sh >> /var/log/cacti-backup.log 2>&1
Integration with Other Tools
Nagios Integration
Cacti can complement Nagios for comprehensive monitoring:
- Nagios: Real-time alerting and service monitoring
- Cacti: Historical trending and capacity planning
- Integration: Use plugins like NPC (Nagios Plugin for Cacti)
Syslog Integration
Configure syslog monitoring with Cacti:
# Install syslog plugin
# Download from Cacti plugin repository
wget https://github.com/Cacti/plugin_syslog/archive/develop.zip

# Extract to plugins directory
unzip develop.zip -d /var/www/html/cacti/plugins/
mv /var/www/html/cacti/plugins/plugin_syslog-develop /var/www/html/cacti/plugins/syslog

# Install through web interface
# Console → Plugin Management → Install syslog plugin
Security Considerations
Access Control
- Strong passwords: Enforce complex password policies
- User roles: Implement least-privilege access
- Session management: Configure secure session handling
- Network security: Use VPN or restricted network access
SNMP Security
- Change default communities: Never use “public” in production
- Use SNMPv3: Implement authentication and encryption
- Restrict access: Limit SNMP access to monitoring networks
- Regular audits: Review and update SNMP configurations
Cacti provides a robust foundation for network monitoring and trending analysis. Its flexibility, extensive template library, and active community make it an excellent choice for organizations seeking comprehensive network visibility. Regular maintenance, proper security practices, and strategic device organization will ensure optimal performance and valuable insights from your monitoring infrastructure.
Related Posts
Cacti Advanced Linux: Complete Guide to Enterprise Network Graphing and Monitoring
Cacti stands as one of the most powerful open-source network graphing solutions available for Linux systems, providing comprehensive network monitoring...

Munin Linux: Complete Guide to Network Resource Monitoring and Performance Analysis
Munin is a powerful networked resource monitoring tool for Linux systems that provides comprehensive insights into system performance, resource utilization,...

Python NetworkX: Analyzing Complex Networks and Graphs
In today's interconnected world, networks are everywhere. From social media connections to transportation systems, understanding and analyzing these complex structures...

observium Linux: Complete Network Management and Monitoring Platform Guide
Observium is a powerful, auto-discovering network monitoring platform designed for Linux systems that provides comprehensive visibility into network infrastructure. This...
iptraf Command Linux: Complete Interactive Network Monitoring Guide
The iptraf command is a powerful console-based network monitoring utility for Linux systems that provides real-time IP LAN monitoring capabilities....

ganglia Linux: Complete Guide to Distributed Monitoring System
Ganglia is a powerful, open-source distributed monitoring system designed specifically for high-performance computing clusters, grids, and cloud infrastructures. Originally developed...

SolarWinds Linux: Complete Network Performance Monitor Guide for System Administrators
SolarWinds Network Performance Monitor (NPM) is a powerful network monitoring solution that provides comprehensive visibility into network infrastructure performance. While...

rrdtool Command Linux: Complete Guide to Round Robin Database Tool
The rrdtool (Round Robin Database Tool) is a powerful Linux command-line utility designed for storing and displaying time-series data in...

Paessler Linux: Complete Guide to Network Monitoring with PRTG on Linux Systems
Network monitoring is crucial for maintaining optimal performance and security in Linux environments. Paessler PRTG Network Monitor offers comprehensive monitoring...

LibreNMS Linux: Complete Network Monitoring System Setup and Configuration Guide
LibreNMS is a powerful, open-source network monitoring platform that provides comprehensive visibility into network infrastructure. Built on PHP and MySQL,...

thruk Linux: Comprehensive Monitoring Web Interface for Network Infrastructure
Thruk is a powerful web-based monitoring interface designed primarily for Nagios and compatible monitoring systems. As a comprehensive frontend solution,...

nagiosxi Linux: Complete Enterprise Network Monitoring Guide with Commands and Configuration
NagiosXI represents the pinnacle of enterprise network monitoring solutions on Linux systems, offering comprehensive infrastructure oversight with advanced alerting, reporting,...


