
Managing Nagios configurations can be complex and time-consuming, especially when dealing with multiple hosts and services. adagios revolutionizes this process by providing a modern, web-based interface for Nagios configuration management, making it accessible even to administrators who prefer graphical interfaces over command-line tools.
What is adagios?
adagios is an open-source web-based configuration tool designed specifically for Nagios monitoring systems. Developed to simplify the traditionally complex process of managing Nagios configurations, adagios provides an intuitive interface that allows administrators to:
- Create and modify host and service definitions
- Manage contact groups and notifications
- Configure check commands and time periods
- Visualize network topology
- Perform configuration validation
Key Features and Benefits
User-Friendly Web Interface
Unlike traditional Nagios configuration methods that require manual editing of text files, adagios offers a clean, modern web interface that streamlines the entire configuration process.
Real-time Configuration Validation
adagios validates your Nagios configuration in real-time, preventing syntax errors and misconfigurations before they affect your monitoring system.
Template Management
Create and manage reusable templates for hosts, services, and contacts, significantly reducing configuration time and ensuring consistency across your monitoring environment.
Installation Prerequisites
Before installing adagios, ensure your system meets these requirements:
- Linux distribution (CentOS, RHEL, Ubuntu, or Debian)
- Nagios Core or Nagios XI installed and configured
- Python 2.7 or higher
- Apache or Nginx web server
- Git version control system
Installing adagios on CentOS/RHEL
Step 1: Install Required Packages
sudo yum update -y
sudo yum install -y epel-release
sudo yum install -y git python-pip httpd python-devel gcc
Step 2: Install Python Dependencies
sudo pip install django==1.6
sudo pip install paramiko
sudo pip install pynag
sudo pip install simplejson
Step 3: Download and Install adagios
cd /opt
sudo git clone https://github.com/opinkerfi/adagios.git
cd adagios
sudo python setup.py install
Step 4: Configure Apache
Create an Apache configuration file for adagios:
sudo nano /etc/httpd/conf.d/adagios.conf
Add the following configuration:
# Adagios Configuration
WSGIScriptAlias /adagios /opt/adagios/adagios/wsgi.py
Alias /adagios/media /opt/adagios/adagios/media

<Directory /opt/adagios>
    WSGIApplicationGroup %{GLOBAL}
    Order allow,deny
    Allow from all
</Directory>

<Directory /opt/adagios/adagios/media>
    Order allow,deny
    Allow from all
</Directory>
Installing adagios on Ubuntu/Debian
Step 1: Update System and Install Dependencies
sudo apt-get update
sudo apt-get install -y git python-pip apache2 libapache2-mod-wsgi
sudo apt-get install -y python-dev build-essential
Step 2: Install Python Packages
sudo pip install django==1.6
sudo pip install paramiko
sudo pip install pynag
sudo pip install simplejson
Step 3: Clone and Install adagios
cd /opt
sudo git clone https://github.com/opinkerfi/adagios.git
cd adagios
sudo python setup.py install
Initial Configuration
Configure adagios Settings
Edit the adagios configuration file:
sudo nano /opt/adagios/adagios/settings.py
Key configuration parameters to modify:
# Nagios configuration directory
nagios_config = '/etc/nagios/nagios.cfg'

# Nagios command file
nagios_command_file = '/var/nagios/rw/nagios.cmd'

# Enable live status
enable_livestatus = True
livestatus_path = '/var/nagios/rw/livestatus'

# Debug mode (disable in production)
DEBUG = False

# Allowed hosts
ALLOWED_HOSTS = ['localhost', '127.0.0.1', 'your-server-ip']
Set Proper Permissions
sudo chown -R apache:apache /opt/adagios
sudo chmod -R 755 /opt/adagios
sudo chown apache:apache /etc/nagios
sudo chmod -R 775 /etc/nagios
Starting and Testing adagios
Enable and Start Apache
# For CentOS/RHEL
sudo systemctl enable httpd
sudo systemctl start httpd

# For Ubuntu/Debian
sudo systemctl enable apache2
sudo systemctl start apache2
Access the Web Interface
Open your web browser and navigate to:
http://your-server-ip/adagios
You should see the adagios login screen. Use your Nagios credentials to log in.
Using adagios Web Interface
Dashboard Overview
The adagios dashboard provides several key sections:
- Status Overview: Real-time status of all monitored hosts and services
- Configuration: Access to host, service, and contact configuration
- Network Scan: Discover new hosts on your network
- Templates: Manage reusable configuration templates
Adding a New Host
Method 1: Using the Web Interface
- Navigate to Configuration → Hosts
- Click Add New Host
- Fill in the required fields:
Host Name: webserver01
Alias: Web Server 01
Address: 192.168.1.100
Host Template: linux-server
Contact Groups: admins
Method 2: Network Discovery
- Go to Network Scan
- Enter your network range (e.g., 192.168.1.0/24)
- Click Start Scan
- Select discovered hosts and click Add to Monitoring
Creating Service Checks
To add a service check to your newly created host:
- Navigate to Configuration → Services
- Click Add New Service
- Configure the service parameters:
Service Description: HTTP Check
Host Name: webserver01
Check Command: check_http
Check Interval: 5
Retry Interval: 1
Max Check Attempts: 3
Advanced Configuration Examples
Creating Host Templates
Host templates reduce configuration redundancy. Here’s how to create a custom Linux server template:
- Go to Configuration → Templates → Host Templates
- Click Add New Template
- Configure the template:
Template Name: custom-linux-server
Alias: Custom Linux Server Template
Check Command: check-host-alive
Max Check Attempts: 3
Check Interval: 5
Retry Interval: 1
Active Checks: Enabled
Passive Checks: Enabled
Notifications: Enabled
Setting Up Contact Groups
Create a contact group for escalating critical alerts:
- Navigate to Configuration → Contacts → Contact Groups
- Click Add New Contact Group
- Fill in the details:
Contact Group Name: critical-alerts
Alias: Critical Alerts Team
Members: admin1, admin2, oncall-engineer
Configuring Notification Periods
Set up custom time periods for notifications:
Time Period Name: business-hours
Alias: Business Hours Only
Monday: 09:00-17:00
Tuesday: 09:00-17:00
Wednesday: 09:00-17:00
Thursday: 09:00-17:00
Friday: 09:00-17:00
Configuration Validation and Deployment
Validating Configuration
adagios provides built-in configuration validation:
- Navigate to Configuration → Validate
- Click Run Validation
- Review any errors or warnings
- Fix issues before deployment
Deploying Configuration Changes
After validation, deploy your changes:
- Go to Configuration → Deploy
- Review pending changes
- Click Deploy Configuration
- Monitor the deployment status
Troubleshooting Common Issues
Permission Errors
If you encounter permission errors:
sudo chown -R apache:nagios /etc/nagios
sudo chmod -R 664 /etc/nagios/objects/*.cfg
sudo chmod 775 /etc/nagios/objects
Django Database Issues
Initialize the Django database if needed:
cd /opt/adagios
sudo python manage.py syncdb
sudo python manage.py migrate
Apache/WSGI Configuration Problems
Check Apache error logs:
sudo tail -f /var/log/httpd/error_log
# or for Ubuntu/Debian
sudo tail -f /var/log/apache2/error.log
Performance Optimization
Caching Configuration
Enable caching in Django settings:
CACHES = {
    'default': {
        'BACKEND': 'django.core.cache.backends.memcached.MemcachedCache',
        'LOCATION': '127.0.0.1:11211',
    }
}
Database Optimization
For large environments, consider using PostgreSQL:
DATABASES = {
    'default': {
        'ENGINE': 'django.db.backends.postgresql_psycopg2',
        'NAME': 'adagios',
        'USER': 'adagios_user',
        'PASSWORD': 'secure_password',
        'HOST': 'localhost',
        'PORT': '5432',
    }
}
Security Best Practices
Enable HTTPS
Configure SSL/TLS for secure access:
<VirtualHost *:443>
    ServerName your-nagios-server.com
    DocumentRoot /opt/adagios

    SSLEngine on
    SSLCertificateFile /path/to/certificate.crt
    SSLCertificateKeyFile /path/to/private.key

    WSGIScriptAlias / /opt/adagios/adagios/wsgi.py
</VirtualHost>
User Authentication
Configure Apache authentication:
<Directory /opt/adagios>
    AuthType Basic
    AuthName "Adagios Access"
    AuthUserFile /etc/nagios/.htpasswd
    Require valid-user
</Directory>
Integration with External Tools
Git Version Control
Enable automatic Git commits for configuration changes:
cd /etc/nagios
sudo git init
sudo git add .
sudo git commit -m "Initial Nagios configuration"

# Configure adagios to use Git
echo "enable_gitdata = True" >> /opt/adagios/adagios/settings.py
REST API Usage
adagios provides REST API endpoints for automation:
# Get all hosts
curl -u username:password http://your-server/adagios/rest/status/hosts

# Add a new host via API
curl -X POST -u username:password \
  -H "Content-Type: application/json" \
  -d '{"host_name":"newserver","address":"192.168.1.200"}' \
  http://your-server/adagios/rest/config/hosts
Monitoring adagios Performance
Log Analysis
Monitor adagios logs for performance issues:
sudo tail -f /var/log/httpd/access_log | grep adagios
sudo journalctl -u httpd -f | grep adagios
Resource Usage
Monitor system resources:
htop
iostat -x 1
free -h
df -h
Backup and Recovery
Configuration Backup
Create automated backups of your Nagios configuration:
#!/bin/bash
# nagios-backup.sh
BACKUP_DIR="/backup/nagios-$(date +%Y%m%d)"
mkdir -p $BACKUP_DIR

cp -r /etc/nagios $BACKUP_DIR/
cp -r /opt/adagios $BACKUP_DIR/

tar -czf $BACKUP_DIR.tar.gz $BACKUP_DIR
rm -rf $BACKUP_DIR

# Keep only last 7 days of backups
find /backup -name "nagios-*.tar.gz" -mtime +7 -delete
Database Backup
Backup the adagios database:
cd /opt/adagios
sudo python manage.py dumpdata > adagios-backup-$(date +%Y%m%d).json
Conclusion
adagios transforms the traditionally complex task of Nagios configuration management into an intuitive, web-based experience. By providing a modern interface, real-time validation, and powerful automation features, adagios significantly reduces the time and expertise required to maintain a robust monitoring infrastructure.
The tool’s integration capabilities with version control systems, REST APIs, and external monitoring tools make it an excellent choice for organizations looking to streamline their monitoring operations while maintaining the powerful monitoring capabilities that Nagios provides.
Whether you’re managing a small network or a large enterprise infrastructure, adagios offers the scalability and user-friendliness needed to maintain effective monitoring without the traditional complexity associated with Nagios configuration management.
Related Posts
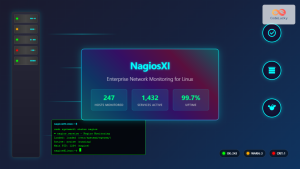
nagiosxi Linux: Complete Enterprise Network Monitoring Guide with Commands and Configuration
NagiosXI represents the pinnacle of enterprise network monitoring solutions on Linux systems, offering comprehensive infrastructure oversight with advanced alerting, reporting,...
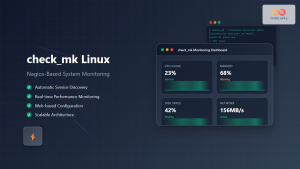
check_mk Linux: Complete Guide to Nagios-Based System Monitoring
check_mk is a powerful monitoring system built on top of Nagios that simplifies infrastructure monitoring with automated service discovery and...
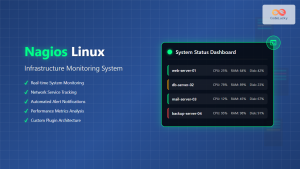
nagios Linux: Complete Infrastructure Monitoring System Setup Guide
Introduction to Nagios Nagios is one of the most popular open-source infrastructure monitoring systems available for Linux environments. Originally developed...
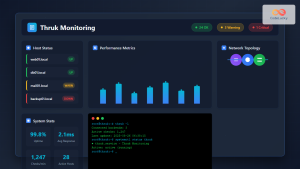
thruk Linux: Comprehensive Monitoring Web Interface for Network Infrastructure
Thruk is a powerful web-based monitoring interface designed primarily for Nagios and compatible monitoring systems. As a comprehensive frontend solution,...
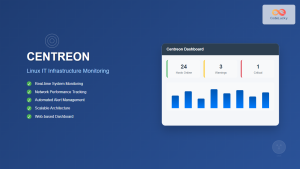
centreon Linux: Complete IT Infrastructure Monitoring Solution Guide
Centreon is a powerful, open-source IT infrastructure monitoring platform built on top of Nagios Core. It provides a comprehensive web-based...
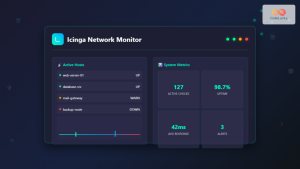
icinga Linux: Complete Network Monitoring System Guide for System Administrators
Icinga is a powerful open-source network monitoring system that helps system administrators monitor network resources, notify users of outages, and...
op5 Linux: Complete Network Monitoring Solution Guide
op5 Linux is a comprehensive network monitoring solution built on top of the proven Nagios monitoring engine. This enterprise-grade platform...
nrpe Linux: Complete Guide to Nagios Remote Plugin Executor Configuration and Usage
NRPE (Nagios Remote Plugin Executor) is a crucial component in the Nagios monitoring ecosystem that enables remote execution of monitoring...
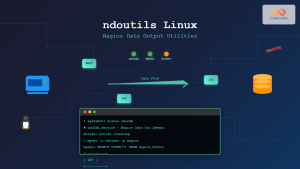
ndoutils Linux: Complete Guide to Nagios Data Output Utilities
The Nagios Data Output Utilities (ndoutils) serve as a crucial bridge between your Nagios monitoring system and database storage, enabling...
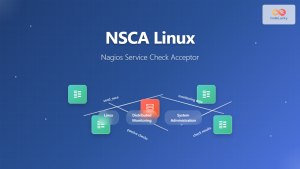
nsca Linux: Complete Guide to Nagios Service Check Acceptor Setup and Configuration
What is NSCA (Nagios Service Check Acceptor)? NSCA (Nagios Service Check Acceptor) is a powerful Linux daemon that allows remote...

PandoraFMS Linux: Complete Network Monitoring Platform Guide
PandoraFMS is a comprehensive, open-source network monitoring platform that provides complete visibility into your IT infrastructure. This powerful monitoring solution...
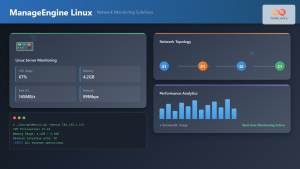
ManageEngine Linux: Complete Network Monitoring Solutions Guide
Network monitoring is crucial for maintaining optimal performance and security in Linux environments. ManageEngine provides powerful network monitoring solutions specifically...


