Vagrant revolutionizes development environment management by providing a consistent, reproducible way to create and manage virtual development environments. This comprehensive guide explores Vagrant’s capabilities on Linux systems, from basic setup to advanced configuration techniques.
What is Vagrant?
Vagrant is an open-source tool that builds and manages virtual machine environments in a single workflow. Created by HashiCorp, it acts as a wrapper around virtualization providers like VirtualBox, VMware, and Docker, providing a unified interface for environment provisioning.
Key Benefits of Vagrant
- Environment Consistency: Ensures identical development environments across team members
- Rapid Setup: Automates complex environment configuration
- Isolation: Keeps project dependencies separate
- Reproducibility: Version-controlled environment definitions
- Cross-Platform: Works seamlessly across Linux, Windows, and macOS
Installing Vagrant on Linux
Prerequisites
Before installing Vagrant, ensure you have a virtualization provider installed:
# Install VirtualBox (most common provider)
sudo apt update
sudo apt install virtualbox virtualbox-ext-pack

# For CentOS/RHEL/Fedora
sudo dnf install VirtualBox kernel-devel
Installing Vagrant
Download and install Vagrant from the official repository:
# Ubuntu/Debian
wget -O- https://apt.releases.hashicorp.com/gpg | gpg --dearmor | sudo tee /usr/share/keyrings/hashicorp-archive-keyring.gpg
echo "deb [signed-by=/usr/share/keyrings/hashicorp-archive-keyring.gpg] https://apt.releases.hashicorp.com $(lsb_release -cs) main" | sudo tee /etc/apt/sources.list.d/hashicorp.list
sudo apt update && sudo apt install vagrant

# CentOS/RHEL/Fedora
sudo dnf install -y dnf-plugins-core
sudo dnf config-manager --add-repo https://rpm.releases.hashicorp.com/RHEL/hashicorp.repo
sudo dnf install vagrant
Verify the installation:
vagrant --version
# Output: Vagrant 2.3.7
Creating Your First Vagrant Environment
Initializing a Vagrant Project
Create a new directory and initialize a Vagrant environment:
mkdir my-vagrant-project
cd my-vagrant-project
vagrant init ubuntu/focal64
This creates a Vagrantfile with basic configuration:
# -*- mode: ruby -*-
# vi: set ft=ruby :

Vagrant.configure("2") do |config|
  config.vm.box = "ubuntu/focal64"
end
Starting Your Virtual Machine
Launch the virtual machine:
vagrant up
Expected output:
Bringing machine 'default' up with 'virtualbox' provider...
==> default: Importing base box 'ubuntu/focal64'...
==> default: Matching MAC address for NAT networking...
==> default: Setting the name of the VM: my-vagrant-project_default_1629123456789_12345
==> default: Machine booted and ready!
Accessing Your Virtual Machine
Connect to the VM via SSH:
vagrant ssh
You’ll be inside the virtual machine:
vagrant@ubuntu-focal:~$ uname -a
Linux ubuntu-focal 5.4.0-80-generic #90-Ubuntu SMP Fri Jul 9 22:49:44 UTC 2021 x86_64 x86_64 x86_64 GNU/Linux
Vagrantfile Configuration
Basic Configuration Options
Here’s a comprehensive Vagrantfile example:
Vagrant.configure("2") do |config|
  # Base box
  config.vm.box = "ubuntu/focal64"
  config.vm.box_version = "20210720.0.0"

  # Hostname
  config.vm.hostname = "development-server"

  # Network configuration
  config.vm.network "private_network", ip: "192.168.56.10"
  config.vm.network "forwarded_port", guest: 80, host: 8080

  # Shared folders
  config.vm.synced_folder "./shared", "/vagrant_shared"

  # Provider-specific configuration
  config.vm.provider "virtualbox" do |vb|
    vb.name = "Development Environment"
    vb.memory = "2048"
    vb.cpus = 2
    vb.gui = false
  end

  # Provisioning
  config.vm.provision "shell", inline: <<-SHELL
    apt-get update
    apt-get install -y nginx nodejs npm
    systemctl enable nginx
    systemctl start nginx
  SHELL
end
Multi-Machine Configuration
Define multiple machines in a single Vagrantfile:
Vagrant.configure("2") do |config|
  # Web server
  config.vm.define "web" do |web|
    web.vm.box = "ubuntu/focal64"
    web.vm.network "private_network", ip: "192.168.56.10"
    web.vm.provider "virtualbox" do |vb|
      vb.memory = "1024"
      vb.name = "WebServer"
    end
    web.vm.provision "shell", inline: "apt-get update && apt-get install -y apache2"
  end

  # Database server
  config.vm.define "db" do |db|
    db.vm.box = "ubuntu/focal64"
    db.vm.network "private_network", ip: "192.168.56.11"
    db.vm.provider "virtualbox" do |vb|
      vb.memory = "2048"
      vb.name = "DatabaseServer"
    end
    db.vm.provision "shell", inline: <<-SHELL
      apt-get update
      apt-get install -y mysql-server
      systemctl enable mysql
      systemctl start mysql
    SHELL
  end
end
Essential Vagrant Commands
Basic Operations
| Command | Description | Example Usage |
|---|---|---|
vagrant up |
Start virtual machine | vagrant up web |
vagrant halt |
Shutdown virtual machine | vagrant halt db |
vagrant reload |
Restart VM with new config | vagrant reload --provision |
vagrant ssh |
Connect via SSH | vagrant ssh web |
vagrant destroy |
Delete virtual machine | vagrant destroy -f |
Status and Information Commands
# Check VM status
vagrant status
# Output:
# Current machine states:
# web                       running (virtualbox)
# db                        poweroff (virtualbox)

# Show detailed configuration
vagrant ssh-config

# List all boxes
vagrant box list
# Output:
# ubuntu/focal64  (virtualbox, 20210720.0.0)
# centos/7        (virtualbox, 2004.01)
Advanced Provisioning
Shell Provisioning
Use external shell scripts for complex provisioning:
# Create bootstrap.sh
#!/bin/bash

# Update system
apt-get update
apt-get upgrade -y

# Install development tools
apt-get install -y git curl vim htop tree

# Install Docker
curl -fsSL https://get.docker.com -o get-docker.sh
sh get-docker.sh
usermod -aG docker vagrant

# Install Node.js
curl -fsSL https://deb.nodesource.com/setup_16.x | bash -
apt-get install -y nodejs

echo "Provisioning completed!"
Reference it in your Vagrantfile:
config.vm.provision "shell", path: "bootstrap.sh"
Ansible Provisioning
Use Ansible for more sophisticated configuration management:
config.vm.provision "ansible" do |ansible|
  ansible.playbook = "playbook.yml"
  ansible.inventory_path = "inventory"
  ansible.limit = "all"
  ansible.verbose = "v"
end
Example Ansible playbook:
---
- hosts: all
  become: yes
  tasks:
    - name: Update apt cache
      apt:
        update_cache: yes

    - name: Install packages
      apt:
        name:
          - nginx
          - postgresql
          - redis-server
        state: present

    - name: Start services
      systemd:
        name: "{{ item }}"
        state: started
        enabled: yes
      loop:
        - nginx
        - postgresql
        - redis-server
Networking Configuration
Private Networks
Create isolated networks between VMs:
# Static IP assignment
config.vm.network "private_network", ip: "192.168.56.10"

# DHCP assignment
config.vm.network "private_network", type: "dhcp"

# Host-only network with specific adapter
config.vm.network "private_network", ip: "10.0.0.10",
                  virtualbox__intnet: "mynetwork"
Port Forwarding
Forward host ports to guest services:
# Forward multiple ports
config.vm.network "forwarded_port", guest: 80, host: 8080
config.vm.network "forwarded_port", guest: 3306, host: 3306
config.vm.network "forwarded_port", guest: 22, host: 2222, id: "ssh"
Shared Folders and Syncing
Default Shared Folder
By default, Vagrant shares the project directory:
vagrant ssh
cd /vagrant
ls -la
# Shows contents of host project directory
Custom Shared Folders
Configure additional shared folders:
# Basic sharing
config.vm.synced_folder "./data", "/vagrant_data"

# NFS sharing (better performance)
config.vm.synced_folder "./app", "/var/www/html", type: "nfs"

# Rsync sharing (one-way sync)
config.vm.synced_folder "./src", "/home/vagrant/src",
                        type: "rsync",
                        rsync__args: ["--verbose", "--archive", "--delete", "-z"]
Box Management
Working with Vagrant Boxes
Boxes are the package format for Vagrant environments:
# Add a box
vagrant box add ubuntu/focal64

# List installed boxes
vagrant box list

# Update a box
vagrant box update --box ubuntu/focal64

# Remove a box
vagrant box remove ubuntu/focal64 --provider virtualbox

# Package current VM as a box
vagrant package --output my-custom-box.box
Creating Custom Boxes
Package your configured VM for reuse:
# After configuring your VM
vagrant package --vagrantfile Vagrantfile.pkg --output custom-dev-box.box

# Add the custom box
vagrant box add custom-dev custom-dev-box.box

# Use in new projects
vagrant init custom-dev
Performance Optimization
VirtualBox Optimizations
config.vm.provider "virtualbox" do |vb|
  # Enable IOAPIC for multiple CPUs
  vb.customize ["modifyvm", :id, "--ioapic", "on"]

  # Allocate more video memory
  vb.customize ["modifyvm", :id, "--vram", "32"]

  # Enable hardware acceleration
  vb.customize ["modifyvm", :id, "--hwvirtex", "on"]
  vb.customize ["modifyvm", :id, "--vtxvpid", "on"]

  # Optimize disk I/O
  vb.customize ["storageattach", :id,
                "--storagectl", "SATA Controller",
                "--port", "0", "--device", "0",
                "--nonrotational", "on"]
end
Resource Management
# Dynamic resource allocation
config.vm.provider "virtualbox" do |vb|
  # Use 1/4 of host memory
  vb.memory = `awk '/MemTotal/ {printf "%d", $2/1024/4}' /proc/meminfo`.to_i

  # Use half of host CPUs
  vb.cpus = `nproc`.to_i / 2

  # Enable linked clones for faster startup
  vb.linked_clone = true
end
Troubleshooting Common Issues
Guest Additions Problems
Install the vagrant-vbguest plugin to automatically manage VirtualBox Guest Additions:
vagrant plugin install vagrant-vbguest
Network Connectivity Issues
Debug network problems:
# Check VM network configuration
vagrant ssh -c "ip addr show"

# Test connectivity from host
ping 192.168.56.10

# Check port forwarding
netstat -tlnp | grep 8080
Permission Issues with Shared Folders
Fix permission problems:
config.vm.synced_folder "./", "/vagrant",
                        owner: "vagrant",
                        group: "vagrant",
                        mount_options: ["uid=1000", "gid=1000"]
Best Practices
Project Organization
- Version Control: Always commit your Vagrantfile to version control
- Environment Variables: Use environment variables for sensitive configuration
- Documentation: Include setup instructions in your project README
- Resource Limits: Set appropriate memory and CPU limits
Security Considerations
# Disable default insecure key
config.ssh.insert_key = true

# Use strong passwords for database setup
config.vm.provision "shell", inline: <<-SHELL
  export MYSQL_ROOT_PASSWORD="$(openssl rand -base64 32)"
  echo "MySQL root password: $MYSQL_ROOT_PASSWORD" > /vagrant/credentials.txt
SHELL
Integration with Development Workflows
Git Hooks Integration
Automate environment updates with Git hooks:
#!/bin/bash
# .git/hooks/post-merge

if [ -f Vagrantfile ]; then
  if vagrant status | grep -q "running"; then
    echo "Reloading Vagrant environment..."
    vagrant reload --provision
  fi
fi
IDE Integration
Configure your IDE to work with Vagrant environments by setting up remote development capabilities or using the forwarded ports to access services running in the VM.
Conclusion
Vagrant transforms development environment management on Linux by providing consistent, reproducible, and easily shareable development environments. From simple single-machine setups to complex multi-tier applications, Vagrant streamlines the development workflow while ensuring environment consistency across teams.
By mastering Vagrant’s configuration options, provisioning capabilities, and best practices outlined in this guide, you’ll be able to create robust development environments that scale with your project needs. Start with simple configurations and gradually incorporate advanced features as your requirements grow.
Remember to regularly update your boxes, optimize resource usage, and maintain clean, well-documented Vagrantfiles to maximize the benefits of this powerful development tool.
Related Posts
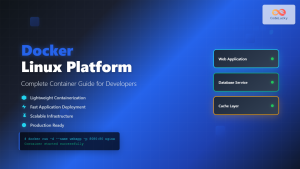
docker Linux: Complete Container Platform Guide for Developers
Docker has revolutionized software development and deployment by introducing lightweight containerization technology. As a platform that enables developers to package...

nomad Linux: Complete Guide to HashiCorp’s Workload Orchestrator
What is HashiCorp Nomad? HashiCorp Nomad is a simple yet powerful workload orchestrator that enables organizations to deploy and manage...
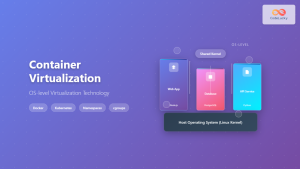
Container Virtualization: Complete Guide to OS-level Virtualization Technology
Container virtualization represents a revolutionary approach to application deployment and resource management through OS-level virtualization. Unlike traditional hardware virtualization, containers...

PHP Docker: Containerizing PHP Applications
In today's fast-paced development world, containerization has become a game-changer. Docker, the leading containerization platform, has revolutionized how we develop,...
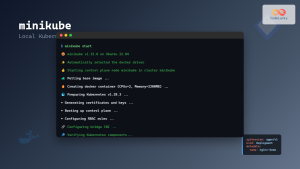
Minikube Linux: Complete Guide to Local Kubernetes Development
Minikube has revolutionized local Kubernetes development by providing developers with a lightweight, single-node Kubernetes cluster that runs directly on their...
Puppet Linux: Complete Configuration Management Guide for System Administrators
Puppet is a powerful configuration management tool that revolutionizes how system administrators manage Linux infrastructure. By automating system configuration, software...
Application Virtualization: Complete Guide to Software Isolation and Virtual Environments
Application virtualization represents one of the most significant advances in modern computing, enabling organizations to run software applications in isolated...
Rancher Linux: Complete Container Management Platform for DevOps Teams
Rancher Linux revolutionizes container management by providing a comprehensive platform that simplifies Kubernetes orchestration, multi-cloud deployments, and enterprise-grade container operations....

Katello Linux: Complete Guide to Enterprise Content and Configuration Management
Introduction to Katello Linux Katello is a powerful open-source content and configuration management platform that serves as the upstream project...
Virtual Machine in Operating System: Complete Guide to Hardware Virtualization Technology
What is a Virtual Machine in Operating System? A Virtual Machine (VM) is a software-based emulation of a physical computer...
Ansible Linux: Complete Guide to IT Automation and Configuration Management
Ansible has revolutionized the way IT professionals manage infrastructure, making complex automation tasks simple and efficient. As an agentless automation...
Desktop Virtualization: Complete VDI Implementation Guide for Modern Enterprises
Introduction to Desktop Virtualization Desktop virtualization represents a paradigm shift in how organizations deliver computing resources to end users. By...