TightVNC Server is a powerful remote desktop solution that allows you to access and control Linux systems remotely over a network connection. This comprehensive guide will walk you through everything you need to know about installing, configuring, and managing TightVNC Server on Linux systems.
What is TightVNC Server?
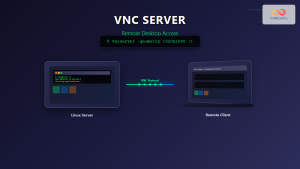
TightVNC Server is an enhanced version of the original VNC (Virtual Network Computing) server that provides improved compression algorithms and better performance over slow network connections. It enables users to remotely access graphical desktop environments running on Linux servers, making it invaluable for system administration, remote work, and technical support scenarios.
Key Features of TightVNC Server
- Superior Compression: Advanced encoding methods reduce bandwidth usage
- Cross-Platform Compatibility: Works with various VNC viewers across different operating systems
- Multiple Display Support: Can run multiple virtual displays simultaneously
- Flexible Authentication: Supports password-based and advanced authentication methods
- Lightweight Design: Minimal resource consumption on the host system
Installation Process
The installation process varies depending on your Linux distribution. Below are detailed instructions for the most common distributions.
Ubuntu/Debian Installation
For Ubuntu and Debian-based systems, use the following commands:
# Update package repository
sudo apt update

# Install TightVNC Server
sudo apt install tightvncserver

# Install desktop environment (if not already present)
sudo apt install xfce4 xfce4-goodies
CentOS/RHEL/Fedora Installation
For Red Hat-based distributions:
# Update system packages
sudo yum update  # or dnf update for Fedora

# Install TightVNC Server
sudo yum install tigervnc-server  # or dnf install for Fedora

# Install desktop environment
sudo yum groupinstall "GNOME Desktop" "Graphical Administration Tools"
Arch Linux Installation
# Install TightVNC Server
sudo pacman -S tightvnc

# Install desktop environment
sudo pacman -S xfce4 xfce4-goodies
Initial Configuration and Setup
After installation, you need to configure TightVNC Server properly. Here’s a step-by-step configuration process:
Starting TightVNC Server for the First Time
Run the following command to start TightVNC Server and create initial configuration:
vncserver :1Expected output:
You will require a password to access your desktops.

Password:
Verify:
Would you like to enter a view-only password (y/n)? n

New 'X' desktop is hostname:1

Creating default startup script /home/username/.vnc/xstartup
Starting applications specified in /home/username/.vnc/xstartup
Log file is /home/username/.vnc/hostname:1.log
Configuring the Startup Script
The default startup script needs modification to launch your preferred desktop environment:
# Stop the VNC server first
vncserver -kill :1

# Edit the startup script
nano ~/.vnc/xstartup
Replace the contents with:
#!/bin/bash
xrdb $HOME/.Xresources
startxfce4 &
Make the script executable:
chmod +x ~/.vnc/xstartupAdvanced Configuration Options
Creating Custom Configuration Files
Create a custom configuration file for better control:
nano ~/.vnc/configAdd the following configuration options:
# Session geometry
geometry=1024x768

# Desktop name
desktop=MyLinuxDesktop

# Pixel depth
depth=24

# DPI settings
dpi=96

# Additional security options
localhost=no
Password Management
To change or set passwords:
# Change VNC password
vncpasswd

# Set password for specific display
vncpasswd ~/.vnc/passwd
Managing VNC Server Sessions
Starting VNC Server Sessions
Start VNC server with specific display numbers and options:
# Start on display :1 with specific geometry
vncserver :1 -geometry 1280x1024 -depth 16

# Start with custom name
vncserver :2 -name "Development Environment"

# Start with specific pixel format
vncserver :3 -pixelformat rgb565
Listing Active Sessions
View all running VNC sessions:
vncserver -listSample output:
TigerVNC server sessions:

X DISPLAY #     PROCESS ID
:1              12345
:2              12346
:3              12347
Stopping VNC Sessions
Stop specific or all VNC sessions:
# Stop specific session
vncserver -kill :1

# Stop all sessions
vncserver -kill :*
Security Configuration
Firewall Configuration
Configure firewall rules for VNC access:
# UFW (Ubuntu/Debian)
sudo ufw allow 5901/tcp
sudo ufw allow 5902/tcp

# Firewalld (CentOS/RHEL/Fedora)
sudo firewall-cmd --add-port=5901/tcp --permanent
sudo firewall-cmd --add-port=5902/tcp --permanent
sudo firewall-cmd --reload
SSH Tunneling for Enhanced Security
Create secure SSH tunnels for VNC connections:
# Client side command
ssh -L 5901:localhost:5901 username@server_ip

# Then connect VNC viewer to localhost:5901
IP Address Restrictions
Limit access to specific IP addresses by editing the hosts file:
nano ~/.vnc/configAdd:
# Allow only specific IPs
localhost=no
interface=192.168.1.100
System Service Configuration
Creating Systemd Service
Create a systemd service for automatic startup:
sudo nano /etc/systemd/system/[email protected]Add the following content:
[Unit]
Description=Start TightVNC server at startup
After=syslog.target network.target

[Service]
Type=forking
User=username
Group=username
WorkingDirectory=/home/username

PIDFile=/home/username/.vnc/%H:%i.pid
ExecStartPre=-/usr/bin/vncserver -kill :%i > /dev/null 2>&1
ExecStart=/usr/bin/vncserver -depth 24 -geometry 1280x1024 :%i
ExecStop=/usr/bin/vncserver -kill :%i

[Install]
WantedBy=multi-user.target
Enable and start the service:
# Reload systemd
sudo systemctl daemon-reload

# Enable service for display :1
sudo systemctl enable [email protected]

# Start the service
sudo systemctl start [email protected]

# Check status
sudo systemctl status [email protected]
Performance Optimization
Bandwidth Optimization
Configure compression and encoding for different network conditions:
# For slow connections
vncserver :1 -geometry 1024x768 -depth 8

# For fast local networks
vncserver :1 -geometry 1920x1080 -depth 24

# With custom compression
vncserver :1 -compresslevel 9 -quality 1
Resource Management
Monitor VNC server resource usage:
# Check memory usage
ps aux | grep vnc

# Monitor network connections
netstat -tulpn | grep :590

# Check log files for performance issues
tail -f ~/.vnc/*.log
Troubleshooting Common Issues
Connection Refused Errors
When encountering connection issues:
# Check if VNC server is running
ps aux | grep vnc

# Verify port availability
netstat -tulpn | grep 590

# Check firewall status
sudo ufw status  # Ubuntu/Debian
sudo firewall-cmd --list-all  # CentOS/RHEL
Display Issues
For black screen or display problems:
# Check X server logs
cat ~/.vnc/*.log

# Verify desktop environment installation
which startxfce4  # or your preferred DE

# Test X server functionality
DISPLAY=:1 xclock  # Should show a clock on VNC display
Authentication Problems
Resolve password and authentication issues:
# Reset VNC password
vncpasswd

# Check password file permissions
ls -la ~/.vnc/passwd

# Verify configuration file syntax
cat ~/.vnc/config
Client Connection Examples
Connecting from Different Platforms
Various methods to connect to your TightVNC Server:
# From Linux command line
vncviewer server_ip:1

# From Windows (using TightVNC Viewer)
# Connect to: server_ip:5901

# From macOS (using built-in Screen Sharing)
# Connect to: vnc://server_ip:5901
Web Browser Access
Enable web-based VNC access:
# Start VNC with HTTP support
vncserver :1 -httpd /usr/share/vnc-java

# Access via browser: http://server_ip:5801
Monitoring and Maintenance
Log File Analysis
Regular monitoring helps maintain system health:
# View current session logs
tail -f ~/.vnc/hostname:1.log

# Check for errors
grep -i error ~/.vnc/*.log

# Monitor connection attempts
grep -i "connection" ~/.vnc/*.log
Backup and Recovery
Backup important VNC configuration:
# Create backup directory
mkdir ~/vnc-backup

# Backup configuration files
cp -r ~/.vnc ~/vnc-backup/

# Create automated backup script
echo "#!/bin/bash
tar -czf ~/vnc-backup/vnc-config-$(date +%Y%m%d).tar.gz ~/.vnc" > ~/backup-vnc.sh
chmod +x ~/backup-vnc.sh
Best Practices and Security Recommendations
Security Hardening
- Use Strong Passwords: Always set complex passwords with mixed characters
- Enable SSH Tunneling: Never expose VNC directly to the internet
- Regular Updates: Keep TightVNC Server updated to latest versions
- Access Logging: Monitor connection logs regularly
- Network Segmentation: Use VLANs or separate networks for VNC traffic
Performance Best Practices
- Appropriate Resolution: Choose resolution based on network capacity
- Color Depth Optimization: Use lower color depths for slow connections
- Compression Settings: Adjust compression based on network speed
- Resource Monitoring: Regularly check system resources
TightVNC Server provides a robust solution for remote Linux desktop access. By following this comprehensive guide, you can successfully deploy, configure, and maintain a secure and efficient remote desktop environment. Remember to regularly update your configuration based on changing security requirements and performance needs.
Related Posts
vncserver Command Linux: Complete Guide to VNC Server Setup and Management
The vncserver command is a powerful tool in Linux that enables remote desktop access by starting a Virtual Network Computing...
RealVNC Linux: Complete Guide to Remote Desktop Access and Control
RealVNC is a powerful remote desktop software that enables users to control Linux systems remotely over a network connection. As...
x11vnc Command Linux: Complete Guide to Remote Desktop Access via VNC Server
The x11vnc command is a powerful Linux utility that allows you to share your existing X11 desktop session via VNC...
NoMachine Linux: Complete Guide to Remote Desktop Access and Configuration
NoMachine is a powerful remote desktop solution that enables secure access to Linux systems from anywhere in the world. Unlike...

xrdp Command Linux: Complete Guide to Remote Desktop Server Setup
The xrdp command is a powerful Linux utility that implements Microsoft's Remote Desktop Protocol (RDP) server functionality on Unix-like systems....
vinagre Command Linux: Complete Guide to VNC Viewer and Remote Desktop Access
The vinagre command is a powerful VNC (Virtual Network Computing) viewer for Linux systems that enables users to connect to...

xfreerdp Command Linux: Complete Guide to FreeRDP Remote Desktop Client
The xfreerdp command is a powerful Linux utility that serves as the primary client for the FreeRDP project, enabling users...
TeamViewer Linux: Complete Guide to Remote Desktop Access and Support
TeamViewer is one of the most popular remote desktop solutions available today, offering cross-platform compatibility and robust features for remote...

AnyDesk Linux: Complete Remote Desktop Solution Guide for Linux Users
AnyDesk is a powerful cross-platform remote desktop application that enables users to access computers remotely over the internet. For Linux...
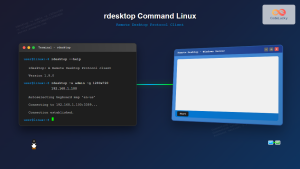
rdesktop Command Linux: Complete Guide to Remote Desktop Protocol Client
The rdesktop command is a powerful Remote Desktop Protocol (RDP) client for Linux systems that enables seamless connections to Windows...
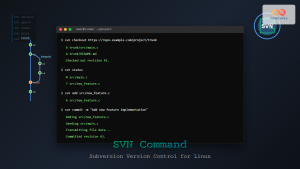
svn Command Linux: Complete Guide to Subversion Version Control System
What is SVN (Subversion)? SVN (Subversion) is a centralized version control system that helps developers track changes in files and...
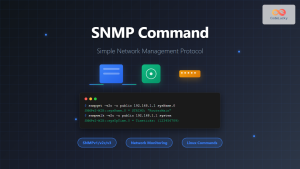
SNMP Command Linux: Complete Guide to Simple Network Management Protocol Configuration and Usage
Introduction to SNMP Command in Linux Simple Network Management Protocol (SNMP) is a fundamental protocol used for monitoring and managing...