The snmpset command is a powerful Linux utility that allows network administrators to modify SNMP (Simple Network Management Protocol) variables on remote network devices. This command is essential for automating network configuration tasks, updating device settings, and managing network infrastructure programmatically.
What is the snmpset Command?
The snmpset command is part of the Net-SNMP suite of tools that enables users to set or modify SNMP variables (OIDs – Object Identifiers) on SNMP-enabled devices such as routers, switches, printers, and servers. Unlike snmpget which retrieves information, snmpset allows you to change configuration parameters remotely.
Installation
Before using snmpset, ensure that the Net-SNMP utilities are installed on your Linux system:
Ubuntu/Debian
sudo apt update
sudo apt install snmp snmp-mibs-downloader
CentOS/RHEL/Fedora
sudo yum install net-snmp-utils
# or for newer versions
sudo dnf install net-snmp-utils
Basic Syntax
The general syntax for the snmpset command is:
snmpset [OPTIONS] HOSTNAME COMMUNITY OID TYPE VALUE [OID TYPE VALUE...]Key Components:
- HOSTNAME: IP address or hostname of the target device
- COMMUNITY: SNMP community string (default is often “public”)
- OID: Object Identifier to modify
- TYPE: Data type of the value
- VALUE: New value to set
Data Types
Understanding SNMP data types is crucial for successful operations:
| Type | Description | Example |
|---|---|---|
| i | INTEGER | -12345 |
| u | Unsigned INTEGER | 12345 |
| s | STRING | “Hello World” |
| x | HEX STRING | 4F:4B |
| d | DECIMAL STRING | 42.195 |
| n | NULL VALUE | |
| o | OBJECT IDENTIFIER | .1.3.6.1.4.1 |
| t | TIME TICKS | 12345 |
| a | IP ADDRESS | 192.168.1.1 |
Common Command Options
Version Options
-v1: Use SNMP version 1-v2c: Use SNMP version 2c (default)-v3: Use SNMP version 3 with authentication
Authentication Options (SNMPv3)
-u USERNAME: Security username-l LEVEL: Security level (noAuthNoPriv, authNoPriv, authPriv)-a PROTOCOL: Authentication protocol (MD5, SHA)-A PASSWORD: Authentication password-x PROTOCOL: Privacy protocol (DES, AES)-X PASSWORD: Privacy password
Other Useful Options
-r RETRIES: Number of retries (default: 5)-t TIMEOUT: Timeout in seconds (default: 1)-p PORT: Remote port number (default: 161)-c COMMUNITY: Community string
Practical Examples
Example 1: Setting System Description
Let’s modify the system description on a device:
snmpset -v2c -c private 192.168.1.100 1.3.6.1.2.1.1.1.0 s "Linux Server - Production Environment"Expected Output:
SNMPv2-MIB::sysDescr.0 = STRING: Linux Server - Production EnvironmentExample 2: Setting Administrative Contact
snmpset -v2c -c private 192.168.1.100 1.3.6.1.2.1.1.4.0 s "[email protected]"Expected Output:
SNMPv2-MIB::sysContact.0 = STRING: [email protected]Example 3: Setting Integer Value
Setting an integer value for interface administrative status:
snmpset -v2c -c private 192.168.1.100 1.3.6.1.2.1.2.2.1.7.1 i 1Expected Output:
IF-MIB::ifAdminStatus.1 = INTEGER: up(1)Example 4: Using SNMPv3 with Authentication
snmpset -v3 -u admin -l authPriv -a SHA -A myauthpassword -x AES -X myprivpassword 192.168.1.100 1.3.6.1.2.1.1.6.0 s "Data Center Room 1"Expected Output:
SNMPv2-MIB::sysLocation.0 = STRING: Data Center Room 1Example 5: Setting Multiple Variables
You can set multiple OIDs in a single command:
snmpset -v2c -c private 192.168.1.100 \
    1.3.6.1.2.1.1.4.0 s "[email protected]" \
    1.3.6.1.2.1.1.6.0 s "Server Room A" \
    1.3.6.1.2.1.1.5.0 s "web-server-01"
Example 6: Setting IP Address Type
snmpset -v2c -c private 192.168.1.100 1.3.6.1.4.1.1234.1.2.3.0 a 192.168.1.254Error Handling and Troubleshooting
Common Error Messages
1. Authentication Failure
snmpset: Authentication failure (incorrect password, community or key)Solution: Verify the community string or SNMPv3 credentials.
2. Timeout Error
Timeout: No Response from 192.168.1.100Solution: Check network connectivity and increase timeout value:
snmpset -t 5 -r 3 -v2c -c private 192.168.1.100 ...3. Permission Denied
Error in packet: (noAccess) The requested MIB object does not allow write accessSolution: Verify that the OID supports write operations and you have proper permissions.
Debugging Tips
Use verbose mode for detailed debugging information:
snmpset -v2c -c private -d 192.168.1.100 1.3.6.1.2.1.1.4.0 s "[email protected]"Security Best Practices
1. Use SNMPv3
Always prefer SNMPv3 with authentication and encryption for production environments:
snmpset -v3 -u secureuser -l authPriv -a SHA -A strongauthpass -x AES -X strongprivpass ...2. Restrict Community Strings
- Never use default community strings like “public” or “private”
- Use complex, unique community strings
- Implement IP-based access control
3. Network Security
- Use firewalls to restrict SNMP access
- Consider VPN for remote SNMP management
- Monitor SNMP traffic for unauthorized access
Automation and Scripting
Bash Script Example
#!/bin/bash

# SNMP Configuration Script
COMMUNITY="private"
HOST="192.168.1.100"

# Set system information
snmpset -v2c -c $COMMUNITY $HOST \
    1.3.6.1.2.1.1.4.0 s "[email protected]" \
    1.3.6.1.2.1.1.6.0 s "Data Center" \
    1.3.6.1.2.1.1.5.0 s "production-server"

if [ $? -eq 0 ]; then
    echo "Configuration updated successfully"
else
    echo "Failed to update configuration"
    exit 1
fi
Python Integration
For complex automation, consider using Python with the pysnmp library:
from pysnmp.hlapi import *

def snmp_set(target, community, oid, value):
    for (errorIndication, errorStatus, errorIndex, varBinds) in setCmd(
        SnmpEngine(),
        CommunityData(community),
        UdpTransportTarget((target, 161)),
        ContextData(),
        ObjectType(ObjectIdentity(oid), OctetString(value))):

        if errorIndication:
            print(f"Error: {errorIndication}")
            return False
        elif errorStatus:
            print(f'Error: {errorStatus.prettyPrint()}')
            return False
        else:
            return True
Performance Considerations
Bulk Operations
When setting multiple variables, use a single snmpset command rather than multiple separate commands to reduce network overhead.
Timeout and Retry Settings
Adjust timeout and retry values based on network conditions:
# For slow networks
snmpset -t 10 -r 2 -v2c -c private 192.168.1.100 ...

# For fast, reliable networks
snmpset -t 1 -r 1 -v2c -c private 192.168.1.100 ...
Advanced Use Cases
Interface Configuration
Enable/disable network interfaces programmatically:
# Disable interface (set to down)
snmpset -v2c -c private 192.168.1.100 1.3.6.1.2.1.2.2.1.7.2 i 2

# Enable interface (set to up)
snmpset -v2c -c private 192.168.1.100 1.3.6.1.2.1.2.2.1.7.2 i 1
SNMP Trap Configuration
Configure SNMP trap destinations:
snmpset -v2c -c private 192.168.1.100 \
    1.3.6.1.4.1.1234.2.3.1.2.0 a 192.168.1.200 \
    1.3.6.1.4.1.1234.2.3.1.3.0 i 162
Monitoring and Verification
Always verify your changes using snmpget:
# Set a value
snmpset -v2c -c private 192.168.1.100 1.3.6.1.2.1.1.4.0 s "[email protected]"

# Verify the change
snmpget -v2c -c public 192.168.1.100 1.3.6.1.2.1.1.4.0
Conclusion
The snmpset command is an indispensable tool for network administrators managing SNMP-enabled devices. By understanding its syntax, data types, and security implications, you can effectively automate network configuration tasks and maintain large-scale network infrastructure. Remember to always follow security best practices, test changes in a non-production environment first, and verify modifications using appropriate monitoring tools.
Whether you’re updating system descriptions, configuring interfaces, or setting up automated network management scripts, mastering snmpset will significantly enhance your network administration capabilities and operational efficiency.
Related Posts
snmpget Command Linux: Complete Guide to Retrieving SNMP Variables
The snmpget command is a powerful Linux utility that allows network administrators to retrieve specific SNMP (Simple Network Management Protocol)...
snmpwalk Command Linux: Complete Guide to SNMP Management Information Retrieval
The snmpwalk command is a powerful Linux utility that allows you to retrieve management information from SNMP-enabled devices on your...
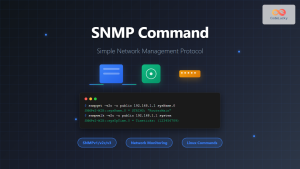
SNMP Command Linux: Complete Guide to Simple Network Management Protocol Configuration and Usage
Introduction to SNMP Command in Linux Simple Network Management Protocol (SNMP) is a fundamental protocol used for monitoring and managing...
net-snmp Linux: Complete Guide to SNMP Implementation and Management
Simple Network Management Protocol (SNMP) is a cornerstone of network management, and net-snmp is the most widely used open-source implementation...
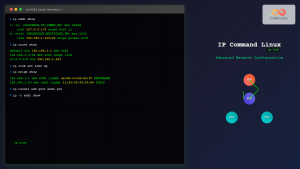
ip Command Linux: Complete Guide to Advanced Network Configuration and Management
The ip command is one of the most powerful and versatile networking tools in Linux, serving as the modern replacement...
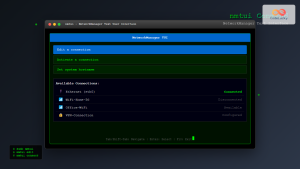
nmtui Command Linux: Complete Guide to NetworkManager Text User Interface
The nmtui (NetworkManager Text User Interface) command is a powerful, menu-driven tool that provides an intuitive way to configure network...

SolarWinds Linux: Complete Network Performance Monitor Guide for System Administrators
SolarWinds Network Performance Monitor (NPM) is a powerful network monitoring solution that provides comprehensive visibility into network infrastructure performance. While...

mibs Linux: Complete Guide to Management Information Base Files and SNMP Monitoring
Management Information Base (MIB) files are essential components in Linux system administration and network monitoring. These structured databases define the...
nmcli Command Linux: Complete Guide to NetworkManager Command Line Tool
The nmcli (NetworkManager Command Line Interface) is a powerful command-line tool that allows you to control NetworkManager and configure network...

intermapper Linux: Complete Network Monitoring and Mapping Guide
What is InterMapper for Linux? InterMapper is a powerful network monitoring and mapping tool that provides real-time visibility into network...
ifconfig Command Linux: Complete Guide to Network Interface Configuration (Deprecated)
The ifconfig (interface configuration) command has been a cornerstone of Linux network administration for decades. While officially deprecated in favor...
systemd-networkd Linux: Complete Network Configuration Manager Guide
systemd-networkd is a powerful system daemon that manages network configurations on Linux systems. As part of the systemd ecosystem, it...