OpenShift represents Red Hat’s enterprise-grade Kubernetes platform that revolutionizes how organizations deploy, manage, and scale containerized applications on Linux systems. This comprehensive guide explores essential OpenShift commands, deployment strategies, and best practices for leveraging this powerful container orchestration platform.
What is OpenShift?
OpenShift is an enterprise Kubernetes platform that extends the capabilities of standard Kubernetes with additional developer and operational tools. Built on Red Hat Enterprise Linux, OpenShift provides a complete container application platform with integrated CI/CD pipelines, security features, and multi-cloud deployment capabilities.
Key Components of OpenShift
- Kubernetes Engine: Core container orchestration
- Container Registry: Built-in image repository
- Developer Console: Web-based management interface
- Source-to-Image (S2I): Automated build process
- Operators: Application lifecycle management
- Service Mesh: Advanced networking and security
Installing OpenShift on Linux
Before working with OpenShift commands, you need to install the OpenShift CLI tools on your Linux system.
Installing OpenShift CLI (oc)
# Download OpenShift CLI for Linux
wget https://mirror.openshift.com/pub/openshift-v4/clients/ocp/latest/openshift-client-linux.tar.gz

# Extract the archive
tar -xzf openshift-client-linux.tar.gz

# Move to system PATH
sudo mv oc kubectl /usr/local/bin/

# Verify installation
oc version
Expected Output:
Client Version: 4.13.0
Kustomize Version: v4.5.7
Server Version: 4.13.0
Kubernetes Version: v1.26.3+b404935
Essential OpenShift Linux Commands
Authentication and Cluster Access
Login to OpenShift Cluster
# Login with username and password
oc login https://api.cluster-name.domain.com:6443 -u username -p password

# Login with token (recommended for automation)
oc login --token=sha256~your-token-here --server=https://api.cluster-name.domain.com:6443

# Login interactively
oc login
Sample Output:
Login successful.

You have access to 67 projects, the list has been suppressed. You can list all projects with 'oc projects'

Using project "default".
Check Current Context and User
# Display current user
oc whoami

# Show current context
oc config current-context

# List all contexts
oc config get-contexts
Project Management Commands
Creating and Managing Projects
# Create a new project
oc new-project my-application --display-name="My Application" --description="Sample application project"

# Switch to a project
oc project my-application

# List all projects
oc projects

# Get project details
oc describe project my-application
Output Example:
Now using project "my-application" on server "https://api.cluster-name.domain.com:6443".

You can add applications to this project with the 'oc new-app' command. For example, try:

    oc new-app rails-postgresql-example

to build a new example application in Ruby. Or use kubectl to deploy a simple Kubernetes application:

    kubectl create deployment hello-node --image=k8s.gcr.io/serve_hostname
Application Deployment Commands
Deploying Applications
# Deploy from Docker image
oc new-app nginx:latest --name=web-server

# Deploy from source code (S2I)
oc new-app https://github.com/openshift/ruby-ex.git --name=ruby-app

# Deploy with environment variables
oc new-app mysql:8.0 --name=database \
  -e MYSQL_ROOT_PASSWORD=secret \
  -e MYSQL_DATABASE=myapp \
  -e MYSQL_USER=appuser \
  -e MYSQL_PASSWORD=apppass

# Deploy from template
oc new-app --template=mysql-persistent --param=MYSQL_USER=admin
Scaling Applications
# Scale deployment to 3 replicas
oc scale deployment web-server --replicas=3

# Auto-scale based on CPU usage
oc autoscale deployment web-server --min=2 --max=10 --cpu-percent=80

# Check scaling status
oc get hpa
Scaling Output:
deployment.apps/web-server scaled

NAME         REFERENCE               TARGETS   MINPODS   MAXPODS   REPLICAS   AGE
web-server   Deployment/web-server   1%/80%    2         10        3          5m
Resource Management Commands
Viewing Resources
# List all resources in current project
oc get all

# Get detailed information about pods
oc get pods -o wide

# Describe a specific resource
oc describe pod web-server-xyz123

# Get resources across all namespaces (cluster admin)
oc get pods --all-namespaces
Resource Monitoring
# Monitor pod logs
oc logs web-server-xyz123

# Follow logs in real-time
oc logs -f web-server-xyz123

# Get logs from all containers in a pod
oc logs web-server-xyz123 --all-containers=true

# View resource usage
oc top pods
oc top nodes
Resource Usage Output:
NAME                         CPU(cores)   MEMORY(bytes)
web-server-6b8c7d4f9-abc123  1m           64Mi
web-server-6b8c7d4f9-def456  1m           58Mi
web-server-6b8c7d4f9-ghi789  2m           71Mi
Advanced OpenShift Operations
Route and Service Management
Exposing Services
# Create a route to expose service
oc expose service web-server --hostname=myapp.example.com

# Create secure route with TLS
oc create route edge --service=web-server --hostname=secure-myapp.example.com

# Get route information
oc get routes
Service Discovery
# List services
oc get services

# Create a service
oc expose deployment web-server --port=8080 --target-port=80

# Test service connectivity
oc port-forward service/web-server 8080:80
Build and Image Management
Source-to-Image Builds
# Start a new build
oc start-build ruby-app

# Start build with source override
oc start-build ruby-app --from-dir=./local-source

# Cancel a build
oc cancel-build ruby-app-2

# Get build logs
oc logs build/ruby-app-1
Image Stream Management
# List image streams
oc get imagestreams

# Import external image
oc import-image nginx:latest --confirm

# Tag an image
oc tag nginx:latest nginx:production
Configuration Management
ConfigMaps and Secrets
# Create ConfigMap from file
oc create configmap app-config --from-file=config.properties

# Create Secret
oc create secret generic db-credentials \
  --from-literal=username=admin \
  --from-literal=password=secret123

# Mount ConfigMap as volume
oc set volume deployment/web-server --add \
  --type=configmap \
  --configmap-name=app-config \
  --mount-path=/etc/config
Environment Variables
# Set environment variable
oc set env deployment/web-server DATABASE_URL=mysql://db:3306/myapp

# Remove environment variable
oc set env deployment/web-server DATABASE_URL-

# List environment variables
oc set env deployment/web-server --list
Security and RBAC Commands
Role-Based Access Control
# Create service account
oc create serviceaccount myapp-sa

# Add role to user
oc adm policy add-role-to-user edit developer-user

# Add cluster role to service account
oc adm policy add-cluster-role-to-user cluster-reader -z myapp-sa

# List role bindings
oc get rolebindings
Security Context Constraints
# List security context constraints
oc get scc

# Add SCC to service account
oc adm policy add-scc-to-user anyuid -z myapp-sa

# Remove SCC from service account
oc adm policy remove-scc-from-user anyuid -z myapp-sa
Troubleshooting Commands
Debugging Applications
# Get events in current project
oc get events --sort-by=.metadata.creationTimestamp

# Debug a deployment
oc debug deployment/web-server

# Execute commands in running pod
oc exec -it web-server-xyz123 -- /bin/bash

# Copy files from/to pod
oc cp local-file.txt web-server-xyz123:/tmp/
oc cp web-server-xyz123:/app/logs/app.log ./local-log.txt
Resource Inspection
# Get resource definition in YAML
oc get deployment web-server -o yaml

# Edit resource directly
oc edit deployment web-server

# Patch resource
oc patch deployment web-server -p '{"spec":{"replicas":5}}'

# Rollback deployment
oc rollout undo deployment/web-server
Performance and Monitoring
Resource Limits and Requests
# Set resource limits
oc set resources deployment web-server \
  --limits=cpu=500m,memory=512Mi \
  --requests=cpu=200m,memory=256Mi

# Create resource quota
oc create quota project-quota \
  --hard=pods=10,requests.cpu=2,requests.memory=4Gi,limits.cpu=4,limits.memory=8Gi
Health Checks
# Add readiness probe
oc set probe deployment/web-server --readiness \
  --get-url=http://:8080/health \
  --initial-delay-seconds=30

# Add liveness probe
oc set probe deployment/web-server --liveness \
  --get-url=http://:8080/health \
  --initial-delay-seconds=60
Best Practices for OpenShift on Linux
Security Best Practices
- Use dedicated service accounts: Avoid using default service accounts
- Implement least privilege: Grant minimal necessary permissions
- Regular image updates: Keep container images updated
- Network policies: Implement micro-segmentation
- Secret management: Use external secret management systems
Performance Optimization
- Resource planning: Set appropriate CPU and memory limits
- Horizontal scaling: Use HPA for dynamic scaling
- Storage optimization: Choose appropriate storage classes
- Network optimization: Configure service mesh for complex applications
Operational Excellence
# Backup critical configurations
oc get all -o yaml > backup-$(date +%Y%m%d).yaml

# Regular cluster health checks
oc get nodes
oc get pods --all-namespaces | grep -v Running

# Monitor cluster events
oc get events --all-namespaces --sort-by='.lastTimestamp'
Advanced Configuration Examples
Multi-Stage Application Deployment
# Deploy to development
oc new-project myapp-dev
oc new-app https://github.com/example/myapp.git#develop --name=myapp

# Promote to staging
oc new-project myapp-staging
oc tag myapp-dev/myapp:latest myapp-staging/myapp:staging
oc new-app myapp:staging --name=myapp -n myapp-staging

# Production deployment with blue-green
oc new-project myapp-prod
oc tag myapp-staging/myapp:staging myapp-prod/myapp:v1.0.0
Persistent Storage Configuration
# Create persistent volume claim
oc create -f - <
Conclusion
OpenShift on Linux provides a robust, enterprise-grade platform for container orchestration that extends Kubernetes with enhanced security, developer productivity, and operational capabilities. Mastering these commands enables efficient management of containerized applications, from development through production deployment.
The combination of OpenShift’s powerful features with Linux’s stability creates an ideal environment for modern application deployment. Regular practice with these commands, combined with understanding of underlying Kubernetes concepts, will enable you to leverage the full potential of this enterprise container platform.
Remember to always test commands in non-production environments first, maintain proper backup strategies, and follow security best practices when managing OpenShift clusters in enterprise environments.
Related Posts

Kubernetes Linux: Complete Guide to Container Orchestration Platform
Kubernetes has revolutionized how we deploy, manage, and scale containerized applications on Linux systems. As the leading container orchestration platform,...
Container Operating Systems: Complete Guide to Docker and Kubernetes Platforms
Container operating systems have revolutionized how we deploy, manage, and scale applications in modern computing environments. Unlike traditional operating systems...
containerd Linux: Complete Guide to Industry-Standard Container Runtime
Containerd has emerged as the industry-standard container runtime, serving as the foundation for modern containerization platforms like Docker and Kubernetes....
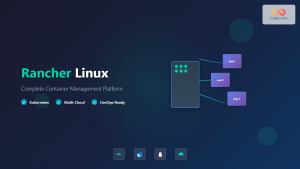
Rancher Linux: Complete Container Management Platform for DevOps Teams
Rancher Linux revolutionizes container management by providing a comprehensive platform that simplifies Kubernetes orchestration, multi-cloud deployments, and enterprise-grade container operations....
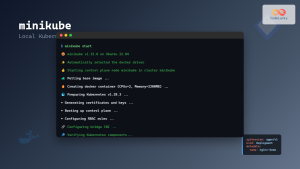
Minikube Linux: Complete Guide to Local Kubernetes Development
Minikube has revolutionized local Kubernetes development by providing developers with a lightweight, single-node Kubernetes cluster that runs directly on their...

kind Linux: Complete Guide to Running Kubernetes in Docker Containers
What is kind (Kubernetes in Docker)? kind (Kubernetes in Docker) is a powerful tool designed for running local Kubernetes clusters...

kubectl Command Linux: Kubernetes Management Made Simple
The kubectl command is the primary command-line interface for interacting with Kubernetes clusters. This powerful tool allows administrators and developers...

podman Command Linux: Complete Container Management Guide
Podman (Pod Manager) is a powerful, daemonless container engine that provides a Docker-compatible command-line interface for managing containers and pods...

CRI-O Linux: Complete Guide to Lightweight Container Runtime for Kubernetes
CRI-O (Container Runtime Interface - Open Container Initiative) is a lightweight, OCI-compliant container runtime specifically designed for Kubernetes. Unlike Docker,...
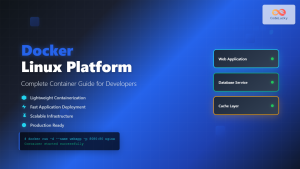
docker Linux: Complete Container Platform Guide for Developers
Docker has revolutionized software development and deployment by introducing lightweight containerization technology. As a platform that enables developers to package...

k3s Linux: Complete Guide to Lightweight Kubernetes for Edge Computing
k3s is a highly available, certified Kubernetes distribution designed for production workloads in unattended, resource-constrained, remote locations or inside IoT...

nomad Linux: Complete Guide to HashiCorp’s Workload Orchestrator
What is HashiCorp Nomad? HashiCorp Nomad is a simple yet powerful workload orchestrator that enables organizations to deploy and manage...