What is HashiCorp Nomad?
HashiCorp Nomad is a simple yet powerful workload orchestrator that enables organizations to deploy and manage applications across on-premises and cloud infrastructure. Unlike Kubernetes, Nomad provides a lightweight alternative that can orchestrate not just containers, but also virtual machines, standalone binaries, and Java applications on Linux systems.
Nomad follows a single binary deployment model, making it exceptionally easy to install and operate on Linux distributions. It automatically handles application placement, scaling, and failure recovery across a cluster of machines.
Key Features of Nomad on Linux
- Multi-Workload Support: Deploy containers, VMs, and binaries
- Simple Architecture: Single binary with no external dependencies
- Flexible Scheduling: Constraint-based and bin-packing algorithms
- Service Discovery: Built-in service mesh capabilities
- Rolling Updates: Zero-downtime deployments
- Multi-Region Support: Federation across multiple data centers
Installing Nomad on Linux
Method 1: Using Package Manager (Ubuntu/Debian)
First, add the HashiCorp GPG key and repository:
curl -fsSL https://apt.releases.hashicorp.com/gpg | sudo apt-key add -
sudo apt-add-repository "deb [arch=amd64] https://apt.releases.hashicorp.com $(lsb_release -cs) main"
sudo apt-get update
sudo apt-get install nomad
Method 2: Binary Installation
Download and install the latest Nomad binary:
# Download Nomad
wget https://releases.hashicorp.com/nomad/1.6.1/nomad_1.6.1_linux_amd64.zip

# Unzip and move to system path
unzip nomad_1.6.1_linux_amd64.zip
sudo mv nomad /usr/local/bin/

# Verify installation
nomad version
Expected Output:
Nomad v1.6.1
BuildDate 2023-07-21T13:49:42Z
Revision 515895c765022573b8b1d4e8fb5952e0f0c94500
Nomad Architecture Components
Server Mode
Nomad servers manage the cluster state, perform scheduling decisions, and handle API requests. They maintain the cluster’s consensus using the Raft protocol.
Client Mode
Nomad clients execute the workloads assigned by servers. They report their status and available resources to the servers.
Dev Mode
A single-node setup combining both server and client functionality, perfect for development and testing.
Basic Nomad Configuration
Server Configuration
Create a server configuration file /etc/nomad.d/server.hcl:
datacenter = "dc1"
data_dir = "/opt/nomad/data"
log_level = "INFO"
node_name = "nomad-server-1"

server {
  enabled = true
  bootstrap_expect = 1
}

client {
  enabled = false
}

ui_config {
  enabled = true
}

bind_addr = "0.0.0.0"

ports {
  http = 4646
  rpc = 4647
  serf = 4648
}
Client Configuration
Create a client configuration file /etc/nomad.d/client.hcl:
datacenter = "dc1"
data_dir = "/opt/nomad/data"
log_level = "INFO"
node_name = "nomad-client-1"

server {
  enabled = false
}

client {
  enabled = true
  servers = ["127.0.0.1:4647"]
}
Starting Nomad Services
Using Systemd
Create a systemd service file /etc/systemd/system/nomad.service:
[Unit]
Description=Nomad
Documentation=https://www.nomadproject.io/
Requires=network-online.target
After=network-online.target
Wants=consul.service

[Service]
Type=notify
User=nomad
Group=nomad
ExecStart=/usr/local/bin/nomad agent -config=/etc/nomad.d/
ExecReload=/bin/kill -HUP $MAINPID
KillMode=process
Restart=on-failure
LimitNOFILE=65536

[Install]
WantedBy=multi-user.target
Start and enable the service:
sudo systemctl daemon-reload
sudo systemctl enable nomad
sudo systemctl start nomad
sudo systemctl status nomad
Development Mode
For testing purposes, start Nomad in development mode:
sudo nomad agent -devExpected Output:
==> Starting Nomad agent...
==> Nomad agent configuration:

       Advertise Addrs: HTTP: 127.0.0.1:4646; RPC: 127.0.0.1:4647; Serf: 127.0.0.1:4648
            Bind Addrs: HTTP: 127.0.0.1:4646; RPC: 127.0.0.1:4647; Serf: 127.0.0.1:4648
                Client: true
             Log Level: INFO
                Region: global (DC: dc1)
                Server: true

==> Nomad agent started! Log data will stream in below:
Essential Nomad Commands
Cluster Management
# Check cluster status
nomad server members

# View node information
nomad node status

# Check server leader
nomad server leader
Job Management
# List all jobs
nomad job status

# Run a job
nomad job run job.nomad

# Stop a job
nomad job stop job-name

# Check job history
nomad job history job-name
Creating Your First Nomad Job
Simple Web Server Job
Create a file named webserver.nomad:
job "webserver" {
  datacenters = ["dc1"]
  type = "service"

  group "web" {
    count = 2

    network {
      port "http" {
        static = 8080
      }
    }

    service {
      name = "webserver"
      port = "http"

      check {
        type = "http"
        path = "/"
        interval = "10s"
        timeout = "2s"
      }
    }

    task "server" {
      driver = "exec"

      config {
        command = "python3"
        args = ["-m", "http.server", "8080"]
      }

      resources {
        cpu = 100
        memory = 128
      }
    }
  }
}
Deploy the job:
nomad job run webserver.nomadExpected Output:
==> Monitoring evaluation "a1b2c3d4"
    Evaluation triggered by job "webserver"
==> Monitoring evaluation "a1b2c3d4"
    Allocation "e5f6g7h8" created: node "i9j0k1l2", group "web"
    Allocation "m3n4o5p6" created: node "q7r8s9t0", group "web"
    Evaluation status changed: "pending" -> "complete"
==> Evaluation "a1b2c3d4" finished with status "complete"
Container-Based Job
Create a Docker container job nginx.nomad:
job "nginx" {
  datacenters = ["dc1"]
  type = "service"

  group "nginx" {
    count = 1

    network {
      port "http" {
        to = 80
      }
    }

    service {
      name = "nginx"
      port = "http"

      tags = [
        "web",
        "nginx"
      ]
    }

    task "nginx" {
      driver = "docker"

      config {
        image = "nginx:alpine"
        ports = ["http"]
      }

      resources {
        cpu = 100
        memory = 128
      }
    }
  }
}
Job Lifecycle Management
Scaling Applications
Update the job count and redeploy:
# Modify count in job file
count = 5

# Plan the changes
nomad job plan nginx.nomad

# Apply the changes
nomad job run nginx.nomad
Rolling Updates
Configure rolling updates in your job specification:
update {
  max_parallel = 2
  min_healthy_time = "10s"
  healthy_deadline = "3m"
  progress_deadline = "10m"
  auto_revert = true
  canary = 1
}
Monitoring and Troubleshooting
Checking Job Status
# View job details
nomad job status webserver

# Check allocation status
nomad alloc status allocation-id

# View logs
nomad alloc logs allocation-id
Sample Status Output:
ID            = webserver
Name          = webserver
Submit Date   = 2023-08-26T08:44:15Z
Type          = service
Priority      = 50
Datacenters   = dc1
Status        = running
Periodic      = false
Parameterized = false

Summary
Task Group  Queued  Starting  Running  Failed  Complete  Lost
web         0       0         2        0       0         0
Resource Monitoring
# Check node resource utilization
nomad node status -verbose node-id

# Monitor cluster resources
nomad node status -stats
Advanced Nomad Features
Constraints and Affinity
Use constraints to control job placement:
constraint {
  attribute = "${attr.kernel.name}"
  value = "linux"
}

constraint {
  attribute = "${meta.environment}"
  value = "production"
}

affinity {
  attribute = "${node.datacenter}"
  value = "dc1"
  weight = 100
}
Variables and Templates
Use Nomad variables for configuration management:
template {
  data = <<EOF
server {
  listen 80;
  server_name {{ env "NOMAD_META_domain" }};

  location / {
    proxy_pass http://{{ range service "backend" }}{{ .Address }}:{{ .Port }}{{ end }};
  }
}
EOF

  destination = "local/nginx.conf"
  change_mode = "restart"
}
Integration with HashiCorp Ecosystem
Consul Integration
Configure Nomad to use Consul for service discovery:
consul {
  address = "127.0.0.1:8500"
  server_service_name = "nomad"
  client_service_name = "nomad-client"
  auto_advertise = true
  server_auto_join = true
  client_auto_join = true
}
Vault Integration
Secure secrets management with Vault:
vault {
  enabled = true
  address = "http://vault.service.consul:8200"
  task_token_ttl = "1h"
  create_from_role = "nomad-cluster"
}
Security Best Practices
ACL Configuration
Enable Access Control Lists for security:
acl {
  enabled = true
  token_ttl = "30s"
  policy_ttl = "60s"
}
TLS Configuration
tls {
  http = true
  rpc = true

  ca_file = "/etc/nomad.d/ca.pem"
  cert_file = "/etc/nomad.d/server.pem"
  key_file = "/etc/nomad.d/server-key.pem"

  verify_server_hostname = true
  verify_https_client = true
}
Performance Optimization
Resource Limits
Configure appropriate resource limits:
resources {
  cpu = 500    # MHz
  memory = 512 # MB

  device "nvidia/gpu" {
    count = 1
  }
}

# Network bandwidth limits
network {
  mbits = 100
}
Node Configuration
Optimize client node settings:
client {
  enabled = true

  # Resource reservation
  reserved {
    cpu = 100
    memory = 256
    disk = 1024
  }

  # Node metadata
  meta {
    "environment" = "production"
    "zone" = "us-west-2a"
  }
}
Common Use Cases
Batch Processing Jobs
job "data-processor" {
  type = "batch"

  group "processor" {
    task "process" {
      driver = "exec"

      config {
        command = "/usr/local/bin/process-data"
        args = ["--input", "/data/input", "--output", "/data/output"]
      }

      resources {
        cpu = 1000
        memory = 2048
      }
    }
  }
}
Periodic Jobs (Cron-like)
job "backup" {
  type = "batch"

  periodic {
    cron = "0 2 * * *"
    prohibit_overlap = true
    time_zone = "UTC"
  }

  group "backup" {
    task "backup-task" {
      driver = "exec"

      config {
        command = "/usr/local/bin/backup.sh"
      }
    }
  }
}
Troubleshooting Common Issues
Job Scheduling Failures
Check evaluation reasons:
nomad eval status evaluation-id
nomad job plan job.nomad
Resource Allocation Issues
# Check available resources
nomad node status -stats

# View allocation failures
nomad alloc status -verbose allocation-id
Network Connectivity Issues
# Test port connectivity
nomad operator debug
nomad monitor -log-level=DEBUG
Conclusion
HashiCorp Nomad provides a powerful yet simple solution for workload orchestration on Linux systems. Its lightweight architecture, multi-workload support, and seamless integration with the HashiCorp ecosystem make it an excellent choice for organizations seeking an alternative to more complex orchestration platforms.
Whether you’re running containers, VMs, or standalone applications, Nomad’s flexible scheduling capabilities and robust feature set can help streamline your deployment processes while maintaining operational simplicity. Start with development mode, experiment with different job types, and gradually build towards a production-ready cluster that meets your specific requirements.
The combination of Nomad’s ease of use and powerful features makes it particularly well-suited for teams who want container orchestration without the complexity traditionally associated with such systems. As you continue exploring Nomad, consider integrating it with Consul for service discovery and Vault for secrets management to create a complete infrastructure automation solution.
Related Posts

Kubernetes Linux: Complete Guide to Container Orchestration Platform
Kubernetes has revolutionized how we deploy, manage, and scale containerized applications on Linux systems. As the leading container orchestration platform,...

Marathon Linux: Complete Guide to Container Orchestration Platform
Marathon is a powerful container orchestration platform built on top of Apache Mesos that enables you to deploy, manage, and...

OpenShift Linux: Complete Guide to Enterprise Kubernetes Platform Management
OpenShift represents Red Hat's enterprise-grade Kubernetes platform that revolutionizes how organizations deploy, manage, and scale containerized applications on Linux systems....
Cloud Operating System: Complete Guide to Virtualized Infrastructure Management
Cloud Operating Systems represent a paradigm shift in how we manage and orchestrate computing resources across distributed environments. Unlike traditional...
Vagrant Linux: Complete Guide to Development Environment Management
Vagrant revolutionizes development environment management by providing a consistent, reproducible way to create and manage virtual development environments. This comprehensive...

mesos Linux: Complete Guide to Distributed Systems Kernel and Cluster Management
Apache Mesos is a powerful distributed systems kernel that abstracts CPU, memory, storage, and other compute resources across machines, enabling...

SaltStack Linux: Complete Guide to Intelligent IT Automation and Configuration Management
SaltStack has revolutionized the way system administrators and DevOps engineers manage infrastructure at scale. As a powerful configuration management and...
Rancher Linux: Complete Container Management Platform for DevOps Teams
Rancher Linux revolutionizes container management by providing a comprehensive platform that simplifies Kubernetes orchestration, multi-cloud deployments, and enterprise-grade container operations....
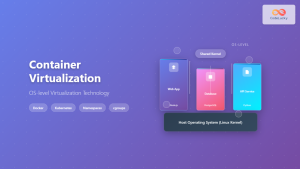
Container Virtualization: Complete Guide to OS-level Virtualization Technology
Container virtualization represents a revolutionary approach to application deployment and resource management through OS-level virtualization. Unlike traditional hardware virtualization, containers...
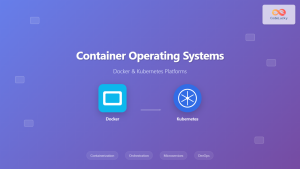
Container Operating Systems: Complete Guide to Docker and Kubernetes Platforms
Container operating systems have revolutionized how we deploy, manage, and scale applications in modern computing environments. Unlike traditional operating systems...

Katello Linux: Complete Guide to Enterprise Content and Configuration Management
Introduction to Katello Linux Katello is a powerful open-source content and configuration management platform that serves as the upstream project...

foreman Linux: Complete Lifecycle Management for Enterprise Infrastructure
Foreman is a powerful open-source lifecycle management tool that revolutionizes how system administrators handle infrastructure provisioning, configuration management, and monitoring....