Minikube has revolutionized local Kubernetes development by providing developers with a lightweight, single-node Kubernetes cluster that runs directly on their Linux machines. This comprehensive guide will take you through everything you need to know about setting up, configuring, and mastering minikube for your local development workflow.
What is Minikube?
Minikube is an open-source tool that enables you to run Kubernetes locally on your Linux system. It creates a single-node Kubernetes cluster inside a virtual machine, container, or bare-metal environment, making it perfect for learning Kubernetes, developing applications, and testing deployments without the complexity of a full production cluster.
Key Features of Minikube
- Lightweight Operation: Runs on minimal system resources
- Multiple Hypervisor Support: Works with VirtualBox, VMware, KVM, and Docker
- Add-on Ecosystem: Extensive collection of Kubernetes add-ons
- LoadBalancer Support: Built-in LoadBalancer implementation
- Persistent Volume Support: Local storage for stateful applications
System Requirements and Prerequisites
Before installing minikube on your Linux system, ensure you meet these requirements:
Hardware Requirements
- At least 2 GB RAM (4 GB recommended)
- 2 CPU cores minimum
- 20 GB free disk space
- Internet connection for downloading images
Software Prerequisites
- Linux distribution (Ubuntu, CentOS, Fedora, etc.)
- Container or virtual machine manager (Docker, VirtualBox, KVM)
- kubectl command-line tool
Installing Minikube on Linux
Method 1: Using Binary Download
The most straightforward way to install minikube is by downloading the binary directly:
# Download the latest minikube binary
curl -LO https://storage.googleapis.com/minikube/releases/latest/minikube-linux-amd64

# Make it executable
chmod +x minikube-linux-amd64

# Move to system PATH
sudo mv minikube-linux-amd64 /usr/local/bin/minikube

# Verify installation
minikube version
Expected Output:
minikube version: v1.32.0
commit: 8220a6eb95f0a4d75f7f2d7b14cef975f050512d
Method 2: Package Manager Installation
For Ubuntu/Debian systems:
# Update package index
sudo apt update

# Install minikube via snap
sudo snap install minikube
For RHEL/CentOS/Fedora systems:
# Install using RPM
curl -LO https://storage.googleapis.com/minikube/releases/latest/minikube-latest.x86_64.rpm
sudo rpm -Uvh minikube-latest.x86_64.rpm
Installing kubectl
kubectl is essential for interacting with your Kubernetes cluster:
# Download kubectl
curl -LO "https://dl.k8s.io/release/$(curl -L -s https://dl.k8s.io/release/stable.txt)/bin/linux/amd64/kubectl"

# Make executable and move to PATH
chmod +x kubectl
sudo mv kubectl /usr/local/bin/

# Verify installation
kubectl version --client
Starting Your First Minikube Cluster
Basic Cluster Startup
Start your first minikube cluster with default settings:
# Start minikube with default driver
minikube start
Expected Output:
😄  minikube v1.32.0 on Ubuntu 22.04
✨  Automatically selected the docker driver
👍  Starting control plane node minikube in cluster minikube
🚜  Pulling base image ...
🔥  Creating docker container (CPUs=2, Memory=2200MB) ...
🐳  Preparing Kubernetes v1.28.3 ...
    ▪ Generating certificates and keys ...
    ▪ Booting up control plane ...
    ▪ Configuring RBAC rules ...
🔗  Configuring bridge CNI (Container Networked Interface) ...
    ▪ Using image gcr.io/k8s-minikube/storage-provisioner:v5
🔎  Verifying Kubernetes components...
🌟  Enabled addons: default-storageclass, storage-provisioner
🏄  Done! kubectl is now configured to use "minikube" cluster and "default" namespace by default
Specifying Driver and Resources
Customize your cluster with specific drivers and resource allocation:
# Start with Docker driver and custom resources
minikube start --driver=docker --cpus=4 --memory=4096 --disk-size=30g

# Start with VirtualBox driver
minikube start --driver=virtualbox --cpus=2 --memory=3072

# Start with KVM2 driver
minikube start --driver=kvm2 --cpus=3 --memory=4096
Essential Minikube Commands
Cluster Management Commands
# Check cluster status
minikube status

# Stop the cluster
minikube stop

# Delete the cluster
minikube delete

# Pause the cluster
minikube pause

# Unpause the cluster
minikube unpause

# Get cluster information
minikube profile list
Status Command Output:
minikube
type: Control Plane
host: Running
kubelet: Running
apiserver: Running
kubeconfig: Configured
Node and Resource Commands
# SSH into minikube node
minikube ssh

# Get minikube IP address
minikube ip

# Check available memory and CPU
minikube ssh -- free -h
minikube ssh -- lscpu
Docker Environment Commands
# Configure shell to use minikube's Docker daemon
eval $(minikube docker-env)

# Build image directly in minikube
docker build -t my-app:latest .

# List images in minikube
docker images

# Reset to host Docker daemon
eval $(minikube docker-env --unset)
Working with Kubernetes Resources
Deploying Your First Application
Let’s deploy a simple nginx application to demonstrate minikube functionality:
# Create a deployment
kubectl create deployment nginx-demo --image=nginx:latest

# Verify deployment
kubectl get deployments
Expected Output:
NAME         READY   UP-TO-DATE   AVAILABLE   AGE
nginx-demo   1/1     1            1           30s
# Check pods
kubectl get podsExpected Output:
NAME                          READY   STATUS    RESTARTS   AGE
nginx-demo-7c79c4bf97-x8p2q   1/1     Running   0          45s
Exposing Services
# Expose deployment as a service
kubectl expose deployment nginx-demo --type=NodePort --port=80

# Get service details
kubectl get services
Service Output:
NAME         TYPE        CLUSTER-IP     EXTERNAL-IP   PORT(S)        AGE
kubernetes   ClusterIP   10.96.0.1      <none>        443/TCP        5m
nginx-demo   NodePort    10.96.75.203   <none>        80:32645/TCP   15s
# Access the service using minikube
minikube service nginx-demo --urlURL Output:
http://192.168.49.2:32645Minikube Add-ons
Managing Add-ons
Minikube provides numerous add-ons to extend cluster functionality:
# List all available add-ons
minikube addons list
Add-ons List Output:
|-----------------------------|----------|--------------|--------------------------------|
|         ADDON NAME          | PROFILE  |    STATUS    |           MAINTAINER           |
|-----------------------------|----------|--------------|--------------------------------|
| ambassador                  | minikube | disabled     | 3rd party (Ambassador)        |
| auto-pause                  | minikube | disabled     | Google                         |
| cloud-spanner               | minikube | disabled     | Google                         |
| csi-hostpath-driver         | minikube | disabled     | Kubernetes                     |
| dashboard                   | minikube | disabled     | Kubernetes                     |
| default-storageclass        | minikube | enabled ✅   | Kubernetes                     |
| efk                         | minikube | disabled     | 3rd party (Elastic)           |
| freshpod                    | minikube | disabled     | Google                         |
| gcp-auth                    | minikube | disabled     | Google                         |
| gvisor                      | minikube | disabled     | Google                         |
| headlamp                    | minikube | disabled     | 3rd party (kinvolk.io)        |
| helm-tiller                 | minikube | disabled     | 3rd party (Helm)              |
| inaccel                     | minikube | disabled     | 3rd party (InAccel)           |
| ingress                     | minikube | disabled     | Kubernetes                     |
| ingress-dns                 | minikube | disabled     | Google                         |
| istio                       | minikube | disabled     | 3rd party (Istio)             |
| istio-provisioner           | minikube | disabled     | 3rd party (Istio)             |
| kong                        | minikube | disabled     | 3rd party (Kong HQ)           |
| kubevirt                    | minikube | disabled     | 3rd party (KubeVirt)          |
| logviewer                   | minikube | disabled     | 3rd party (unknown)           |
| metallb                     | minikube | disabled     | 3rd party (MetalLB)           |
| metrics-server              | minikube | disabled     | Kubernetes                     |
| nvidia-driver-installer     | minikube | disabled     | Google                         |
| nvidia-gpu-device-plugin    | minikube | disabled     | 3rd party (Nvidia)            |
| olm                         | minikube | disabled     | 3rd party (Operator Framework)|
| pod-security-policy         | minikube | disabled     | 3rd party (unknown)           |
| portainer                   | minikube | disabled     | 3rd party (Portainer.io)      |
| registry                    | minikube | disabled     | Google                         |
| registry-aliases            | minikube | disabled     | 3rd party (unknown)           |
| registry-creds              | minikube | disabled     | 3rd party (UPMC Enterprises)  |
| storage-provisioner         | minikube | enabled ✅   | Google                         |
| storage-provisioner-gluster | minikube | disabled     | 3rd party (Gluster)           |
| volumesnapshots             | minikube | disabled     | Kubernetes                     |
|-----------------------------|----------|--------------|--------------------------------|
Essential Add-ons Setup
# Enable Kubernetes Dashboard
minikube addons enable dashboard

# Enable Ingress controller
minikube addons enable ingress

# Enable Metrics Server
minikube addons enable metrics-server

# Enable Registry
minikube addons enable registry
Accessing the Kubernetes Dashboard
# Start dashboard proxy
minikube dashboard
This command will automatically open your default browser with the Kubernetes Dashboard interface.
Advanced Minikube Configurations
Multi-node Clusters
Create multi-node clusters for testing distributed applications:
# Start multi-node cluster
minikube start --nodes 3 --cpus=2 --memory=2048

# Check nodes
kubectl get nodes
Multi-node Output:
NAME           STATUS   ROLES           AGE   VERSION
minikube       Ready    control-plane   2m    v1.28.3
minikube-m02   Ready    <none>          90s   v1.28.3
minikube-m03   Ready    <none>          60s   v1.28.3
Custom Kubernetes Versions
# Start with specific Kubernetes version
minikube start --kubernetes-version=v1.27.8

# Start with latest Kubernetes version
minikube start --kubernetes-version=latest
Persistent Storage Configuration
Configure persistent volumes for stateful applications:
# Create a persistent volume claim
cat << EOF | kubectl apply -f -
apiVersion: v1
kind: PersistentVolumeClaim
metadata:
  name: my-pvc
spec:
  accessModes:
    - ReadWriteOnce
  resources:
    requests:
      storage: 1Gi
EOF

# Check PVC status
kubectl get pvc
Networking in Minikube
Service Types and Access Methods
# ClusterIP service (default)
kubectl expose deployment nginx-demo --port=80 --type=ClusterIP

# NodePort service
kubectl expose deployment nginx-demo --port=80 --type=NodePort

# LoadBalancer service
kubectl expose deployment nginx-demo --port=80 --type=LoadBalancer

# Access LoadBalancer service
minikube tunnel
Ingress Configuration
Set up ingress for advanced routing:
# Enable ingress add-on
minikube addons enable ingress

# Create ingress resource
cat << EOF | kubectl apply -f -
apiVersion: networking.k8s.io/v1
kind: Ingress
metadata:
  name: nginx-ingress
  annotations:
    nginx.ingress.kubernetes.io/rewrite-target: /
spec:
  ingressClassName: nginx
  rules:
  - host: nginx.local
    http:
      paths:
      - path: /
        pathType: Prefix
        backend:
          service:
            name: nginx-demo
            port:
              number: 80
EOF

# Get ingress IP
minikube ip
Monitoring and Logging
Resource Monitoring
# Enable metrics server
minikube addons enable metrics-server

# View node metrics
kubectl top nodes

# View pod metrics
kubectl top pods
Log Management
# View pod logs
kubectl logs deployment/nginx-demo

# Follow logs in real-time
kubectl logs -f deployment/nginx-demo

# View logs from minikube system
minikube logs
Troubleshooting Common Issues
Driver-Related Issues
Problem: Docker driver fails to start
# Check Docker status
sudo systemctl status docker

# Start Docker if not running
sudo systemctl start docker

# Add user to docker group
sudo usermod -aG docker $USER

# Restart minikube with clean state
minikube delete
minikube start --driver=docker
Resource Constraints
Problem: Pods stuck in Pending state
# Check node resources
kubectl describe nodes

# Increase cluster resources
minikube stop
minikube start --cpus=4 --memory=4096
Network Connectivity Issues
Problem: Services not accessible
# Check service endpoints
kubectl get endpoints

# Verify pod network connectivity
kubectl exec -it pod-name -- nslookup kubernetes

# Reset cluster networking
minikube delete
minikube start
Image Pull Issues
Problem: ImagePullBackOff errors
# Check image availability
minikube ssh
docker pull image-name:tag

# Configure registry mirrors
minikube start --insecure-registry="registry.local:5000"
Performance Optimization
Resource Allocation
# Optimize for development workload
minikube start --cpus=4 --memory=8192 --disk-size=50g

# Enable CPU and memory limits
minikube config set cpus 4
minikube config set memory 8192
Caching and Storage
# Use local docker registry
minikube addons enable registry

# Configure image caching
eval $(minikube docker-env)
docker pull nginx:latest
docker pull redis:latest
Best Practices for Development
Development Workflow
- Use resource limits: Always define CPU and memory limits for containers
- Implement health checks: Add readiness and liveness probes
- Version your images: Avoid using latest tags in production-like testing
- Use namespaces: Organize resources using Kubernetes namespaces
Configuration Management
# Create development namespace
kubectl create namespace development

# Use namespace for deployments
kubectl apply -f deployment.yaml -n development

# Set default namespace context
kubectl config set-context --current --namespace=development
Integration with CI/CD
Automated Testing Setup
# Create test script for CI/CD
cat << 'EOF' > test-minikube.sh
#!/bin/bash
set -e

# Start minikube
minikube start --wait=false
minikube status

# Deploy application
kubectl apply -f k8s/

# Wait for deployment
kubectl wait --for=condition=available --timeout=300s deployment/my-app

# Run tests
kubectl exec deployment/my-app -- ./run-tests.sh

# Cleanup
minikube delete
EOF

chmod +x test-minikube.sh
Security Considerations
RBAC Configuration
# Create service account
kubectl create serviceaccount dev-user

# Create role binding
kubectl create rolebinding dev-user-binding --clusterrole=edit --serviceaccount=default:dev-user

# Get service account token
kubectl describe secret $(kubectl get secrets | grep dev-user | cut -f1 -d ' ')
Network Policies
# Enable network policy support
minikube start --cni=calico

# Create network policy
cat << EOF | kubectl apply -f -
apiVersion: networking.k8s.io/v1
kind: NetworkPolicy
metadata:
  name: deny-all
spec:
  podSelector: {}
  policyTypes:
  - Ingress
  - Egress
EOF
Conclusion
Minikube provides an excellent platform for local Kubernetes development on Linux systems. From basic cluster operations to advanced multi-node configurations, this guide has covered the essential aspects of working with minikube. By following the practices and examples outlined here, you’ll be able to create robust local development environments that closely mirror production Kubernetes clusters.
Remember to regularly update minikube and kubectl to access the latest features and security improvements. As you become more comfortable with minikube, explore additional add-ons and integrations that can enhance your development workflow and bring you closer to production-ready Kubernetes deployments.
Whether you’re learning Kubernetes fundamentals, developing cloud-native applications, or testing deployment strategies, minikube serves as an invaluable tool in your development arsenal. Start with the basic commands and gradually implement more advanced features as your projects grow in complexity.
Related Posts

Kubernetes Linux: Complete Guide to Container Orchestration Platform
Kubernetes has revolutionized how we deploy, manage, and scale containerized applications on Linux systems. As the leading container orchestration platform,...

kind Linux: Complete Guide to Running Kubernetes in Docker Containers
What is kind (Kubernetes in Docker)? kind (Kubernetes in Docker) is a powerful tool designed for running local Kubernetes clusters...

OpenShift Linux: Complete Guide to Enterprise Kubernetes Platform Management
OpenShift represents Red Hat's enterprise-grade Kubernetes platform that revolutionizes how organizations deploy, manage, and scale containerized applications on Linux systems....

kubectl Command Linux: Kubernetes Management Made Simple
The kubectl command is the primary command-line interface for interacting with Kubernetes clusters. This powerful tool allows administrators and developers...
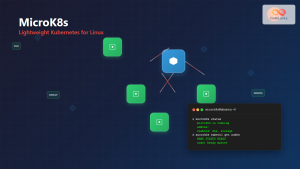
MicroK8s Linux: Complete Guide to Canonical’s Lightweight Kubernetes Distribution
MicroK8s is Canonical's lightweight, single-package Kubernetes distribution designed for developers, IoT, and edge computing environments. Unlike traditional Kubernetes installations that...

k3s Linux: Complete Guide to Lightweight Kubernetes for Edge Computing
k3s is a highly available, certified Kubernetes distribution designed for production workloads in unattended, resource-constrained, remote locations or inside IoT...
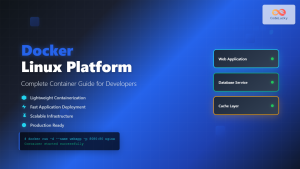
docker Linux: Complete Container Platform Guide for Developers
Docker has revolutionized software development and deployment by introducing lightweight containerization technology. As a platform that enables developers to package...
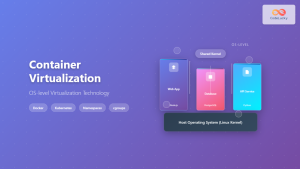
Container Virtualization: Complete Guide to OS-level Virtualization Technology
Container virtualization represents a revolutionary approach to application deployment and resource management through OS-level virtualization. Unlike traditional hardware virtualization, containers...
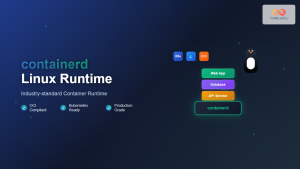
containerd Linux: Complete Guide to Industry-Standard Container Runtime
Containerd has emerged as the industry-standard container runtime, serving as the foundation for modern containerization platforms like Docker and Kubernetes....
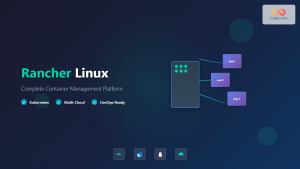
Rancher Linux: Complete Container Management Platform for DevOps Teams
Rancher Linux revolutionizes container management by providing a comprehensive platform that simplifies Kubernetes orchestration, multi-cloud deployments, and enterprise-grade container operations....
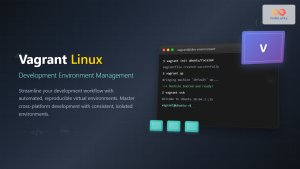
Vagrant Linux: Complete Guide to Development Environment Management
Vagrant revolutionizes development environment management by providing a consistent, reproducible way to create and manage virtual development environments. This comprehensive...

nomad Linux: Complete Guide to HashiCorp’s Workload Orchestrator
What is HashiCorp Nomad? HashiCorp Nomad is a simple yet powerful workload orchestrator that enables organizations to deploy and manage...