
JavaScript Window pageYOffset Property: Understanding Vertical Scroll Position
The pageYOffset property of the JavaScript window object provides the number of pixels that the document has been scrolled vertically from the upper-left corner of the window. It is a read-only property and is particularly useful for implementing features that depend on the user’s scroll position, such as lazy loading, parallax effects, and dynamic header behaviors.
Definition and Purpose
The window.pageYOffset property returns the number of pixels the current document has been scrolled vertically. It is a modern alternative to document.documentElement.scrollTop or document.body.scrollTop, which can have inconsistencies across different browsers and doctypes.
The main purposes of pageYOffset are:
- Determine Scroll Position: Get the current vertical scroll position of the document.
- Implement Scroll-Based Effects: Trigger actions or animations when the user scrolls to a specific point on the page.
- Enhance User Experience: Provide dynamic and responsive behaviors based on scroll position.
Syntax
The syntax for accessing the pageYOffset property is straightforward:
let verticalOffset = window.pageYOffset;
Return Value
- Number: An integer representing the number of pixels the document has been scrolled vertically. If the document is not scrolled vertically, the value is
0.
Examples
Let’s explore some practical examples of how to use the window.pageYOffset property.
Basic Usage: Displaying Scroll Position
This example demonstrates how to display the current vertical scroll position in real-time.
<!DOCTYPE html>
<html>
<head>
    <title>pageYOffset Example</title>
    <style>
        body {
            height: 2000px; /* Create a long page to enable scrolling */
        }
        #scrollDisplay {
            position: fixed;
            top: 10px;
            left: 10px;
            background-color: white;
            padding: 5px;
            border: 1px solid black;
        }
    </style>
</head>
<body>

<div id="scrollDisplay">Scroll Position: 0</div>

<script>
    const scrollDisplayElem_1 = document.getElementById('scrollDisplay');

    function updateScrollPosition_1() {
        const scrollY_1 = window.pageYOffset;
        scrollDisplayElem_1.textContent = 'Scroll Position: ' + scrollY_1;
    }

    window.addEventListener('scroll', updateScrollPosition_1);
</script>

</body>
</html>
In this example, a div element with the id scrollDisplay is used to show the current vertical scroll position. The updateScrollPosition_1 function is called every time the window is scrolled, updating the content of the div with the latest pageYOffset value.
Implementing a “Back to Top” Button
This example shows how to display a “Back to Top” button when the user scrolls down and hide it when at the top of the page.
<!DOCTYPE html>
<html>
<head>
    <title>Back to Top Example</title>
    <style>
        body {
            height: 2000px; /* Create a long page to enable scrolling */
        }
        #backToTopBtn {
            position: fixed;
            bottom: 20px;
            right: 20px;
            display: none; /* Hidden by default */
            padding: 10px;
            background-color: #007bff;
            color: white;
            border: none;
            cursor: pointer;
        }
    </style>
</head>
<body>

<button id="backToTopBtn">Back to Top</button>

<script>
    const backToTopBtnElem_2 = document.getElementById('backToTopBtn');

    function toggleBackToTopButton_2() {
        if (window.pageYOffset > 300) {
            backToTopBtnElem_2.style.display = 'block';
        } else {
            backToTopBtnElem_2.style.display = 'none';
        }
    }

    backToTopBtnElem_2.addEventListener('click', function() {
        window.scrollTo({
            top: 0,
            behavior: 'smooth'
        });
    });

    window.addEventListener('scroll', toggleBackToTopButton_2);
</script>

</body>
</html>
Here, a button with the id backToTopBtn is initially hidden. The toggleBackToTopButton_2 function checks the pageYOffset value and shows or hides the button accordingly. When the button is clicked, the window.scrollTo method smoothly scrolls the page back to the top.
Lazy Loading Images
This example demonstrates how to implement lazy loading for images, loading them only when they are about to come into the viewport.
<!DOCTYPE html>
<html>
<head>
    <title>Lazy Loading Example</title>
    <style>
        body {
            height: 2000px; /* Create a long page to enable scrolling */
        }
        .lazy-load {
            display: block;
            width: 200px;
            height: 150px;
            margin-bottom: 20px;
            background-color: #eee;
            text-align: center;
            line-height: 150px;
            font-size: 16px;
        }
    </style>
</head>
<body>

<img class="lazy-load" data-src="https://via.placeholder.com/200x150?text=Image+1" alt="Image 1">
<img class="lazy-load" data-src="https://via.placeholder.com/200x150?text=Image+2" alt="Image 2">
<img class="lazy-load" data-src="https://via.placeholder.com/200x150?text=Image+3" alt="Image 3">
<img class="lazy-load" data-src="https://via.placeholder.com/200x150?text=Image+4" alt="Image 4">

<script>
    const lazyImages_3 = document.querySelectorAll('.lazy-load');

    function lazyLoadImages_3() {
        lazyImages_3.forEach(img => {
            if (img.offsetTop < window.pageYOffset + window.innerHeight) {
                img.src = img.dataset.src;
                img.classList.remove('lazy-load');
            }
        });
    }

    window.addEventListener('scroll', lazyLoadImages_3);
    lazyLoadImages_3(); // Initial check in case some images are already in the viewport
</script>

</body>
</html>
In this example, images with the class lazy-load have their src attribute replaced with the value in data-src when they are close to the viewport. The lazyLoadImages_3 function checks if the image’s top offset is within the viewport’s scroll position plus its height.
Creating a Parallax Scrolling Effect
This example demonstrates how to create a simple parallax scrolling effect, where different elements move at different speeds when the user scrolls.
<!DOCTYPE html>
<html>
<head>
    <title>Parallax Effect Example</title>
    <style>
        body {
            height: 2000px; /* Create a long page to enable scrolling */
            margin: 0;
            overflow-x: hidden; /* Prevent horizontal scroll */
        }
        #parallaxBg {
            position: fixed;
            top: 0;
            left: 0;
            width: 100%;
            height: 100%;
            background: url('https://via.placeholder.com/1920x1080?text=Parallax+Background') no-repeat center center fixed;
            background-size: cover;
            z-index: -1;
            transform: translateZ(-1px);
            will-change: transform;
        }
        #content {
            padding: 50px;
            font-size: 20px;
            background-color: rgba(255, 255, 255, 0.8);
        }
    </style>
</head>
<body>

<div id="parallaxBg"></div>
<div id="content">
    <h1>Parallax Scrolling Effect</h1>
    <p>Scroll down to see the effect.</p>
    <!-- Add more content here -->
</div>

<script>
    const parallaxBgElem_4 = document.getElementById('parallaxBg');

    function parallaxScroll_4() {
        const scrollY_4 = window.pageYOffset;
        parallaxBgElem_4.style.transform = `translate3d(0, ${scrollY_4 * 0.5}px, -1px)`;
    }

    window.addEventListener('scroll', parallaxScroll_4);
</script>

</body>
</html>
In this example, the parallaxBg element is moved vertically based on the scroll position, creating a parallax effect. The translate3d function is used for hardware acceleration, ensuring smooth performance.
Tips and Best Practices
- Performance: Be mindful of the performance implications of using
pageYOffsetin scroll event listeners. Debounce or throttle the event handler to avoid excessive calculations. - Cross-Browser Compatibility: While
pageYOffsetis widely supported, consider using a polyfill or fallback for older browsers if necessary. - Accessibility: Ensure that scroll-based effects do not negatively impact accessibility. Provide alternative ways to access content for users who cannot scroll.
- Modern Alternatives: Consider using the Intersection Observer API for more advanced scroll-based behaviors, such as lazy loading and infinite scrolling, as it provides better performance and more precise control.
Browser Support
The pageYOffset property is supported by all modern browsers, including:
- Chrome
- Firefox
- Safari
- Edge
- Opera
Conclusion
The window.pageYOffset property is a valuable tool for web developers to create dynamic and responsive web experiences based on the user’s scroll position. By understanding how to use this property effectively, you can implement a wide range of features, from simple “Back to Top” buttons to complex parallax scrolling effects.
Related Posts
JavaScript Window scrollY Property: Window Scroll Y
Understanding the JavaScript Window scrollY Property The JavaScript window.scrollY property is a read-only property that returns the number of pixels...

JavaScript Window scrollX Property: Window Scroll X
JavaScript Window scrollX Property: A Comprehensive Guide The scrollX property of the JavaScript window object is a read-only property that...
JavaScript Window scrollTo() Method: Scrolling Window to Position
JavaScript Window scrollTo() Method: Precisely Scroll the Window to Any Position The window.scrollTo() method in JavaScript provides a way to...
JavaScript Window scrollBy() Method: Scrolling Window
JavaScript Window scrollBy() Method: Scrolling the Window The window.scrollBy() method in JavaScript is used to scroll the content of a...
HTML Element scrollTop Property: Element Scroll Top
HTML Element scrollTop Property: Mastering Element Scroll Top The scrollTop property in HTML DOM represents the distance between the top...
JavaScript Window outerHeight Property: Window Outer Height
JavaScript Window outerHeight Property: A Comprehensive Guide The JavaScript window.outerHeight property returns the height of the entire browser window, including...
HTML Element scrollLeft Property: Element Scroll Left
HTML Element scrollLeft Property: Controlling Horizontal Scroll The scrollLeft property of an HTML element is a read-write property that specifies...
JavaScript Window innerHeight Property: Window Inner Height
JavaScript Window innerHeight Property: Window Inner Height The window.innerHeight property in JavaScript returns the interior height of the browser window's...
HTML Element scrollHeight Property: Element Scroll Height
HTML Element scrollHeight Property: Understanding Element Scroll Height The scrollHeight property is a read-only property of an HTML element that...
HTML Element clientHeight Property: Element Height
HTML Element clientHeight Property: Understanding Element Height The clientHeight property is a read-only property of an HTML element in the...
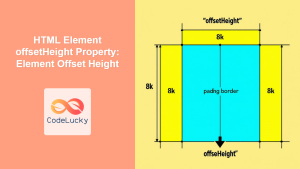
HTML Element offsetHeight Property: Element Offset Height
HTML Element offsetHeight Property: Understanding Element Height The offsetHeight property is a read-only property in JavaScript that provides the height...
JavaScript Window screenX Property: Window Screen X
JavaScript Window screenX Property: Understanding Window Screen X The screenX property of the JavaScript window object returns the horizontal distance...


