
JavaScript popup alerts are a powerful tool for creating interactive and informative user experiences on web pages. These dialog boxes and notifications can be used to display important messages, gather user input, or confirm actions. In this comprehensive guide, we'll explore various types of JavaScript popups, their implementations, and best practices for using them effectively.
Understanding JavaScript Popup Alerts
JavaScript popup alerts are built-in browser functions that allow developers to display messages or gather information from users. These popups temporarily interrupt the user's interaction with the page, ensuring that important information is conveyed or necessary actions are taken.
🔑 Key Point: Popup alerts are synchronous, meaning they pause the execution of JavaScript until the user responds.
Let's dive into the different types of JavaScript popup alerts and how to implement them.
The Alert() Function
The alert() function is the simplest form of JavaScript popup. It displays a message to the user with an "OK" button to dismiss the dialog.
Here's a basic example:
alert("Welcome to our website!");
When this code is executed, a popup will appear with the message "Welcome to our website!" and an "OK" button.
Let's look at a more practical example:
function checkAge(age) {
    if (age < 18) {
        alert("Sorry, you must be 18 or older to access this content.");
        return false;
    }
    return true;
}

let userAge = 16;
if (!checkAge(userAge)) {
    alert("Access denied. Please try again when you're older.");
}
In this example, we use the alert() function to inform underage users that they can't access certain content. The first alert is triggered if the age is less than 18, and a second alert provides additional information if access is denied.
🚀 Pro Tip: While alert() is useful for quick debugging or simple notifications, it's generally not recommended for production websites due to its intrusive nature and lack of styling options.
The Confirm() Function
The confirm() function displays a dialog box with a message and two buttons: "OK" and "Cancel". It returns a boolean value: true if the user clicks "OK", and false if they click "Cancel".
Here's a basic example:
let result = confirm("Are you sure you want to delete this item?");
if (result) {
    console.log("Item deleted");
} else {
    console.log("Deletion cancelled");
}
This code presents the user with a confirmation dialog. The action taken depends on the user's choice.
Let's explore a more complex example:
function saveChanges(changes) {
    let confirmSave = confirm("You have unsaved changes. Do you want to save them?");
    if (confirmSave) {
        // Simulating an API call to save changes
        setTimeout(() => {
            alert("Changes saved successfully!");
        }, 1000);
        return true;
    } else {
        let confirmDiscard = confirm("Are you sure you want to discard your changes?");
        if (confirmDiscard) {
            alert("Changes discarded.");
            return false;
        } else {
            return saveChanges(changes); // Recursive call if user cancels discarding
        }
    }
}

let userChanges = { title: "New Title", content: "Updated content" };
saveChanges(userChanges);
In this example, we use multiple confirm() dialogs to guide the user through the process of saving or discarding changes. The function even includes a recursive call if the user is unsure about their decision.
💡 Insight: The confirm() function is particularly useful for getting user confirmation before performing irreversible actions, such as deleting data or navigating away from a page with unsaved changes.
The Prompt() Function
The prompt() function displays a dialog box that prompts the user for input. It takes two parameters: the message to display, and an optional default value for the input field.
Here's a simple example:
let name = prompt("Please enter your name:", "John Doe");
if (name != null && name != "") {
    alert("Hello, " + name + "! Welcome to our website.");
}
This code prompts the user to enter their name, with "John Doe" as the default value. If the user enters a name (i.e., doesn't click "Cancel" or leave it empty), they're greeted with a personalized message.
Let's look at a more advanced use case:
function createCustomAlert(message, defaultValue = "") {
    let userInput = prompt(message, defaultValue);
    if (userInput === null) {
        return null; // User clicked Cancel
    } else if (userInput.trim() === "") {
        return createCustomAlert("Please enter a valid input:", defaultValue); // Recursive call for empty input
    } else {
        return userInput.trim();
    }
}

function processOrder() {
    let pizzaSize = createCustomAlert("What size pizza would you like? (Small/Medium/Large)", "Medium");
    if (pizzaSize === null) {
        alert("Order cancelled.");
        return;
    }

    let toppings = createCustomAlert("Enter your desired toppings (comma-separated):", "Cheese, Tomato");
    if (toppings === null) {
        alert("Order cancelled.");
        return;
    }

    let deliveryAddress = createCustomAlert("Enter your delivery address:");
    if (deliveryAddress === null) {
        alert("Order cancelled.");
        return;
    }

    alert(`Order confirmed!\nSize: ${pizzaSize}\nToppings: ${toppings}\nDelivery Address: ${deliveryAddress}`);
}

processOrder();
In this example, we've created a custom function createCustomAlert() that builds upon the basic prompt() functionality. It includes input validation and allows for recursive prompts if the user enters invalid data. We then use this function to create a simple pizza ordering system.
🔍 Deep Dive: The createCustomAlert() function demonstrates how we can enhance built-in JavaScript functions to create more robust and user-friendly interactions.
Custom Popup Alerts with HTML and CSS
While the built-in JavaScript popup functions are useful, they have limitations in terms of styling and functionality. For more control over the appearance and behavior of popups, we can create custom popup alerts using HTML, CSS, and JavaScript.
Here's an example of a custom popup alert:
<!DOCTYPE html>
<html lang="en">
<head>
    <meta charset="UTF-8">
    <meta name="viewport" content="width=device-width, initial-scale=1.0">
    <title>Custom Popup Alert</title>
    <style>
        .popup {
            display: none;
            position: fixed;
            top: 50%;
            left: 50%;
            transform: translate(-50%, -50%);
            background-color: #f9f9f9;
            padding: 20px;
            border-radius: 5px;
            box-shadow: 0 2px 10px rgba(0, 0, 0, 0.2);
            z-index: 1000;
        }
        .popup-content {
            text-align: center;
        }
        .popup-buttons {
            margin-top: 15px;
        }
        .popup-buttons button {
            margin: 0 5px;
            padding: 5px 10px;
        }
        .overlay {
            display: none;
            position: fixed;
            top: 0;
            left: 0;
            width: 100%;
            height: 100%;
            background-color: rgba(0, 0, 0, 0.5);
            z-index: 999;
        }
    </style>
</head>
<body>
    <button onclick="showPopup()">Show Custom Popup</button>

    <div id="overlay" class="overlay"></div>
    <div id="popup" class="popup">
        <div class="popup-content">
            <h2>Custom Popup Alert</h2>
            <p>This is a custom popup alert created with HTML, CSS, and JavaScript.</p>
            <div class="popup-buttons">
                <button onclick="closePopup()">Close</button>
                <button onclick="performAction()">Perform Action</button>
            </div>
        </div>
    </div>

    <script>
        function showPopup() {
            document.getElementById('overlay').style.display = 'block';
            document.getElementById('popup').style.display = 'block';
        }

        function closePopup() {
            document.getElementById('overlay').style.display = 'none';
            document.getElementById('popup').style.display = 'none';
        }

        function performAction() {
            alert('Action performed!');
            closePopup();
        }
    </script>
</body>
</html>
This example creates a custom popup alert with a semi-transparent overlay. The popup includes a title, message, and two buttons. The JavaScript functions showPopup(), closePopup(), and performAction() control the behavior of the popup.
🎨 Design Tip: Custom popups allow for much greater flexibility in design. You can match the popup's style to your website's theme, include images or icons, and even add animations for a more engaging user experience.
Best Practices for Using JavaScript Popup Alerts
While popup alerts can be useful, they should be used judiciously to avoid annoying users or disrupting their experience. Here are some best practices to keep in mind:
-
Use sparingly: Only use popups for important information or actions that require immediate attention.
-
Provide context: Ensure that the popup message clearly explains why it's appearing and what action (if any) the user needs to take.
-
Offer alternatives: For non-critical notifications, consider using less intrusive methods like toast notifications or inline messages.
-
Make them dismissible: Always provide a clear way for users to dismiss the popup, either by clicking a close button or clicking outside the popup area.
-
Ensure accessibility: Make sure your custom popups are accessible to users relying on screen readers or keyboard navigation.
-
Test on multiple devices: Ensure your popups work well and look good on various screen sizes and devices.
-
Consider user preferences: If possible, allow users to set preferences for how and when they receive popup notifications.
Here's an example implementing some of these best practices:
class PopupManager {
    constructor() {
        this.popupCount = 0;
        this.maxPopups = 3;
        this.popupQueue = [];
    }

    showPopup(message, type = 'info') {
        if (this.popupCount >= this.maxPopups) {
            this.popupQueue.push({ message, type });
            return;
        }

        const popup = document.createElement('div');
        popup.className = `popup popup-${type}`;
        popup.innerHTML = `
            <div class="popup-content">
                <p>${message}</p>
                <button onclick="popupManager.closePopup(this.parentNode.parentNode)">Close</button>
            </div>
        `;

        document.body.appendChild(popup);
        this.popupCount++;

        // Automatically close the popup after 5 seconds
        setTimeout(() => this.closePopup(popup), 5000);
    }

    closePopup(popup) {
        popup.remove();
        this.popupCount--;

        if (this.popupQueue.length > 0 && this.popupCount < this.maxPopups) {
            const nextPopup = this.popupQueue.shift();
            this.showPopup(nextPopup.message, nextPopup.type);
        }
    }
}

const popupManager = new PopupManager();

// Usage
popupManager.showPopup("Welcome to our website!", "info");
popupManager.showPopup("Your session will expire in 5 minutes.", "warning");
popupManager.showPopup("Error: Unable to save changes. Please try again.", "error");
popupManager.showPopup("This popup will be queued until others are closed.");
This PopupManager class implements several best practices:
- It limits the number of popups shown simultaneously to avoid overwhelming the user.
- It queues additional popups when the maximum is reached.
- Popups automatically close after a set time, but can also be closed manually.
- Different types of popups (info, warning, error) can be created for visual distinction.
🏆 Best Practice: By implementing a popup management system, you can ensure a better user experience by controlling the flow and presentation of popup alerts.
Conclusion
JavaScript popup alerts are a versatile tool for creating interactive and informative web experiences. From simple built-in functions like alert(), confirm(), and prompt() to custom-designed popups, these dialog boxes and notifications play a crucial role in user interaction and information display.
By following best practices and considering user experience, you can effectively use popup alerts to enhance your web applications without overwhelming or frustrating your users. Remember, the key is to use them judiciously and always provide clear, contextual information.
As you continue to develop your JavaScript skills, experiment with different types of popups and notification systems to find the best fit for your projects. With the right approach, popup alerts can significantly improve the usability and interactivity of your web applications.
Related Posts
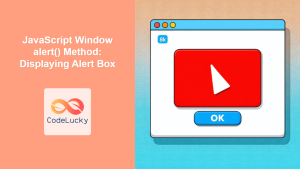
JavaScript Window alert() Method: Displaying Alert Box
JavaScript window.alert() Method: Displaying Alert Box The window.alert() method in JavaScript is a fundamental function used to display a simple...
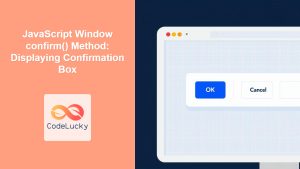
JavaScript Window confirm() Method: Displaying Confirmation Box
JavaScript Window confirm() Method: Displaying Confirmation Box The JavaScript window.confirm() method is a fundamental tool for creating interactive web experiences....

JavaScript DOM Events: Handling User and Browser Events
JavaScript's ability to interact with the Document Object Model (DOM) is one of its most powerful features. This interaction is...

JavaScript Events: Handling User Interactions and Browser Actions
JavaScript events are the backbone of interactive web applications, allowing developers to create dynamic and responsive user interfaces. In this...

JavaScript HTML Events Examples: Handling Various Browser Events
JavaScript's ability to interact with HTML events is a cornerstone of dynamic web development. By leveraging event handlers, developers can...
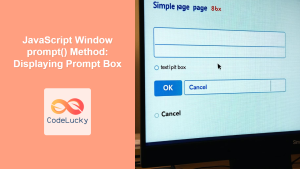
JavaScript Window prompt() Method: Displaying Prompt Box
JavaScript Window prompt() Method: Displaying Prompt Boxes for User Input The window.prompt() method in JavaScript is used to display a...

HTML DOM Dialog Object: Accessing Dialog Elements
HTML DOM Dialog Object: A Comprehensive Guide to Accessing Dialog Elements The HTML DOM Dialog object represents the <dialog> element...
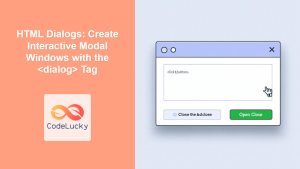
HTML Dialogs: Create Interactive Modal Windows with the <dialog> Tag
HTML <dialog> Tag The <dialog> tag in HTML is used to create interactive dialog boxes or modal windows. These dialogs...

JavaScript Language Overview: Summarizing Key Features and Concepts
JavaScript, often abbreviated as JS, is a versatile and powerful programming language that has become an integral part of web...

JavaScript DOM Event Listener: Advanced Event Handling Techniques
JavaScript's ability to interact with the Document Object Model (DOM) is one of its most powerful features. At the heart...

JavaScript Window: Interacting with the Browser Window Object
JavaScript's window object is a powerful tool that serves as the global object in browser environments. It represents the browser...

JavaScript Web API: Overview and Usage
JavaScript Web API: Overview and Usage JavaScript Web APIs are the backbone of modern web development, providing a rich set...


