
JavaScript is a powerful programming language that brings interactivity and dynamism to web pages. However, knowing where and how to include JavaScript in your HTML documents is crucial for optimal performance and functionality. In this comprehensive guide, we'll explore various methods of incorporating JavaScript into your web pages, discussing the pros and cons of each approach, and providing practical examples to illustrate best practices.
Internal JavaScript
One of the most straightforward ways to include JavaScript in your HTML document is by using internal scripts. This method involves writing your JavaScript code directly within the HTML file, typically inside the <script> tags.
Placing JavaScript in the <head> Section
Let's start with an example of internal JavaScript placed in the <head> section of an HTML document:
<!DOCTYPE html>
<html lang="en">
<head>
    <meta charset="UTF-8">
    <meta name="viewport" content="width=device-width, initial-scale=1.0">
    <title>Internal JavaScript in Head</title>
    <script>
        function greet() {
            alert("Hello, welcome to our website!");
        }
    </script>
</head>
<body onload="greet()">
    <h1>Welcome to Our Website</h1>
</body>
</html>
In this example, we've defined a greet() function in the <head> section. The function is called when the body loads, thanks to the onload attribute.
🔍 Pro Tip: Placing scripts in the <head> allows them to load before the body content, which can be beneficial for functions that need to be available immediately.
⚠️ Caution: However, if you have a lot of JavaScript code, this approach might delay the rendering of your page content, as the browser needs to parse and execute the script before rendering the body.
Placing JavaScript at the End of the <body> Section
An alternative approach is to place your JavaScript code just before the closing </body> tag:
<!DOCTYPE html>
<html lang="en">
<head>
    <meta charset="UTF-8">
    <meta name="viewport" content="width=device-width, initial-scale=1.0">
    <title>Internal JavaScript at End of Body</title>
</head>
<body>
    <h1>Welcome to Our Website</h1>
    <p id="greeting"></p>

    <script>
        document.getElementById("greeting").innerHTML = "Hello, welcome to our website!";
    </script>
</body>
</html>
🚀 Advantage: This method ensures that the HTML content is loaded before the script runs, which can improve perceived loading times and prevent errors related to manipulating elements that haven't loaded yet.
External JavaScript
While internal scripts are convenient for small amounts of code, larger projects often benefit from using external JavaScript files. This approach separates your JavaScript code from your HTML, making your files easier to maintain and allowing for better organization of your codebase.
Linking an External JavaScript File
Here's how you can link an external JavaScript file to your HTML document:
<!DOCTYPE html>
<html lang="en">
<head>
    <meta charset="UTF-8">
    <meta name="viewport" content="width=device-width, initial-scale=1.0">
    <title>External JavaScript</title>
    <script src="script.js" defer></script>
</head>
<body>
    <h1>Welcome to Our Website</h1>
    <button id="greetButton">Click to Greet</button>
</body>
</html>
And in your script.js file:
document.getElementById("greetButton").addEventListener("click", function() {
    alert("Hello, thanks for clicking!");
});
🔧 Key Point: The defer attribute in the <script> tag tells the browser to download the script file but wait to execute it until the HTML document has finished loading.
💡 Best Practice: Using external files allows you to leverage browser caching, potentially speeding up load times for repeat visitors.
Asynchronous and Deferred Script Loading
When working with external scripts, you have additional options to control when and how they load. Two important attributes to consider are async and defer.
The async Attribute
The async attribute allows the script to be downloaded asynchronously while the rest of the page continues to parse. Once the script is downloaded, it executes immediately, regardless of whether the page has finished parsing.
<head>
    <script src="analytics.js" async></script>
</head>
🏎️ Performance Boost: This is particularly useful for scripts that don't depend on other scripts or don't need to access page content, like analytics scripts.
⚠️ Warning: Be cautious with async if your scripts depend on each other, as they may execute out of order.
The defer Attribute
The defer attribute, which we saw earlier, tells the browser to download the script but wait to execute it until the HTML document has finished parsing.
<head>
    <script src="app.js" defer></script>
    <script src="components.js" defer></script>
</head>
🎯 Precision: defer ensures that scripts execute in the order they appear in the document, after parsing but before the DOMContentLoaded event.
Inline JavaScript
While generally not recommended for larger blocks of code, inline JavaScript can be useful for small, one-off actions. Here's an example:
<button onclick="alert('Hello, World!')">Click Me</button>
⚖️ Trade-off: Inline JavaScript is quick to implement but can make your HTML harder to read and maintain if overused.
JavaScript in URL
It's also possible to include JavaScript directly in URLs, though this practice is generally discouraged for security reasons:
<a href="javascript:alert('Hello from URL!')">Click for greeting</a>
🚫 Security Note: This method can be a security risk and is often blocked by content security policies. Use with caution and only when absolutely necessary.
Dynamic Script Injection
For more advanced scenarios, you might need to load scripts dynamically. This can be useful for lazy-loading or conditionally loading scripts based on user actions or other criteria.
Here's an example of dynamically loading a script:
function loadScript(url) {
    return new Promise((resolve, reject) => {
        let script = document.createElement('script');
        script.src = url;
        script.onload = () => resolve(script);
        script.onerror = () => reject(new Error(`Script load error for ${url}`));
        document.head.append(script);
    });
}

// Usage
loadScript('https://cdnjs.cloudflare.com/ajax/libs/lodash.js/4.17.21/lodash.min.js')
    .then(() => {
        console.log(_.VERSION);  // Access Lodash after it's loaded
    })
    .catch(error => {
        console.error('Script loading failed:', error);
    });
🔄 Flexibility: This approach gives you fine-grained control over when and how scripts are loaded, which can be crucial for optimizing performance in complex applications.
Module Scripts
Modern JavaScript development often involves working with modules. You can use the type="module" attribute to indicate that a script should be treated as a module:
<script type="module" src="app.module.js"></script>
And in your app.module.js:
import { formatDate } from './utils.js';

const formattedDate = formatDate(new Date());
console.log(`Today's date is ${formattedDate}`);
🧩 Modularity: This approach allows you to break your code into smaller, reusable pieces and manage dependencies more effectively.
Content Security Policy (CSP) Considerations
When deciding where to place your JavaScript, it's important to consider Content Security Policy (CSP). CSP is a security standard that helps prevent various types of attacks, including Cross-Site Scripting (XSS).
Here's an example of how you might set a CSP that allows inline scripts and scripts from your own domain:
<meta http-equiv="Content-Security-Policy" content="default-src 'self'; script-src 'self' 'unsafe-inline';">
🛡️ Security First: While this example allows inline scripts, in a production environment, you should aim to avoid 'unsafe-inline' and instead use nonces or hashes for any inline scripts you absolutely need.
Performance Considerations
Where you place your JavaScript can significantly impact your page's performance. Here are some best practices:
- Minimize blocking: Use
asyncordeferfor scripts that don't need to run immediately. - Prioritize critical scripts: Place scripts that are crucial for initial rendering in the
<head>withdefer. - Lazy load non-critical scripts: Use dynamic script injection to load scripts only when needed.
Here's an example that combines these practices:
<!DOCTYPE html>
<html lang="en">
<head>
    <meta charset="UTF-8">
    <meta name="viewport" content="width=device-width, initial-scale=1.0">
    <title>Optimized Script Loading</title>
    <script src="critical.js" defer></script>
    <script>
        // Lazy load non-critical script
        window.addEventListener('load', () => {
            const script = document.createElement('script');
            script.src = 'non-critical.js';
            document.body.appendChild(script);
        });
    </script>
</head>
<body>
    <h1>Welcome to Our Optimized Page</h1>
    <!-- Page content -->
</body>
</html>
⚡ Performance Boost: This approach ensures that critical scripts are loaded efficiently while deferring non-essential scripts to after the page load.
Debugging and Error Handling
Regardless of where you place your JavaScript, proper error handling and debugging practices are crucial. Consider using try-catch blocks for error-prone code and leverage browser developer tools for debugging.
Here's an example of error handling in an external script:
// In external.js
try {
    // Some potentially error-prone code
    const result = riskyOperation();
    console.log("Operation successful:", result);
} catch (error) {
    console.error("An error occurred:", error.message);
    // Optionally, send error to a logging service
    sendErrorLog(error);
}

function sendErrorLog(error) {
    // Implementation of error logging
    console.log("Error logged:", error);
}
🐞 Debug Tip: Use browser developer tools to set breakpoints and inspect variables during script execution, regardless of where the script is located in your HTML.
Conclusion
Choosing where to place your JavaScript code is a crucial decision that impacts your website's performance, maintainability, and user experience. By understanding the various options – from internal scripts to external files, async and defer attributes, and dynamic loading – you can make informed decisions that best suit your project's needs.
Remember these key points:
- Use external files for better organization and caching benefits.
- Leverage
asyncanddeferattributes to optimize loading. - Consider performance implications when placing scripts.
- Use modules for better code organization in larger projects.
- Always keep security in mind, especially when using inline scripts.
- Implement proper error handling and debugging practices.
By applying these principles and techniques, you'll be well-equipped to create efficient, performant, and maintainable JavaScript-powered websites. Happy coding! 🚀👨💻👩💻
Related Posts

HTML JavaScript: Adding Interactivity to Your Web Pages
Introduction Have you ever wondered what makes a website more than just static text and images? The magic often lies...
HTML Script Tag: Adding JavaScript to Your Web Pages
HTML <script> Tag The <script> tag in HTML is used to embed or reference executable scripts, most commonly JavaScript, within...

HTML Document scripts Collection: Accessing Script Elements
HTML Document scripts Collection: Accessing Script Elements The document.scripts collection in HTML provides a convenient way to access all the...

JavaScript DOM HTML: Changing HTML Content Dynamically
JavaScript's ability to manipulate the Document Object Model (DOM) is one of its most powerful features. This capability allows developers...

HTML Document getElementById() Method: Getting Element by ID
HTML Document getElementById() Method: Getting Elements by ID The getElementById() method is a fundamental part of the HTML Document Object...

JavaScript HTML Objects Examples: Interacting with HTML Objects
JavaScript is a powerful language that allows developers to create dynamic and interactive web pages. One of its most important...
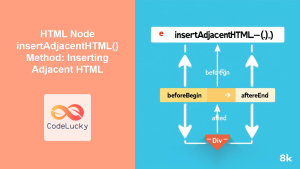
HTML Node insertAdjacentHTML() Method: Inserting Adjacent HTML
HTML Node insertAdjacentHTML() Method: Inserting Adjacent HTML The insertAdjacentHTML() method is a powerful feature in the HTML DOM (Document Object...

HTML DOM Link Object: Accessing Link Elements
HTML DOM Link Object: Accessing and Manipulating Link Elements The HTML DOM Link object provides an interface to interact with...

HTML DOM Embed Object: Accessing Embed Elements
HTML DOM Embed Object: Accessing and Manipulating Embed Elements The HTML DOM Embed object provides a way to interact with...

HTML Script text Property: Script Text Content
HTML Script text Property: Embedding Script Text The text property of the HTML <script> element is used to set or...
HTML Script src Property: Script Source URL
HTML Script src Property: Linking External JavaScript Files The HTML <script> tag is used to embed or reference executable code,...

HTML DOM Script Object: Accessing Script Elements
HTML DOM Script Object: Accessing Script Elements The HTML DOM script object represents the <script> element in HTML. This object...


