Introduction
Have you ever looked at a website and wondered how all the elements are so beautifully arranged and styled? The secret lies in HTML styles, primarily achieved through CSS (Cascading Style Sheets). While HTML provides the structure of your webpage, CSS is what brings it to life, dictating how elements look and feel. This article will guide you through the different methods of styling HTML elements – inline styles, internal stylesheets, and external stylesheets – while also briefly introducing CSS selectors and the all-important concept of the cascade. Mastering these techniques is crucial for creating visually appealing and user-friendly websites. Understanding how styles work is a core part of frontend development and sets the stage for more complex web design.
Imagine building a house – HTML is the framework (walls, rooms, windows), and CSS is like the paint, the furniture, the lighting, and all the decorative elements that make it a home. Without CSS, your web pages would be plain and uninviting, just the bare structure. Learning to use CSS effectively means you can tailor the look and feel of each and every part of your webpage, making it accessible, beautiful, and aligned with your branding.
Main Content
Inline Styles
Inline styles are applied directly within an HTML element using the style attribute. This attribute allows you to add CSS properties directly to an HTML tag. Inline styling provides the most granular control over elements but is generally not recommended for large projects because it becomes harder to manage and update. It can be useful for quick prototyping or making small, one-off changes.
<p style="color: blue; font-size: 16px;">This text is styled using inline CSS.</p>
Best Practices & Common Pitfalls
- Use Sparingly: Avoid using inline styles extensively. They make your HTML verbose and hard to maintain.
- Specific Use Cases: Use inline styles for very specific, one-off styling needs.
- Specificity Overrides: Inline styles have high specificity and will override any conflicting styles from internal or external stylesheets.
Internal Stylesheets
Internal stylesheets are defined within the <head> section of your HTML document, enclosed by <style> tags. This approach is better for styling a single webpage. It centralizes the CSS for that page but doesn’t allow for reuse across other pages.
<!DOCTYPE html>
<html>
<head>
    <title>Internal Stylesheet Example</title>
    <style>
        p {
            color: green;
            font-weight: bold;
        }
    </style>
</head>
<body>
    <p>This paragraph is styled with an internal stylesheet.</p>
</body>
</html>
Best Practices & Common Pitfalls
- Single Page Styling: Suitable for styling single-page applications or when a specific page requires unique styles.
- Organization: Keep your internal styles organized and well-commented for readability.
- Limited Reusability: Styles are limited to the single HTML document in which they are included.
External Stylesheets
External stylesheets are the recommended method for styling larger websites or applications. They involve creating a separate .css file and linking it to your HTML document using the <link> tag within the <head> section. This method promotes code reusability, maintainability, and faster load times.
<!DOCTYPE html>
<html>
<head>
    <title>External Stylesheet Example</title>
    <link rel="stylesheet" href="styles.css">
</head>
<body>
    <p>This text is styled using external CSS.</p>
</body>
</html>
styles.css
p {
    color: purple;
    font-family: Arial, sans-serif;
}
Best Practices & Common Pitfalls
- Reusability: Styles can be shared across multiple HTML pages.
- Maintainability: Easier to update and manage, leading to a more scalable project.
- Performance: Browsers can cache external CSS files, resulting in faster loading times.
- Proper Linking: Ensure the
<link>tag’shrefattribute correctly points to the CSS file.
CSS Selectors
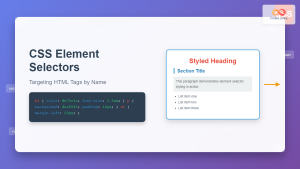
CSS selectors are used to target specific HTML elements that you want to style. These can range from simple element selectors (e.g., p for paragraphs) to more complex class and ID selectors, along with attribute selectors and pseudo-classes/elements.
/* Element Selector */
h1 {
    color: red;
}

/* Class Selector */
.highlight {
    background-color: yellow;
}

/* ID Selector */
#main-content {
    padding: 20px;
}
The Cascade
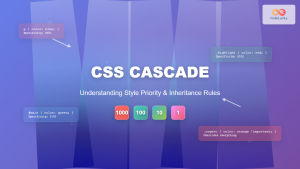
The “cascade” in CSS refers to how styles are applied and overridden based on their origin, specificity, and order. The browser applies styles in the following order of importance:
- Browser default styles.
- External stylesheets.
- Internal stylesheets.
- Inline styles.
Styles with higher specificity (e.g., ID selectors) will override those with lower specificity (e.g., element selectors). Styles defined later in the CSS will override previous styles if their specificity is the same.
Practical Examples
Example 1: Styling a Blog Post
Here’s how you could use external stylesheets to style a blog post page:
index.html
<!DOCTYPE html>
<html lang="en">
<head>
    <meta charset="UTF-8">
    <meta name="viewport" content="width=device-width, initial-scale=1.0">
    <title>My Blog Post</title>
    <link rel="stylesheet" href="blog.css">
</head>
<body>
    <article>
        <h1>My Amazing Blog Post Title</h1>
        <p class="author">By: John Doe</p>
        <p>This is the first paragraph of my blog post. It contains some very important information.</p>
        <p>Here is another paragraph. You can style it differently.</p>
    </article>
</body>
</html>
blog.css
body {
    font-family: Arial, sans-serif;
    line-height: 1.6;
    margin: 20px;
}

h1 {
    color: #333;
    border-bottom: 2px solid #eee;
    padding-bottom: 10px;
}

.author {
    font-style: italic;
    color: #888;
}

p {
  margin-bottom: 15px;
}
Example 2: Using Inline Styles (Use Case)
While generally not recommended, you might use inline styles to highlight a specific element:
<p>This is a normal paragraph, but <span style="color: red; font-weight: bold;">this part is highlighted</span>.</p>
Best Practices and Tips
- Organized CSS: Keep your CSS files organized with clear sections for different components of your website.
- Use a CSS Framework: Consider using CSS frameworks (like Bootstrap or Tailwind CSS) for faster development and consistent styling.
- Specificity Management: Understand and manage the specificity of your selectors to avoid unexpected behavior.
- Browser Compatibility: Test your styles on multiple browsers to ensure consistent rendering. Use browser developer tools to debug styling issues.
- Use of CSS preprocessors: Consider using CSS preprocessors like Sass or Less for writing more maintainable and scalable code.
- Comment your CSS: Add comments to explain your code, making it easier for other developers to understand and modify your styles.
- Responsive Design: Use CSS media queries to create layouts that adapt to different screen sizes.
- Performance: Optimize your CSS by minifying files and avoiding complex and unnecessary selectors.
- Consistent Naming: Follow a consistent naming convention for CSS classes and ids to maintain readability and scalability.
- Linting: Use CSS linting tools to catch common mistakes and enforce coding standards.
By understanding and practicing these techniques, you will be well on your way to creating beautifully styled, user-friendly websites. Remember, styling is a crucial part of web development, and mastering it will significantly improve your skills and allow you to create engaging online experiences. Keep practicing and exploring more advanced CSS techniques to enhance your skills further.

