HTML Radio value Property: Understanding Radio Button Values
The HTML radio button is a fundamental element for creating forms where users need to select one option from a predefined set. The value property of the <input type="radio"> element plays a crucial role in defining what data is submitted when a particular radio button is selected. This guide will delve into the value property, explaining its syntax, usage, and providing practical examples to enhance your understanding.
What is the value Property?
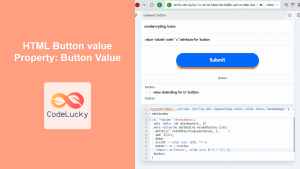
The value property specifies the value that will be sent to the server when the radio button is selected and the form is submitted. It is essential for differentiating between different radio button options within the same group (defined by the name attribute).
Syntax
The syntax for using the value property within the <input type="radio"> element is straightforward:
<input type="radio" id="radioId" name="groupName" value="optionValue">
Here:
id: A unique identifier for the radio button.name: The name of the radio button group, ensuring that only one button in the group can be selected at a time.value: The value associated with this specific radio button, which will be submitted with the form.
Key Attributes
The value attribute is simple, but vital. Here’s a quick look:
| Attribute | Type | Description |
|---|---|---|
| `value` | String | Specifies the value to be sent to the server when the radio button is selected. |
Examples of Using the value Property
Let’s explore some practical examples of how to use the value property in HTML radio buttons.
Basic Example
In this example, we have a simple form with two radio buttons representing different options. Each radio button has a unique value.
<form id="myFormBasic">
  <label for="option1Basic">
    <input type="radio" id="option1Basic" name="optionsBasic" value="option1">
    Option 1
  </label><br>

  <label for="option2Basic">
    <input type="radio" id="option2Basic" name="optionsBasic" value="option2">
    Option 2
  </label><br>

  <button type="submit">Submit</button>
</form>
In this case, if “Option 1” is selected, the form will submit optionsBasic=option1. If “Option 2” is selected, it will submit optionsBasic=option2.
Using Values with JavaScript
You can also retrieve the selected radio button’s value using JavaScript. Here’s how:
<form id="myFormJS">
    <label for="option1JS">
        <input type="radio" id="option1JS" name="optionsJS" value="javascript_option1">
        Option 1
    </label><br>

    <label for="option2JS">
        <input type="radio" id="option2JS" name="optionsJS" value="javascript_option2">
        Option 2
    </label><br>

    <button type="button" onclick="getValueJS()">Get Value</button>
</form>

<p id="resultJS"></p>

<script>
function getValueJS() {
    const radiosJS = document.getElementsByName('optionsJS');
    let selectedValueJS;

    for (let i = 0; i < radiosJS.length; i++) {
        if (radiosJS[i].checked) {
            selectedValueJS = radiosJS[i].value;
            break;
        }
    }

    document.getElementById('resultJS').innerText = selectedValueJS ? `Selected Value: ${selectedValueJS}` : 'No option selected';
}
</script>
When a radio button is selected and the “Get Value” button is clicked, the JavaScript function retrieves and displays the selected value.
Real-World Example: Payment Options
Consider a scenario where you need to implement payment options in an e-commerce form.
<form id="paymentForm">
    <label for="creditCard">
        <input type="radio" id="creditCard" name="paymentMethod" value="credit_card">
        Credit Card
    </label><br>

    <label for="paypal">
        <input type="radio" id="paypal" name="paymentMethod" value="paypal">
        PayPal
    </label><br>

    <label for="upi">
        <input type="radio" id="upi" name="paymentMethod" value="upi">
        UPI
    </label><br>

    <button type="submit">Submit Payment</button>
</form>
In this setup, the value attribute clearly indicates which payment method the user has chosen, making it easy to process the payment accordingly on the server-side.
Dynamic Radio Buttons with Values
You can dynamically create radio buttons with different values using JavaScript based on data from an array.
<div id="dynamicRadios"></div>

<script>
const optionsDynamic = ['Value A', 'Value B', 'Value C'];
const containerDynamic = document.getElementById('dynamicRadios');

optionsDynamic.forEach((optionDynamic, indexDynamic) => {
    const radioDynamic = document.createElement('input');
    radioDynamic.type = 'radio';
    radioDynamic.id = `dynamicOption${indexDynamic}`;
    radioDynamic.name = 'dynamicOptions';
    radioDynamic.value = optionDynamic;

    const labelDynamic = document.createElement('label');
    labelDynamic.htmlFor = `dynamicOption${indexDynamic}`;
    labelDynamic.textContent = optionDynamic;

    containerDynamic.appendChild(radioDynamic);
    containerDynamic.appendChild(labelDynamic);
    containerDynamic.appendChild(document.createElement('br'));
});
</script>
This JavaScript code dynamically generates radio buttons with values from the optionsDynamic array, providing a flexible way to create dynamic forms.
Tips and Best Practices
- Always Include a Value: Ensure that every radio button has a
valueattribute. Omitting it can lead to unexpected behavior when the form is submitted. ⚠️ - Use Descriptive Values: Make sure the
valueattribute contains a descriptive string that accurately represents the option. This makes server-side processing easier. - Consistency: Maintain consistency in naming conventions and value formats across all radio buttons within the same group.
- Accessibility: Use labels properly to associate text with radio buttons, enhancing accessibility for users with disabilities. 🧑💻
Conclusion
The value property of the HTML radio button is fundamental for creating forms that capture user selections accurately. By understanding its syntax and usage, you can effectively implement radio buttons in your web projects, ensuring seamless data submission and a better user experience.


