
Understanding the offsetWidth Property in HTML Elements
The offsetWidth property is a read-only property of HTML elements in the DOM (Document Object Model). It returns the layout width of an element in pixels, including the element’s content, padding, and border. The offsetWidth is often used in JavaScript to dynamically determine the size of an element, which is crucial for responsive design, animations, and interactive web applications.
What is offsetWidth?
The offsetWidth property provides a way to retrieve the full width of an element as it is rendered on the page. This includes:
- Content Width: The width of the actual content inside the element.
- Padding: The space between the content and the border.
- Border: The width of the element’s border.
In essence, offsetWidth gives you the total horizontal space an element occupies.
Syntax
The syntax for accessing the offsetWidth property is straightforward:
let width = element.offsetWidth;
Here, element refers to the HTML element you want to measure, and width will store the numerical value of the element’s offsetWidth in pixels.
Key Attributes and Usage
Understanding the key attributes of the offsetWidth property is essential for effective use:
| Attribute | Type | Description |
|---|---|---|
| `offsetWidth` | Number | A read-only property that returns the layout width of an element in pixels, including content, padding, and border. |
Note: The offsetWidth property is read-only. You cannot set or modify its value directly. 🚫
Practical Examples of offsetWidth
Let’s explore some practical examples demonstrating how to use the offsetWidth property in JavaScript.
Basic Usage: Retrieving Element Width
In this example, we retrieve the offsetWidth of a <div> element and display it.
<div id="myDiv" style="width: 200px; padding: 20px; border: 5px solid black;">
  This is a sample div.
</div>
<p id="widthDisplay"></p>

<script>
  const divElement = document.getElementById("myDiv");
  const widthDisplayElement = document.getElementById("widthDisplay");

  const widthValue = divElement.offsetWidth;
  widthDisplayElement.textContent = "The offsetWidth of the div is: " + widthValue + "px";
</script>
Output:
The offsetWidth of the div is: 250px
In this case, the offsetWidth is 250px because it includes the content width (200px), left and right padding (20px each), and left and right border (5px each).
Dynamic Width Calculation: Responsive Design
Here, we use offsetWidth to dynamically adjust the size of another element based on the width of a parent element, demonstrating a responsive design technique.
<div id="parentDiv" style="width: 500px; border: 1px solid black;">
  <div id="childDiv" style="height: 50px; background-color: lightblue;"></div>
</div>

<script>
  const parentDivElement = document.getElementById("parentDiv");
  const childDivElement = document.getElementById("childDiv");

  function adjustChildWidth() {
    const parentWidth = parentDivElement.offsetWidth;
    childDivElement.style.width = (parentWidth / 2) + "px"; // Child is half the width of the parent
  }

  // Adjust the width initially and on window resize
  adjustChildWidth();
  window.addEventListener("resize", adjustChildWidth);
</script>
In this example, the child div‘s width is dynamically set to half the width of its parent div, ensuring it remains responsive even when the window size changes.
Interactive Element Scaling
This example demonstrates how to use offsetWidth to scale an element up or down based on user interaction, such as clicking a button.
<button id="scaleButton">Scale Element</button>
<div id="scalableDiv" style="width: 100px; height: 100px; background-color: orange;"></div>

<script>
  const scaleButtonElement = document.getElementById("scaleButton");
  const scalableDivElement = document.getElementById("scalableDiv");

  scaleButtonElement.addEventListener("click", function() {
    const currentWidth = scalableDivElement.offsetWidth;
    const newWidth = currentWidth * 1.2; // Increase width by 20%
    scalableDivElement.style.width = newWidth + "px";
    scalableDivElement.style.height = newWidth + "px"; //Keep it a square
  });
</script>
Each time the button is clicked, the scalableDiv‘s width and height increase by 20%, providing a simple interactive scaling effect.
Calculating Available Space: Dynamic Layout
Here’s an example where we calculate the available space within a container and adjust the width of an element to fit within that space, considering margins and borders.
<div id="container" style="width: 400px; border: 1px solid black; padding: 10px;">
  <div id="content" style="margin: 10px; background-color: lightgreen;">This is the content.</div>
</div>

<script>
  const containerElement = document.getElementById("container");
  const contentElement = document.getElementById("content");

  function adjustContentWidth() {
    const containerWidth = containerElement.offsetWidth;
    const containerPadding = 20; // 10px padding on each side
    const contentMargin = 20; // 10px margin on each side
    const availableWidth = containerWidth - containerPadding - contentMargin;

    contentElement.style.width = availableWidth + "px";
  }

  adjustContentWidth();
  window.addEventListener("resize", adjustContentWidth);
</script>
In this case, the content div‘s width is dynamically adjusted to fit within the container, taking into account the container’s padding and the content’s margins. This ensures that the content always fits properly within the container, regardless of its size.
Canvas Integration: Dynamic Sizing
Here’s how you might use offsetWidth to dynamically size an HTML canvas element, ensuring it fills its container.
<div id="canvasContainer" style="width: 500px; height: 300px; border: 1px solid black;">
  <canvas id="myCanvasElement"></canvas>
</div>

<script>
  const canvasContainerElement = document.getElementById("canvasContainer");
  const canvasElement = document.getElementById("myCanvasElement");
  const ctxElement = canvasElement.getContext("2d");

  function adjustCanvasSize() {
    const containerWidth = canvasContainerElement.offsetWidth;
    const containerHeight = canvasContainerElement.offsetHeight;

    canvasElement.width = containerWidth;
    canvasElement.height = containerHeight;

    // Example drawing
    ctxElement.fillStyle = "red";
    ctxElement.fillRect(10, 10, 50, 50);
  }

  adjustCanvasSize();
  window.addEventListener("resize", adjustCanvasSize);
</script>
This code dynamically adjusts the canvas size to fit its container and draws a red rectangle on it.
Real-World Applications of offsetWidth
The offsetWidth property is used in various scenarios, including:
- Responsive Web Design: Adjusting element sizes based on screen or container width.
- Dynamic Layouts: Calculating available space for content and adjusting element sizes accordingly.
- Interactive Components: Scaling, resizing, or positioning elements in response to user actions.
- Animation: Creating smooth and precise animations that depend on element dimensions.
- Canvas Integration: Dynamically sizing canvas elements to fit their containers.
Browser Support
The offsetWidth property is widely supported across all modern web browsers, ensuring consistent behavior across different platforms. 💯
Conclusion
The offsetWidth property is an essential tool for web developers, providing a way to accurately determine the layout width of HTML elements. By understanding its usage and incorporating it into your projects, you can create more responsive, dynamic, and interactive web applications.
Related Posts
HTML Element offsetLeft Property: Element Offset Left
Understanding the offsetLeft Property in HTML The offsetLeft property in HTML DOM is a read-only property that returns the distance...
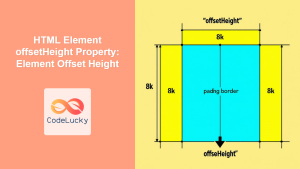
HTML Element offsetHeight Property: Element Offset Height
HTML Element offsetHeight Property: Understanding Element Height The offsetHeight property is a read-only property in JavaScript that provides the height...

HTML Element scrollWidth Property: Element Scroll Width
Understanding the scrollWidth Property in HTML Elements The scrollWidth property in HTML is a read-only property that returns the total...

HTML Element clientWidth Property: Element Width
HTML Element clientWidth Property: Understanding Element Width The clientWidth property is a read-only property of an HTML element that returns...

HTML Element clientHeight Property: Element Height
HTML Element clientHeight Property: Understanding Element Height The clientHeight property is a read-only property of an HTML element in the...

HTML Element offsetTop Property: Element’s Distance to Top
HTML Element offsetTop Property: Understanding the Element's Distance to the Top The offsetTop property in HTML DOM provides the distance...

HTML Element offsetParent Property: Element Offset Parent
HTML Element offsetParent Property: Understanding Element Offset Parent The offsetParent property in HTML DOM is a read-only property that returns...

CSS Width Property: Mastering Element Width in CSS
CSS Width Property: Mastering Element Width The width property in CSS defines the width of an element's content area. It's...

HTML Object width Property: Object Width
HTML Object width Property: Mastering Object Width The HTML <object> tag is a versatile element used to embed various types...
HTML Element scrollHeight Property: Element Scroll Height
HTML Element scrollHeight Property: Understanding Element Scroll Height The scrollHeight property is a read-only property of an HTML element that...
JavaScript screen.width Property: Screen Width
JavaScript screen.width Property: Screen Width The screen.width property in JavaScript is a read-only property that returns the total width of...

JavaScript Window outerWidth Property: Window Outer Width
JavaScript Window outerWidth Property: A Comprehensive Guide The JavaScript window.outerWidth property returns the outer width of the browser window, including...


