
HTML Checkbox Value Property: A Comprehensive Guide
The value property in HTML checkboxes is a crucial attribute that defines the data submitted when the checkbox is checked and the form is submitted. It allows developers to associate specific data with each checkbox, making it easier to process form submissions on the server-side. This guide covers the syntax, usage, and practical examples of the checkbox value property.
Understanding the Checkbox Value Property
The value attribute specifies the value that is sent to the server when the checkbox is checked. If the checkbox is not checked, no value is sent. This property is fundamental for handling form data correctly.
Syntax
The syntax for setting the value property of an HTML checkbox is straightforward:
<input type="checkbox" id="myCheckbox" name="agreement" value="agreed">
Here, value="agreed" specifies that if the checkbox with id="myCheckbox" is checked, the value “agreed” will be sent to the server under the name “agreement”.
Key Attributes
| Attribute | Type | Description |
|---|---|---|
| `value` | String | Specifies the value to be sent to the server when the checkbox is checked. |
| `name` | String | Specifies the name of the checkbox, used as the key when submitting the form data. |
| `id` | String | A unique identifier for the checkbox element, used to associate labels or access the element via JavaScript. |
| `checked` | Boolean | Indicates whether the checkbox is checked by default. |
Basic Examples
Let’s explore some basic examples to understand how the value property works in different scenarios.
Simple Checkbox Value
<form id="simpleForm">
  <label for="terms">
    <input type="checkbox" id="terms" name="terms" value="accepted">
    I accept the terms and conditions
  </label>
  <button type="submit">Submit</button>
</form>

<script>
  document.getElementById('simpleForm').addEventListener('submit', function(event) {
    event.preventDefault();
    const termsCheckbox = document.getElementById('terms');
    if (termsCheckbox.checked) {
      alert('Terms accepted with value: ' + termsCheckbox.value);
    } else {
      alert('Terms not accepted');
    }
  });
</script>
In this example, if the checkbox is checked, submitting the form (which is prevented for demonstration purposes) will alert “Terms accepted with value: accepted”. Otherwise, it alerts “Terms not accepted”.
Multiple Checkboxes with Values
<form id="optionsForm">
  <label>
    <input type="checkbox" name="options" value="option1"> Option 1
  </label><br>
  <label>
    <input type="checkbox" name="options" value="option2"> Option 2
  </label><br>
  <label>
    <input type="checkbox" name="options" value="option3"> Option 3
  </label><br>
  <button type="submit">Submit</button>
</form>

<script>
  document.getElementById('optionsForm').addEventListener('submit', function(event) {
    event.preventDefault();
    const selectedOptions = [];
    const checkboxes = document.querySelectorAll('input[name="options"]:checked');
    checkboxes.forEach(function(checkbox) {
      selectedOptions.push(checkbox.value);
    });
    alert('Selected options: ' + selectedOptions.join(', '));
  });
</script>
Here, multiple checkboxes share the same name attribute, but each has a unique value. When the form is submitted, the script gathers the values of the checked boxes and displays them.
Default Checked State
<form id="defaultForm">
  <label>
    <input type="checkbox" name="subscribe" value="yes" checked> Subscribe to newsletter
  </label>
  <button type="submit">Submit</button>
</form>

<script>
  document.getElementById('defaultForm').addEventListener('submit', function(event) {
    event.preventDefault();
    const subscribeCheckbox = document.querySelector('input[name="subscribe"]');
    alert('Subscribe value: ' + subscribeCheckbox.value);
  });
</script>
In this example, the checkbox is checked by default due to the checked attribute. The value “yes” is submitted if the user submits the form without changing the state of the checkbox.
Advanced Techniques
Dynamically Setting the Value
JavaScript can be used to dynamically set or modify the value property of a checkbox:
<input type="checkbox" id="dynamicCheckbox" name="dynamic" value="">
<button onclick="setValue()">Set Value</button>

<script>
  function setValue() {
    const checkbox_dynamic = document.getElementById('dynamicCheckbox');
    checkbox_dynamic.value = 'dynamicValue';
    alert('Value set to: ' + checkbox_dynamic.value);
  }
</script>
Clicking the “Set Value” button dynamically sets the value property of the checkbox to “dynamicValue”.
Accessing Value with JavaScript
<input type="checkbox" id="accessCheckbox" name="access" value="initialValue">
<button onclick="getValue()">Get Value</button>

<script>
  function getValue() {
    const checkbox_access = document.getElementById('accessCheckbox');
    alert('Current value: ' + checkbox_access.value);
  }
</script>
Clicking the “Get Value” button alerts the current value of the checkbox.
Real-World Applications
Capturing User Preferences
Checkboxes are commonly used to capture user preferences, such as notification settings or feature choices.
<form id="preferencesForm">
    <label>
        <input type="checkbox" name="preferences" value="email"> Email Notifications
    </label><br>
    <label>
        <input type="checkbox" name="preferences" value="sms"> SMS Notifications
    </label><br>
    <button type="submit">Update Preferences</button>
</form>

<script>
    document.getElementById('preferencesForm').addEventListener('submit', function(event) {
        event.preventDefault();
        const selectedPreferences = [];
        const checkboxes = document.querySelectorAll('input[name="preferences"]:checked');
        checkboxes.forEach(function(checkbox) {
            selectedPreferences.push(checkbox.value);
        });
        alert('Selected preferences: ' + selectedPreferences.join(', '));
    });
</script>
Agreement Forms
For collecting user agreement to terms and conditions, privacy policies, or legal documents, using the value attribute ensures clarity.
<form id="agreementForm">
    <label>
        <input type="checkbox" id="agreementCheckbox" name="agreement" value="accepted">
        I agree to the terms and conditions
    </label>
    <button type="submit">Submit</button>
</form>

<script>
    document.getElementById('agreementForm').addEventListener('submit', function(event) {
        event.preventDefault();
        const agreementCheckbox = document.getElementById('agreementCheckbox');
        if (agreementCheckbox.checked) {
            alert('Agreement status: ' + agreementCheckbox.value);
        } else {
            alert('Agreement is required');
        }
    });
</script>
Tips and Best Practices
- Always Define a Value: Ensure that every checkbox has a meaningful
valueattribute for proper form data handling. - Use Consistent Naming: Employ a consistent naming convention for checkboxes, especially when dealing with multiple checkboxes with the same
name. - Handle Unchecked Boxes: Remember that unchecked checkboxes do not submit any value. Handle this scenario appropriately on the server-side.
Conclusion
The value property of HTML checkboxes is essential for managing form data and capturing user input effectively. By understanding and utilizing this property correctly, developers can create robust and user-friendly forms. From basic acceptance confirmations to capturing detailed user preferences, the value attribute ensures that form submissions accurately reflect user choices. 🚀
Related Posts

HTML Checkbox name Property: Checkbox Name
HTML Checkbox name Property: Comprehensive Guide The name property of the HTML <input type="checkbox"> element is crucial for handling form...

HTML Checkbox checked Property: Checkbox Checked
HTML Checkbox checked Property: A Comprehensive Guide The checked property in HTML represents the state of a checkbox. It indicates...
HTML Checkbox type Property: Checkbox Type
HTML Checkbox type Property: A Comprehensive Guide The type attribute of the HTML <input> element is fundamental in defining the...

HTML Checkbox form Property: Checkbox Form
HTML Checkbox form Property: A Comprehensive Guide The HTML form property for checkboxes allows you to explicitly associate a checkbox...
HTML Checkbox required Property: Enforcing User Input
HTML Checkbox required Property: Enforcing User Input The required property in HTML checkboxes is a boolean attribute that specifies whether...
HTML Checkbox defaultChecked Property: Checkbox Default Checked
HTML Checkbox defaultChecked Property: Setting the Initial State The defaultChecked property in HTML represents the initial state of a checkbox...

HTML Checkbox disabled Property: Checkbox Disabled
HTML Checkbox disabled Property: A Comprehensive Guide The disabled property in HTML is a boolean attribute that, when present, prevents...
HTML Checkbox indeterminate Property: Checkbox Indeterminate
HTML Checkbox indeterminate Property: A Comprehensive Guide The indeterminate property in HTML checkboxes is used to represent a state where...
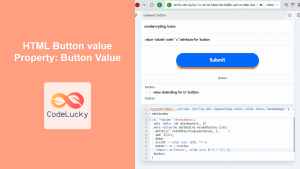
HTML Button value Property: Button Value
HTML Button value Property: A Comprehensive Guide The HTML <button> element is a fundamental component for creating interactive forms and...

HTML DOM Checkbox Object: Accessing Checkbox Elements
HTML DOM Checkbox Object: Accessing Checkbox Elements The HTML DOM Checkbox object represents an HTML <input type="checkbox"> element. This object...

HTML Radio checked Property: Radio Checked
HTML Radio checked Property: Control Radio Button State The HTML checked property of a radio button is a boolean attribute...

HTML Text required Property: Text Input Required
HTML Text required Property: Ensuring Mandatory Input The required attribute in HTML is a boolean attribute that, when present, specifies...


