
HTML Canvas lineWidth Property: Controlling Line Thickness
The HTML Canvas lineWidth property is a fundamental part of the Canvas API, allowing you to control the thickness of lines when drawing shapes, paths, and text outlines. This property is crucial for creating visually appealing and precise graphics. By adjusting the lineWidth, you can create a wide range of effects, from delicate lines to bold strokes. This guide will explore the usage of lineWidth with various examples.
What is the lineWidth Property?
The lineWidth property of the Canvas 2D rendering context specifies the width of the line used for strokes, measured in pixels. It affects any stroke operation performed on the canvas context, including the outlines of shapes, paths, and text.
Purpose of the lineWidth Property
The primary purpose of the lineWidth property is to allow developers to:
- Control the visual weight of lines and outlines.
- Create a visual hierarchy by using different line thicknesses.
- Add emphasis to specific parts of the drawing.
- Achieve particular design aesthetics and effects.
Syntax
The lineWidth property is set directly on the 2D rendering context:
ctx.lineWidth = value;
ctx: This is the 2D rendering context obtained from the canvas element.value: This is a number representing the width of the line in pixels. It can be a floating-point number, allowing for sub-pixel precision.
Examples
Let's explore some examples of how to use the lineWidth property with various drawing operations. Each example includes the necessary HTML and JavaScript code to render the graphics directly.
Basic Line with Different Widths
This example demonstrates drawing multiple lines with varying thicknesses using the lineWidth property.
<canvas
  id="canvasLineWidth1"
  width="300"
  height="150"
  style="border: 1px solid black;"
></canvas>

<script>
//<![CDATA[

  const canvas1 = document.getElementById("canvasLineWidth1");
  const ctx1 = canvas1.getContext("2d");

  ctx1.beginPath();
  ctx1.moveTo(20, 20);
  ctx1.lineTo(280, 20);
  ctx1.lineWidth = 2;
  ctx1.stroke();

  ctx1.beginPath();
  ctx1.moveTo(20, 50);
  ctx1.lineTo(280, 50);
  ctx1.lineWidth = 5;
  ctx1.stroke();

  ctx1.beginPath();
  ctx1.moveTo(20, 80);
  ctx1.lineTo(280, 80);
  ctx1.lineWidth = 10;
  ctx1.stroke();

  ctx1.beginPath();
  ctx1.moveTo(20, 120);
  ctx1.lineTo(280, 120);
  ctx1.lineWidth = 15;
  ctx1.stroke();

//]]]]><![CDATA[>
</script>
Stroked Rectangle with Variable Line Width
Here, we draw a rectangle with different line widths, showcasing how the lineWidth affects the outline of a shape.
<canvas
id="canvasLineWidth2"
width="200"
height="150"
style="border: 1px solid black;"
></canvas>
<script></script>
Stroked Circle with Line Width
This example demonstrates how the lineWidth property can be used to change the thickness of a circle's outline.
<canvas
id="canvasLineWidth3"
width="200"
height="200"
style="border: 1px solid black;"
></canvas>
<script></script>
Path with Different Widths and Colors
This shows how to combine different line widths and colors for a custom path.
<canvas
id="canvasLineWidth4"
width="300"
height="200"
style="border: 1px solid black;"
></canvas>
<script></script>
Text Outline with Line Width
You can apply lineWidth to the outline of text using strokeText().
<canvas
id="canvasLineWidth5"
width="300"
height="100"
style="border: 1px solid black;"
></canvas>
<script>
//<![CDATA[
const canvas5 = document.getElementById("canvasLineWidth5");
const ctx5 = canvas5.getContext("2d");
ctx5.font = "40px Arial";
ctx5.lineWidth = 2;
ctx5.strokeStyle = "black";
ctx5.strokeText("CodeLucky", 20, 60);
ctx5.fillStyle = "lightblue";
ctx5.fillText("CodeLucky", 20, 60)
//]]]]><
HTML Canvas strokeStyle Property: Stroking Styles
HTML Canvas strokeStyle Property: Defining Stroke Styles The strokeStyle property in the HTML Canvas API is crucial for styling the...
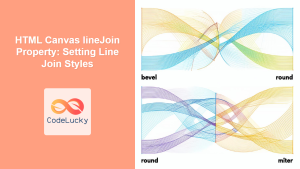
HTML Canvas lineJoin Property: Setting Line Join Styles
HTML Canvas lineJoin Property: Styling Line Connections The HTML Canvas lineJoin property is used to define how two connecting lines...

HTML Canvas fillStyle Property: Filling Styles
HTML Canvas fillStyle Property: Defining Filling Styles The HTML Canvas fillStyle property is a fundamental aspect of the Canvas API,...
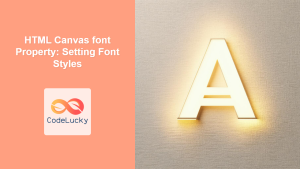
HTML Canvas font Property: Setting Font Styles
HTML Canvas font Property: Setting Font Styles The font property in the HTML Canvas API is used to specify the...
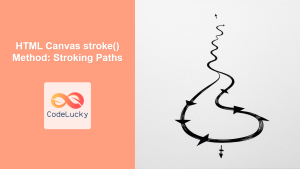
HTML Canvas stroke() Method: Stroking Paths
HTML Canvas stroke() Method: Stroking Paths The stroke() method in the HTML Canvas API is used to outline the current...
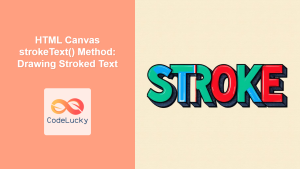
HTML Canvas strokeText() Method: Drawing Stroked Text
HTML Canvas strokeText() Method: Drawing Stroked Text The strokeText() method in the HTML Canvas API is used to draw outlined...
HTML Canvas createLinearGradient() Method: Creating Linear Gradients
The createLinearGradient() Method: Mastering Linear Gradients on HTML Canvas The createLinearGradient() method in the HTML Canvas API is a powerful...

HTML Canvas scale() Method: Scaling the Canvas
HTML Canvas scale() Method: Scaling the Canvas The HTML Canvas scale() method allows you to scale drawings on the canvas,...

HTML Canvas lineTo() Method: Drawing Straight Lines
HTML Canvas lineTo() Method: Drawing Straight Lines The HTML Canvas lineTo() method is a fundamental tool for drawing straight lines...
CSS Style borderWidth Property: CSS Border Width
CSS borderWidth Property: A Comprehensive Guide The borderWidth property in CSS is used to set the width of an element's...
HTML Canvas ImageData Data Property: Pixel Manipulation
HTML Canvas ImageData data Property: Pixel-Level Control The HTML Canvas ImageData object's data property provides direct access to the underlying...

HTML Canvas fill() Method: Filling Paths
HTML Canvas fill() Method: Filling Paths and Shapes The HTML Canvas fill() method is a fundamental function in the Canvas...


