Grafana has revolutionized the way organizations visualize and analyze their data on Linux systems. This powerful open-source analytics and interactive visualization platform transforms raw data into meaningful insights through beautiful, customizable dashboards.
What is Grafana?
Grafana is a multi-platform open-source analytics and interactive visualization web application. It provides charts, graphs, and alerts for the web when connected to supported data sources. Originally developed by Torkel Ödegaard in 2014, Grafana has become the de facto standard for monitoring and observability dashboards.
Key Features
- Multi-data source support: Connect to Prometheus, InfluxDB, MySQL, PostgreSQL, and 60+ other data sources
- Rich visualization options: Time series graphs, heatmaps, histograms, and custom panels
- Alert management: Intelligent alerting with notification channels
- Dashboard templating: Dynamic dashboards with variables
- User management: Team-based access control and permissions
Installing Grafana on Linux
Ubuntu/Debian Installation
Install Grafana on Ubuntu or Debian systems using the official APT repository:
# Add Grafana GPG key
sudo wget -q -O /usr/share/keyrings/grafana.key https://apt.grafana.com/gpg.key

# Add repository
echo "deb [signed-by=/usr/share/keyrings/grafana.key] https://apt.grafana.com stable main" | sudo tee -a /etc/apt/sources.list.d/grafana.list

# Update package index
sudo apt-get update

# Install Grafana
sudo apt-get install grafana

# Enable and start Grafana service
sudo systemctl enable grafana-server
sudo systemctl start grafana-server
CentOS/RHEL/Fedora Installation
For RPM-based distributions, use the YUM repository:
# Create repository file
sudo tee /etc/yum.repos.d/grafana.repo << EOF
[grafana]
name=grafana
baseurl=https://rpm.grafana.com
repo_gpgcheck=1
enabled=1
gpgcheck=1
gpgkey=https://rpm.grafana.com/gpg.key
sslverify=1
sslcacert=/etc/pki/tls/certs/ca-bundle.crt
EOF

# Install Grafana
sudo yum install grafana

# Start and enable service
sudo systemctl start grafana-server
sudo systemctl enable grafana-server
Docker Installation
Run Grafana using Docker for quick deployment:
# Run Grafana container
docker run -d \
  --name grafana \
  -p 3000:3000 \
  -v grafana-storage:/var/lib/grafana \
  grafana/grafana:latest
Initial Configuration
Accessing Grafana
After installation, access Grafana through your web browser:
# Default URL
http://localhost:3000

# Default credentials
Username: admin
Password: admin
Note: You’ll be prompted to change the default password on first login.
Configuration File
The main configuration file is located at /etc/grafana/grafana.ini. Key settings include:
# HTTP port
http_port = 3000

# Domain name
domain = localhost

# Root URL
root_url = http://localhost:3000

# Database settings
[database]
type = sqlite3
host = 127.0.0.1:3306
name = grafana
user = root
password =
Data Source Configuration
Adding Prometheus Data Source
Configure Prometheus as a data source for metrics collection:
# Install Prometheus first
wget https://github.com/prometheus/prometheus/releases/download/v2.45.0/prometheus-2.45.0.linux-amd64.tar.gz
tar xvfz prometheus-*.tar.gz
cd prometheus-*

# Start Prometheus
./prometheus --config.file=prometheus.yml
Add Prometheus in Grafana:
- Navigate to Configuration → Data Sources
- Click Add data source
- Select Prometheus
- Set URL to
http://localhost:9090 - Click Save & Test
MySQL Data Source Example
# Install MySQL connector
sudo apt-get install mysql-client

# Test connection
mysql -h localhost -u grafana_user -p grafana_db
Configuration in Grafana:
- Host: localhost:3306
- Database: your_database_name
- User: grafana_user
- Password: your_secure_password
Creating Your First Dashboard
System Monitoring Dashboard
Create a comprehensive system monitoring dashboard:
# Install Node Exporter for system metrics
wget https://github.com/prometheus/node_exporter/releases/download/v1.6.1/node_exporter-1.6.1.linux-amd64.tar.gz
tar xvfz node_exporter-*.tar.gz
cd node_exporter-*
./node_exporter
Panel Configuration Example
CPU Usage Panel Query:
# Prometheus query for CPU usage
100 - (avg(irate(node_cpu_seconds_total{mode="idle"}[5m])) * 100)
Memory Usage Panel Query:
# Memory utilization percentage
(1 - (node_memory_MemAvailable_bytes / node_memory_MemTotal_bytes)) * 100
Advanced Dashboard Features
Template Variables
Create dynamic dashboards using variables:
# Server variable query
label_values(node_uname_info, instance)

# Usage in panel queries
node_cpu_seconds_total{instance="$server"}
Alerting Configuration
Set up intelligent alerts:
# Create alert rule
{
  "conditions": [
    {
      "query": {
        "queryType": "",
        "model": {
          "expr": "up == 0",
          "interval": "",
          "refId": "A"
        }
      },
      "reducer": {
        "params": [],
        "type": "last"
      },
      "evaluator": {
        "params": [1],
        "type": "lt"
      }
    }
  ],
  "executionErrorState": "alerting",
  "noDataState": "no_data",
  "frequency": "10s"
}
Command Line Management
Grafana CLI Commands
Manage Grafana using the command line interface:
# Install plugins
grafana-cli plugins install grafana-piechart-panel

# List installed plugins
grafana-cli plugins ls

# Update all plugins
grafana-cli plugins update-all

# Reset admin password
grafana-cli admin reset-admin-password newpassword

# Create admin user
grafana-cli admin create-user --name admin --login admin --password admin
Service Management
# Check Grafana status
sudo systemctl status grafana-server

# View logs
sudo journalctl -u grafana-server -f

# Restart service
sudo systemctl restart grafana-server

# Stop service
sudo systemctl stop grafana-server
Performance Optimization
Database Optimization
Configure database settings for better performance:
# In grafana.ini
[database]
type = postgres
host = 127.0.0.1:5432
name = grafana
user = grafana
password = password
ssl_mode = disable
max_idle_conn = 2
max_open_conn = 0
conn_max_lifetime = 14400
Caching Configuration
# Enable query caching
[caching]
enabled = true
ttl = 60s

# Memory cache
[cache.memory]
enabled = true
ttl = 1m
Security Best Practices
SSL/TLS Configuration
# Generate SSL certificate
sudo openssl req -x509 -nodes -days 365 -newkey rsa:2048 \
  -keyout /etc/grafana/grafana.key \
  -out /etc/grafana/grafana.crt

# Configure HTTPS in grafana.ini
[server]
protocol = https
cert_file = /etc/grafana/grafana.crt
cert_key = /etc/grafana/grafana.key
User Authentication
# LDAP configuration
[auth.ldap]
enabled = true
config_file = /etc/grafana/ldap.toml
allow_sign_up = true

# OAuth configuration
[auth.google]
enabled = true
allow_sign_up = true
client_id = your_google_client_id
client_secret = your_google_client_secret
Backup and Restore
Database Backup
# SQLite backup
sudo cp /var/lib/grafana/grafana.db /backup/grafana.db.backup

# MySQL backup
mysqldump -u root -p grafana > grafana_backup.sql

# PostgreSQL backup
pg_dump grafana > grafana_backup.sql
Configuration Backup
# Backup configuration and dashboards
sudo tar -czf grafana_backup.tar.gz \
  /etc/grafana/ \
  /var/lib/grafana/dashboards/ \
  /var/lib/grafana/plugins/
Troubleshooting Common Issues
Service Won’t Start
# Check service status
sudo systemctl status grafana-server

# Check logs for errors
sudo journalctl -u grafana-server --no-pager

# Verify configuration
sudo grafana-server -config /etc/grafana/grafana.ini -check-config
Permission Issues
# Fix ownership
sudo chown -R grafana:grafana /var/lib/grafana
sudo chown -R grafana:grafana /var/log/grafana
sudo chown -R grafana:grafana /etc/grafana

# Set correct permissions
sudo chmod 640 /etc/grafana/grafana.ini
Integration Examples
Docker Monitoring
Monitor Docker containers using cAdvisor:
# Run cAdvisor
docker run \
  --volume=/:/rootfs:ro \
  --volume=/var/run:/var/run:rw \
  --volume=/sys:/sys:ro \
  --volume=/var/lib/docker/:/var/lib/docker:ro \
  --publish=8080:8080 \
  --detach=true \
  --name=cadvisor \
  gcr.io/cadvisor/cadvisor:latest
Log Analysis with Loki
# Install Loki
wget https://github.com/grafana/loki/releases/download/v2.9.0/loki-linux-amd64.zip
unzip loki-linux-amd64.zip
sudo mv loki-linux-amd64 /usr/local/bin/loki

# Start Loki
loki -config.file=local-config.yaml
Conclusion
Grafana on Linux provides a powerful platform for data visualization and monitoring. From basic installation to advanced dashboard creation, this comprehensive guide covers everything needed to implement robust analytics solutions. Whether monitoring system performance, application metrics, or business KPIs, Grafana’s flexibility and extensive features make it an essential tool for any Linux environment.
The combination of multiple data sources, rich visualizations, and intelligent alerting creates a complete observability stack that scales from small deployments to enterprise-level monitoring solutions. Regular maintenance, security updates, and performance optimization ensure your Grafana installation continues to provide valuable insights for data-driven decision making.
Related Posts
Kibana Linux: Complete Guide to Data Visualization Dashboard Setup and Management
Kibana is a powerful open-source data visualization and exploration tool that works seamlessly with Elasticsearch to provide interactive dashboards and...
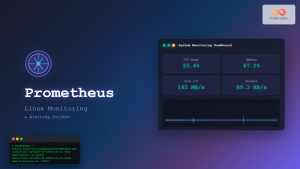
Prometheus Linux: Complete Monitoring and Alerting Toolkit Guide
Prometheus has revolutionized the way we monitor and alert on modern infrastructure. As an open-source monitoring toolkit originally built at...
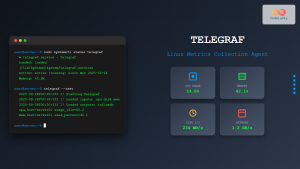
Telegraf Linux: Complete Guide to Installing and Configuring the Metrics Collection Agent
Telegraf is a powerful, plugin-driven server agent for collecting and reporting metrics from databases, systems, and IoT sensors. As part...

PHP Data Visualization: Creating Charts and Graphs
In today's data-driven world, the ability to present information visually is crucial. PHP, being a versatile server-side scripting language, offers...
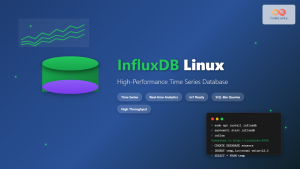
InfluxDB Linux: Complete Guide to Time Series Database Installation and Management
InfluxDB is a powerful open-source time series database designed to handle high write and query loads for applications involving time-stamped...
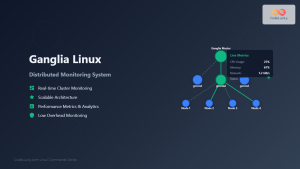
ganglia Linux: Complete Guide to Distributed Monitoring System
Ganglia is a powerful, open-source distributed monitoring system designed specifically for high-performance computing clusters, grids, and cloud infrastructures. Originally developed...
Zabbix Linux: Complete Enterprise Monitoring Solution for System Administrators
Zabbix stands as one of the most powerful and comprehensive open-source monitoring solutions available for Linux environments. This enterprise-grade monitoring...
Cacti Advanced Linux: Complete Guide to Enterprise Network Graphing and Monitoring
Cacti stands as one of the most powerful open-source network graphing solutions available for Linux systems, providing comprehensive network monitoring...
Munin Linux: Complete Guide to Network Resource Monitoring and Performance Analysis
Munin is a powerful networked resource monitoring tool for Linux systems that provides comprehensive insights into system performance, resource utilization,...
Groundwork Linux: Complete Guide to IT Infrastructure Monitoring and System Health Management
What is Groundwork Linux? Groundwork Linux is a comprehensive open-source IT infrastructure monitoring platform built specifically for Linux environments. It...

Cacti Linux: Complete Network Monitoring and Graphing Solution
Cacti is a comprehensive network graphing solution designed to harness the power of RRDtool's data storage and graphing functionality. Built...
thruk Linux: Comprehensive Monitoring Web Interface for Network Infrastructure
Thruk is a powerful web-based monitoring interface designed primarily for Nagios and compatible monitoring systems. As a comprehensive frontend solution,...