Elasticsearch is a powerful, distributed search and analytics engine built on Apache Lucene that enables real-time search, analysis, and visualization of large volumes of data. As one of the core components of the Elastic Stack (ELK), it provides lightning-fast full-text search capabilities, making it essential for applications requiring complex search functionality, log analysis, and business intelligence.
What is Elasticsearch?
Elasticsearch is an open-source, RESTful search engine that stores data in a distributed manner across multiple nodes. It’s designed to handle massive amounts of data with near real-time search capabilities, making it perfect for:
- Full-text search applications
- Log and event data analysis
- Real-time analytics and monitoring
- Business intelligence and reporting
- Content discovery and recommendation systems
System Requirements
Before installing Elasticsearch on Linux, ensure your system meets these requirements:
- Java: OpenJDK or Oracle JDK 8 or higher
- RAM: Minimum 2GB, recommended 4GB or more
- Disk Space: Minimum 1GB free space
- Operating System: Any modern Linux distribution
Installing Java (Prerequisites)
Elasticsearch requires Java to run. Let’s install OpenJDK:
Ubuntu/Debian:
sudo apt update
sudo apt install openjdk-11-jdk
java -version
CentOS/RHEL/Fedora:
sudo yum install java-11-openjdk-devel
# Or for newer versions
sudo dnf install java-11-openjdk-devel
java -version
Expected Output:
openjdk version "11.0.16" 2022-07-19
OpenJDK Runtime Environment (build 11.0.16+8-post-Ubuntu-0ubuntu120.04)
OpenJDK 64-Bit Server VM (build 11.0.16+8-post-Ubuntu-0ubuntu120.04, mixed mode, sharing)
Installing Elasticsearch
Method 1: Using APT Repository (Ubuntu/Debian)
Add the Elastic repository and install Elasticsearch:
# Import the Elasticsearch public key
wget -qO - https://artifacts.elastic.co/GPG-KEY-elasticsearch | sudo apt-key add -

# Add the repository definition
echo "deb https://artifacts.elastic.co/packages/8.x/apt stable main" | sudo tee /etc/apt/sources.list.d/elastic-8.x.list

# Update package index and install
sudo apt update
sudo apt install elasticsearch
Method 2: Using YUM Repository (CentOS/RHEL)
# Import the Elasticsearch public key
sudo rpm --import https://artifacts.elastic.co/GPG-KEY-elasticsearch

# Create repository file
sudo tee /etc/yum.repos.d/elasticsearch.repo << EOF
[elasticsearch]
name=Elasticsearch repository for 8.x packages
baseurl=https://artifacts.elastic.co/packages/8.x/yum
gpgcheck=1
gpgkey=https://artifacts.elastic.co/GPG-KEY-elasticsearch
enabled=0
autorefresh=1
type=rpm-md
EOF

# Install Elasticsearch
sudo yum install --enablerepo=elasticsearch elasticsearch
Method 3: Direct Download
# Download the latest version
wget https://artifacts.elastic.co/downloads/elasticsearch/elasticsearch-8.10.2-linux-x86_64.tar.gz

# Extract the archive
tar -xzf elasticsearch-8.10.2-linux-x86_64.tar.gz

# Move to appropriate directory
sudo mv elasticsearch-8.10.2 /opt/elasticsearch

# Create elasticsearch user
sudo useradd -r -s /bin/false elasticsearch

# Change ownership
sudo chown -R elasticsearch:elasticsearch /opt/elasticsearch
Basic Configuration
The main configuration file is located at /etc/elasticsearch/elasticsearch.yml. Let’s configure basic settings:
# Cluster name
cluster.name: my-application

# Node name
node.name: node-1

# Network settings
network.host: localhost
http.port: 9200

# Discovery settings for single node
discovery.type: single-node

# Security settings (disable for development)
xpack.security.enabled: false
xpack.security.enrollment.enabled: false
Important Configuration Options:
| Parameter | Description | Example |
|---|---|---|
| cluster.name | Name of the cluster | my-cluster |
| node.name | Name of the node | node-1 |
| network.host | Network interface to bind | 0.0.0.0 |
| http.port | HTTP port for REST API | 9200 |
| path.data | Data storage directory | /var/lib/elasticsearch |
| path.logs | Log files directory | /var/log/elasticsearch |
Starting Elasticsearch Service
Using Systemd (Most Linux Distributions):
# Enable service at boot
sudo systemctl enable elasticsearch

# Start the service
sudo systemctl start elasticsearch

# Check service status
sudo systemctl status elasticsearch

# View logs
sudo journalctl -u elasticsearch -f
Expected Status Output:
● elasticsearch.service - Elasticsearch
     Loaded: loaded (/lib/systemd/system/elasticsearch.service; enabled; vendor preset: enabled)
     Active: active (running) since Tue 2025-08-26 09:25:30 IST; 2min 15s ago
   Main PID: 12345 (java)
     CGroup: /system.slice/elasticsearch.service
             └─12345 /usr/share/elasticsearch/jdk/bin/java -Xshare:auto
Manual Start (Direct Installation):
# Navigate to Elasticsearch directory
cd /opt/elasticsearch

# Start Elasticsearch
sudo -u elasticsearch bin/elasticsearch -d
Verifying Installation
Test if Elasticsearch is running properly:
# Check cluster health
curl -X GET "localhost:9200/_cluster/health?pretty"

# Get basic cluster information
curl -X GET "localhost:9200/"
Expected Response:
{
  "name" : "node-1",
  "cluster_name" : "my-application",
  "cluster_uuid" : "abc123def456",
  "version" : {
    "number" : "8.10.2",
    "build_flavor" : "default",
    "build_type" : "deb",
    "build_hash" : "6d20dd8fbee7",
    "build_date" : "2023-09-28T10:05:34.536646456Z",
    "build_snapshot" : false,
    "lucene_version" : "9.7.0"
  },
  "tagline" : "You Know, for Search"
}
Basic Elasticsearch Operations
Creating an Index
An index in Elasticsearch is similar to a database in relational databases:
# Create an index named 'products'
curl -X PUT "localhost:9200/products?pretty"

# Create index with custom settings
curl -X PUT "localhost:9200/products" -H 'Content-Type: application/json' -d'
{
  "settings": {
    "number_of_shards": 1,
    "number_of_replicas": 0
  }
}'
Indexing Documents
Add documents to your index:
# Index a single document
curl -X POST "localhost:9200/products/_doc/1?pretty" -H 'Content-Type: application/json' -d'
{
  "name": "Wireless Headphones",
  "price": 99.99,
  "brand": "TechCorp",
  "category": "Electronics",
  "description": "High-quality wireless headphones with noise cancellation"
}
'

# Index multiple documents
curl -X POST "localhost:9200/products/_doc/2?pretty" -H 'Content-Type: application/json' -d'
{
  "name": "Gaming Laptop",
  "price": 1299.99,
  "brand": "GamerTech",
  "category": "Computers",
  "description": "Powerful gaming laptop with RTX graphics"
}
'
Response Example:
{
  "_index" : "products",
  "_type" : "_doc",
  "_id" : "1",
  "_version" : 1,
  "result" : "created",
  "_shards" : {
    "total" : 1,
    "successful" : 1,
    "failed" : 0
  },
  "_seq_no" : 0,
  "_primary_term" : 1
}
Searching Documents
Basic Search:
# Search all documents
curl -X GET "localhost:9200/products/_search?pretty"

# Search with query parameter
curl -X GET "localhost:9200/products/_search?q=wireless&pretty"
Advanced Query DSL:
# Match query
curl -X GET "localhost:9200/products/_search?pretty" -H 'Content-Type: application/json' -d'
{
  "query": {
    "match": {
      "description": "wireless"
    }
  }
}
'

# Range query
curl -X GET "localhost:9200/products/_search?pretty" -H 'Content-Type: application/json' -d'
{
  "query": {
    "range": {
      "price": {
        "gte": 100,
        "lte": 1000
      }
    }
  }
}
'

# Bool query with multiple conditions
curl -X GET "localhost:9200/products/_search?pretty" -H 'Content-Type: application/json' -d'
{
  "query": {
    "bool": {
      "must": [
        { "match": { "category": "Electronics" } }
      ],
      "filter": [
        { "range": { "price": { "lte": 200 } } }
      ]
    }
  }
}
'
Search Response Example:
{
  "took" : 2,
  "timed_out" : false,
  "_shards" : {
    "total" : 1,
    "successful" : 1,
    "skipped" : 0,
    "failed" : 0
  },
  "hits" : {
    "total" : {
      "value" : 1,
      "relation" : "eq"
    },
    "max_score" : 0.6931471,
    "hits" : [
      {
        "_index" : "products",
        "_type" : "_doc",
        "_id" : "1",
        "_score" : 0.6931471,
        "_source" : {
          "name" : "Wireless Headphones",
          "price" : 99.99,
          "brand" : "TechCorp",
          "category" : "Electronics",
          "description" : "High-quality wireless headphones"
        }
      }
    ]
  }
}
Advanced Search Features
Aggregations
Perform analytics and get insights from your data:
# Average price by category
curl -X GET "localhost:9200/products/_search?pretty" -H 'Content-Type: application/json' -d'
{
  "size": 0,
  "aggs": {
    "avg_price_by_category": {
      "terms": {
        "field": "category.keyword"
      },
      "aggs": {
        "avg_price": {
          "avg": {
            "field": "price"
          }
        }
      }
    }
  }
}
'

# Price range histogram
curl -X GET "localhost:9200/products/_search?pretty" -H 'Content-Type: application/json' -d'
{
  "size": 0,
  "aggs": {
    "price_ranges": {
      "histogram": {
        "field": "price",
        "interval": 500
      }
    }
  }
}
'
Fuzzy Search
Handle typos and approximate matches:
# Fuzzy search for misspelled terms
curl -X GET "localhost:9200/products/_search?pretty" -H 'Content-Type: application/json' -d'
{
  "query": {
    "fuzzy": {
      "name": {
        "value": "hedphones",
        "fuzziness": 2
      }
    }
  }
}
'
Index Management
Viewing Index Information:
# List all indices
curl -X GET "localhost:9200/_cat/indices?v"

# Get index mapping
curl -X GET "localhost:9200/products/_mapping?pretty"

# Get index settings
curl -X GET "localhost:9200/products/_settings?pretty"
Updating Index Settings:
# Update index settings
curl -X PUT "localhost:9200/products/_settings" -H 'Content-Type: application/json' -d'
{
  "index": {
    "number_of_replicas": 1
  }
}
'
Index Templates
Create templates for automatic index configuration:
# Create index template
curl -X PUT "localhost:9200/_index_template/product_template" -H 'Content-Type: application/json' -d'
{
  "index_patterns": ["products*"],
  "template": {
    "settings": {
      "number_of_shards": 1,
      "number_of_replicas": 0
    },
    "mappings": {
      "properties": {
        "name": {"type": "text"},
        "price": {"type": "float"},
        "brand": {"type": "keyword"},
        "category": {"type": "keyword"},
        "created_at": {"type": "date"}
      }
    }
  }
}
'
Monitoring and Maintenance
Cluster Health and Statistics:
# Check cluster health
curl -X GET "localhost:9200/_cluster/health?pretty"

# Get cluster statistics
curl -X GET "localhost:9200/_cluster/stats?pretty"

# Node information
curl -X GET "localhost:9200/_nodes?pretty"

# Index statistics
curl -X GET "localhost:9200/products/_stats?pretty"
Log Analysis:
# View Elasticsearch logs
sudo tail -f /var/log/elasticsearch/my-application.log

# Check for errors
sudo grep "ERROR" /var/log/elasticsearch/my-application.log

# Monitor slow queries
sudo grep "slow" /var/log/elasticsearch/my-application.log
Security Best Practices
Enable Security Features:
Edit /etc/elasticsearch/elasticsearch.yml:
# Enable security
xpack.security.enabled: true
xpack.security.enrollment.enabled: true

# Enable HTTPS
xpack.security.http.ssl.enabled: true
xpack.security.transport.ssl.enabled: true
Create User Accounts:
# Set password for built-in users
sudo /usr/share/elasticsearch/bin/elasticsearch-setup-passwords interactive

# Create custom user
curl -X POST "localhost:9200/_security/user/developer" -H 'Content-Type: application/json' -d'
{
  "password": "securepassword",
  "roles": ["kibana_admin", "monitoring_user"],
  "full_name": "Developer User"
}
'
Performance Optimization
JVM Heap Size:
Configure JVM settings in /etc/elasticsearch/jvm.options:
# Set heap size (50% of available RAM, max 32GB)
-Xms2g
-Xmx2g
Index Optimization:
# Force merge index segments
curl -X POST "localhost:9200/products/_forcemerge?max_num_segments=1"

# Refresh index
curl -X POST "localhost:9200/products/_refresh"

# Clear cache
curl -X POST "localhost:9200/products/_cache/clear"
Backup and Recovery
Snapshot Configuration:
# Create snapshot repository
curl -X PUT "localhost:9200/_snapshot/backup_repo" -H 'Content-Type: application/json' -d'
{
  "type": "fs",
  "settings": {
    "location": "/opt/elasticsearch/backup"
  }
}
'

# Create snapshot
curl -X PUT "localhost:9200/_snapshot/backup_repo/snapshot_1?wait_for_completion=true"

# Restore from snapshot
curl -X POST "localhost:9200/_snapshot/backup_repo/snapshot_1/_restore"
Common Troubleshooting
Service Won’t Start:
# Check service status
sudo systemctl status elasticsearch

# View detailed logs
sudo journalctl -u elasticsearch -n 50

# Check configuration
sudo /usr/share/elasticsearch/bin/elasticsearch-config
Memory Issues:
# Check memory usage
free -h

# Monitor Elasticsearch memory
curl -X GET "localhost:9200/_nodes/stats/jvm?pretty"

# Check for memory-related errors
sudo grep -i "memory\|heap\|gc" /var/log/elasticsearch/*.log
Common Error Solutions:
| Error | Cause | Solution |
|---|---|---|
| Connection refused | Service not running | Start elasticsearch service |
| Heap space error | Insufficient memory | Increase heap size in jvm.options |
| Disk space low | Storage full | Clean old indices or increase storage |
| Port already in use | Port conflict | Change http.port in config |
Integration with Other Tools
Using with Kibana:
# Install Kibana
sudo apt install kibana

# Configure Kibana
sudo nano /etc/kibana/kibana.yml

# Start Kibana
sudo systemctl start kibana
Using with Logstash:
# Install Logstash
sudo apt install logstash

# Create pipeline configuration
sudo nano /etc/logstash/conf.d/pipeline.conf
Conclusion
Elasticsearch is a powerful search and analytics engine that provides fast, scalable, and flexible data processing capabilities on Linux systems. From basic installation to advanced search operations, this guide covers the essential aspects of working with Elasticsearch.
Key takeaways include:
- Proper installation and configuration ensure optimal performance
- RESTful API makes integration simple and flexible
- Advanced search features like aggregations and fuzzy search provide powerful analytics
- Regular monitoring and maintenance ensure system reliability
- Security configuration is crucial for production deployments
Whether you’re building a search application, analyzing logs, or creating business intelligence dashboards, Elasticsearch on Linux provides the foundation for handling large-scale data processing and real-time analytics effectively.
Related Posts
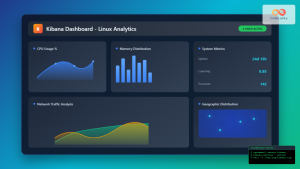
Kibana Linux: Complete Guide to Data Visualization Dashboard Setup and Management
Kibana is a powerful open-source data visualization and exploration tool that works seamlessly with Elasticsearch to provide interactive dashboards and...

Beats Linux: Complete Guide to Data Shippers for Elasticsearch Integration
Beats are lightweight, open-source data shippers developed by Elastic that collect different types of data from your systems and forward...
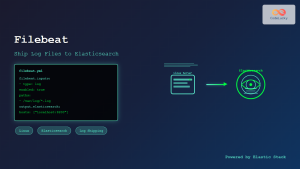
filebeat Linux: Complete Guide to Ship Log Files to Elasticsearch with Real Examples
Filebeat is a lightweight log shipper that belongs to the Elastic Stack (formerly ELK Stack) ecosystem. It's designed to monitor...
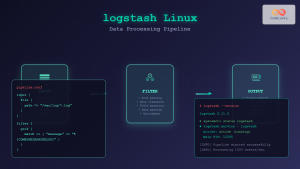
logstash Linux: Complete Guide to Data Processing Pipeline
What is Logstash? Logstash is a powerful, open-source data processing pipeline that ingests data from multiple sources simultaneously, transforms it,...

auditbeat Linux: Complete Guide to Shipping Audit Data to Elasticsearch
Introduction to auditbeat auditbeat is a lightweight shipper from the Elastic Beat family that collects audit data from the Linux...
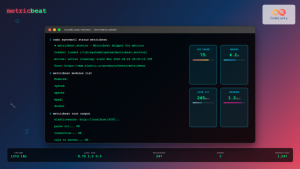
metricbeat Linux: Complete Guide to System and Service Metrics Monitoring
Metricbeat is a lightweight shipper that helps you monitor your systems and services by collecting metrics from the operating system...

Functionbeat Linux: Complete Guide to Serverless Deployment and Monitoring
Functionbeat represents a revolutionary approach to serverless monitoring and data collection in modern cloud environments. As part of the Elastic...
Prometheus Linux: Complete Monitoring and Alerting Toolkit Guide
Prometheus has revolutionized the way we monitor and alert on modern infrastructure. As an open-source monitoring toolkit originally built at...
InfluxDB Linux: Complete Guide to Time Series Database Installation and Management
InfluxDB is a powerful open-source time series database designed to handle high write and query loads for applications involving time-stamped...

mesos Linux: Complete Guide to Distributed Systems Kernel and Cluster Management
Apache Mesos is a powerful distributed systems kernel that abstracts CPU, memory, storage, and other compute resources across machines, enabling...
Telegraf Linux: Complete Guide to Installing and Configuring the Metrics Collection Agent
Telegraf is a powerful, plugin-driven server agent for collecting and reporting metrics from databases, systems, and IoT sensors. As part...

grafana Linux: Complete Guide to Analytics and Interactive Visualization Platform
Grafana has revolutionized the way organizations visualize and analyze their data on Linux systems. This powerful open-source analytics and interactive...