
CSS text-overflow Property: Managing Overflowing Text
The CSS text-overflow property specifies how overflowed content that is not displayed should be signaled to the user. It dictates what happens when text exceeds the bounds of its container. This property is crucial for maintaining a clean and user-friendly layout, especially when dealing with dynamic content or responsive designs.
Purpose
The primary purpose of the text-overflow property is to handle text that exceeds its container’s boundaries, preventing layout breaks and ensuring readability. It provides options to clip, display an ellipsis, or use a custom string to indicate overflow.
Syntax
The text-overflow property is defined as follows:
text-overflow: clip | ellipsis | <string> | inherit | initial | revert | unset;
Values
Here’s a detailed breakdown of the possible values:
| Value | Description |
|---|---|
| `clip` | Clips the text at the limit of the content area. Characters may be truncated in the middle. This is the default value. |
| `ellipsis` | Displays an ellipsis (…) to represent the clipped text. The ellipsis is displayed inside the content area, potentially shrinking the available text. |
| ` |
Specifies a custom string to be displayed at the point where the text is clipped. Browser support for this value is limited. |
| `inherit` | Inherits the `text-overflow` value from its parent element. |
| `initial` | Sets the property to its default value (`clip`). |
| `revert` | Reverts the property to the value defined by the user-agent stylesheet. |
| `unset` | Resets the property to its inherited value if it inherits from its parent or to its initial value if not. |
Conditions for text-overflow to Work
For the text-overflow property to have an effect, the following conditions must be met:
- The element must have
overflow: hidden,overflow: scroll, oroverflow: auto. - The element must have
white-space: nowrapto prevent text from wrapping. - The element must have a defined
widthormax-width.
Examples
Let’s explore practical examples of how to use the text-overflow property effectively.
Example 1: Using text-overflow: clip
This example demonstrates the default behavior where the text is simply clipped at the container’s boundary.
<!DOCTYPE html>
<html>
  <head>
    <title>text-overflow: clip Example</title>
    <style>
      #containerClip {
        width: 200px;
        overflow: hidden;
        white-space: nowrap;
        text-overflow: clip;
        border: 1px solid #ccc;
      }
    </style>
  </head>
  <body>
    <div id="containerClip">
      This is a long text that will be clipped.
    </div>
  </body>
</html>
The text is cut off abruptly at the end of the container.
Example 2: Using text-overflow: ellipsis
This example shows how to use the ellipsis value to indicate that there is more text than what is visible.
<!DOCTYPE html>
<html>
  <head>
    <title>text-overflow: ellipsis Example</title>
    <style>
      #containerEllipsis {
        width: 200px;
        overflow: hidden;
        white-space: nowrap;
        text-overflow: ellipsis;
        border: 1px solid #ccc;
      }
    </style>
  </head>
  <body>
    <div id="containerEllipsis">
      This is a long text that will be truncated with an ellipsis.
    </div>
  </body>
</html>
The text is truncated, and an ellipsis (…) is displayed at the end.
Example 3: Handling Dynamic Content with JavaScript
This example demonstrates how to dynamically update the text content and ensure it’s properly handled with text-overflow.
<!DOCTYPE html>
<html>
  <head>
    <title>Dynamic text-overflow Example</title>
    <style>
      #containerDynamic {
        width: 200px;
        overflow: hidden;
        white-space: nowrap;
        text-overflow: ellipsis;
        border: 1px solid #ccc;
      }
    </style>
  </head>
  <body>
    <div id="containerDynamic">Initial Text</div>
    <button id="updateButton">Update Text</button>

    <script>
      const containerDynamicElement = document.getElementById("containerDynamic");
      const updateButtonElement = document.getElementById("updateButton");

      updateButtonElement.addEventListener("click", function () {
        containerDynamicElement.textContent =
          "This is a very long text that exceeds the container width and will be truncated with ellipsis dynamically.";
      });
    </script>
  </body>
</html>
Clicking the “Update Text” button changes the text inside the container, and the text-overflow: ellipsis ensures that the overflowing text is properly indicated.
Example 4: Using text-overflow in Responsive Design
In responsive design, text containers may change size based on screen dimensions. Using text-overflow ensures that text remains readable even when the container shrinks.
<!DOCTYPE html>
<html>
  <head>
    <title>Responsive text-overflow Example</title>
    <style>
      #containerResponsive {
        max-width: 300px;
        overflow: hidden;
        white-space: nowrap;
        text-overflow: ellipsis;
        border: 1px solid #ccc;
      }

      /* Responsive adjustments */
      @media (max-width: 480px) {
        #containerResponsive {
          max-width: 150px;
        }
      }
    </style>
  </head>
  <body>
    <div id="containerResponsive">
      This is a long text that adapts to different screen sizes using
      text-overflow.
    </div>
  </body>
</html>
The container’s max-width changes based on the screen size, and text-overflow: ellipsis ensures the text is always handled correctly.
Example 5: Applying text-overflow to Multiple Elements
You can apply the text-overflow property to multiple elements using CSS classes, ensuring consistency across your design.
<!DOCTYPE html>
<html>
  <head>
    <title>Multiple Elements text-overflow Example</title>
    <style>
      .text-overflow-ellipsis {
        width: 200px;
        overflow: hidden;
        white-space: nowrap;
        text-overflow: ellipsis;
        border: 1px solid #ccc;
        margin-bottom: 10px;
      }
    </style>
  </head>
  <body>
    <div class="text-overflow-ellipsis">
      This is the first long text with text-overflow.
    </div>
    <div class="text-overflow-ellipsis">
      This is the second long text with text-overflow.
    </div>
    <div class="text-overflow-ellipsis">
      And this is another one with text-overflow.
    </div>
  </body>
</html>
Each div with the class text-overflow-ellipsis will have its text truncated with an ellipsis if it overflows.
Tips and Best Practices
- Always Include
overflow: hiddenandwhite-space: nowrap: Thetext-overflowproperty will not work without these. - Test Across Browsers: Ensure consistent behavior across different browsers, especially older versions.
- Consider Accessibility: Ensure that users can still access the full text, possibly through a tooltip or by expanding the container on click/hover.
- Use Responsively: Adapt the container size and text properties for different screen sizes to maintain readability.
Browser Support
The text-overflow property is widely supported across modern browsers. Here is a summary:
- Chrome: Supported
- Edge: Supported
- Firefox: Supported
- Safari: Supported
- Opera: Supported
- IE: Supported from version 6.0
Conclusion
The CSS text-overflow property is a valuable tool for managing text that exceeds its container. By using clip or ellipsis, you can ensure that your layouts remain clean and user-friendly, even with dynamic or responsive content. Understanding the conditions required for text-overflow to work and applying it thoughtfully will significantly improve your web design. 🚀
Related Posts

CSS Style overflow Property: CSS Overflow
CSS overflow Property: Controlling Content Overflow The CSS overflow property specifies how to handle content that overflows a container element....

CSS overflowX Property: CSS Overflow X Explained with Examples
Understanding the CSS overflowX Property The overflowX property in CSS dictates how the browser handles content that overflows the horizontal...
CSS Style overflowY Property: CSS Overflow Y
CSS overflowY Property: Controlling Vertical Content Overflow The CSS overflowY property specifies what happens when content overflows an element's block-level...
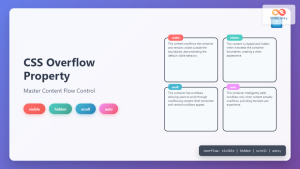
CSS Overflow Property: Complete Guide to Visible, Hidden, Scroll & Auto Values
The CSS overflow property is a fundamental tool for controlling how content behaves when it exceeds the boundaries of its...

CSS Text-Overflow: Complete Guide to Ellipsis and Text Clipping Techniques
Long text content can break your carefully crafted layouts and create poor user experiences. The CSS text-overflow property provides elegant...
CSS Style wordBreak Property: CSS Word Break
CSS word-break Property: Comprehensive Guide The word-break property in CSS is used to specify how words should break when reaching...

CSS Style maxWidth Property: CSS Max Width
Understanding the CSS maxWidth Property The CSS maxWidth property is a fundamental tool in web development for controlling the maximum...
CSS Style wordWrap Property: CSS Word Wrap
CSS word-wrap Property: Controlling Word Breaking in CSS The CSS word-wrap property (now standardized as overflow-wrap) is used to specify...

CSS Overflow-X and Overflow-Y: Complete Guide to Horizontal and Vertical Overflow Control
When building web layouts, content doesn't always fit perfectly within its container. CSS overflow properties provide precise control over how...
CSS Style textDecorationLine Property: CSS Text Decoration Line
CSS text-decoration-line Property: Styling Text Decorations The text-decoration-line property in CSS is used to specify the kind of text decoration...

CSS flexWrap Property: CSS Flex Wrap
CSS flex-wrap Property: Mastering Flex Item Wrapping The flex-wrap property in CSS is a powerful tool for controlling how flex...
CSS white-space Property: Controlling Text White Space
CSS white-space Property: Controlling Text White Space The white-space property in CSS controls how whitespace characters (spaces, tabs, and line...


