
Understanding the CSS top Property: A Comprehensive Guide
The top property in CSS is used to specify the vertical position of a positioned element. It determines how far an element’s top edge is offset from the top edge of its containing block. This property is a fundamental tool for controlling the layout of elements on a web page, allowing for precise and dynamic positioning. In this comprehensive guide, we’ll explore the syntax, possible values, and practical examples of the top property.
What is the top Property?
The top property is part of CSS’s positioning scheme, which allows you to precisely place elements on a webpage. To use top effectively, the element’s position property must be set to relative, absolute, fixed, or sticky. The top property then defines the offset from the top edge of the element’s containing block.
Purpose of the top Property
The primary purpose of the top property is to:
- Control the vertical placement of elements.
- Create overlapping elements or layered designs.
- Implement dynamic layouts and animations.
- Adjust element positions based on screen size or user interaction.
Syntax of the top Property
The top property is specified as follows:
/* Keyword values */
top: auto;

/* <length> values */
top: 10px;
top: 3em;

/* <percentage> values */
top: 10%;
Possible Values
The top property accepts the following values:
| Value | Description |
|---|---|
| `auto` | The initial value. The browser calculates the position of the element. |
| ` |
Specifies a fixed distance from the top edge of the containing block. Can be a positive or negative value. Example: `10px`, `-5px`, `2em`. |
| ` |
Specifies a percentage of the containing block’s height. Can be a positive or negative value. Example: `10%`, `-5%`. |
Note: The effect of the top property depends on the position property of the element. If position is static, the top property has no effect. ⚠️
Examples of the top Property
Let’s explore some practical examples of how to use the top property in CSS. Each example includes the necessary HTML and CSS code to demonstrate different use cases.
Example 1: Relative Positioning
When using position: relative, the element is positioned relative to its normal position. Setting top moves the element down from its original position.
<div style="position: relative; width: 200px; height: 100px; border: 1px solid black;">
  <div style="position: relative; top: 20px; left: 20px; width: 50px; height: 50px; background-color: lightblue;">
    Relative
  </div>
</div>
This code moves the blue box 20 pixels down from its normal position.
Example 2: Absolute Positioning
When using position: absolute, the element is positioned relative to its nearest positioned ancestor (or the initial containing block if no positioned ancestor exists).
<div style="position: relative; width: 200px; height: 200px; border: 1px solid black;">
  <div style="position: absolute; top: 50px; left: 50px; width: 50px; height: 50px; background-color: lightcoral;">
    Absolute
  </div>
</div>
This code positions the red box 50 pixels from the top and left of its containing block (the outer div).
Example 3: Fixed Positioning
When using position: fixed, the element is positioned relative to the viewport. It remains in the same place even when the page is scrolled.
<div style="height: 500px; overflow: auto; border: 1px solid black;">
  <div style="position: fixed; top: 10px; left: 10px; width: 50px; height: 50px; background-color: lightgreen;">
    Fixed
  </div>
  <p>Scroll this box to see the fixed element stay in place.</p>
  <!-- More content here -->
  <p>More content here.</p>
  <p>More content here.</p>
  <p>More content here.</p>
  <p>More content here.</p>
</div>
This code keeps the green box fixed at the top-left corner of the viewport, even when the content is scrolled.
Example 4: Using Percentage Values
Percentage values are relative to the height of the containing block.
<div style="position: relative; width: 200px; height: 200px; border: 1px solid black;">
  <div style="position: absolute; top: 25%; left: 25%; width: 50px; height: 50px; background-color: orange;">
    25% Top
  </div>
</div>
This code positions the orange box 25% from the top and left of its containing block.
Example 5: Negative Values
Negative values can be used to move elements outside of their containing block.
<div style="position: relative; width: 200px; height: 200px; border: 1px solid black;">
  <div style="position: absolute; top: -20px; left: 50px; width: 50px; height: 50px; background-color: purple;">
    Negative Top
  </div>
</div>
This code moves the purple box 20 pixels above the top edge of its containing block.
Real-World Applications of the top Property
The top property is used in various scenarios, including:
- Creating Overlapping Elements: Implementing layered designs or creating visual effects with overlapping elements.
- Implementing Tooltips: Positioning tooltips relative to the hovered element.
- Building Navigation Bars: Creating fixed or sticky navigation bars that remain visible as the user scrolls.
- Implementing Modal Windows: Positioning modal windows in the center of the screen.
- Creating Dynamic Layouts: Adjusting element positions based on user interactions or screen size.
Use Case Example: Creating a Sticky Header
Let’s create a practical example that demonstrates how to use the top property with position: sticky to build a sticky header that stays at the top of the viewport when the user scrolls.
<div style="height: 200px; background-color: #f0f0f0; text-align: center; padding-top: 80px;">
    Initial Content
</div>

<div style="position: sticky; top: 0; background-color: #333; color: white; padding: 10px; text-align: center;">
    Sticky Header
</div>

<div style="height: 500px; background-color: #ddd; padding: 20px;">
    Scrollable Content
    <p>More content here.</p>
    <p>More content here.</p>
    <p>More content here.</p>
    <p>More content here.</p>
    <p>More content here.</p>
</div>
In this example, the position: sticky and top: 0 properties ensure that the header sticks to the top of the viewport once it reaches that point during scrolling.
This is a common technique for creating user-friendly navigation and ensuring important information remains visible as the user explores the page.
Browser Support
The top property enjoys excellent support across all modern web browsers, ensuring that your layouts will render consistently across various platforms.
Note: Always test your layouts across different browsers and devices to ensure a consistent user experience. 🧐
Conclusion
The top property is a fundamental tool in CSS for controlling the vertical positioning of elements. By understanding its syntax, possible values, and interaction with the position property, you can create precise and dynamic layouts that enhance the user experience. From creating overlapping elements to building sticky headers, the top property is an essential part of any web developer’s toolkit. Happy coding!
Related Posts
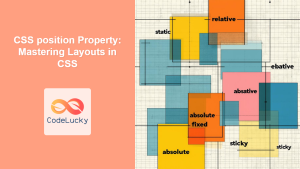
CSS position Property: Mastering Layouts in CSS
Understanding the CSS position Property: A Comprehensive Guide The position property in CSS is a fundamental tool for controlling the...
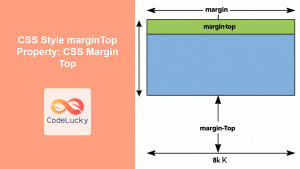
CSS Style marginTop Property: CSS Margin Top
Understanding the CSS marginTop Property: A Comprehensive Guide The marginTop property in CSS is used to set the top margin...
CSS Style height Property: CSS Height
Understanding the CSS height Property: A Comprehensive Guide The height property in CSS specifies the height of an element's content...
CSS Style right Property: CSS Right
Understanding the CSS right Property The CSS right property plays a crucial role in positioning elements within a web page....
CSS borderTop Property: CSS Border Top Style Guide
Understanding the CSS borderTop Property The borderTop property in CSS is a shorthand property used to set the width, style,...
CSS Style paddingTop Property: CSS Padding Top
Understanding the CSS padding-top Property The padding-top property in CSS defines the amount of space between the top edge of...

CSS Style left Property: CSS Left
CSS left Property: A Comprehensive Guide The CSS left property is a fundamental tool for web developers, enabling precise horizontal...
CSS bottom Property: CSS Bottom
Understanding the CSS bottom Property The CSS bottom property is a fundamental tool for controlling the vertical positioning of elements...

CSS Margin: Mastering Spacing in Web Design
CSS Margin: Mastering Spacing in Web Design In CSS, the margin property is fundamental for controlling the space around HTML...

CSS Style float Property: CSS Float
CSS float Property: A Comprehensive Guide The CSS float property is a fundamental tool for controlling the layout of elements...
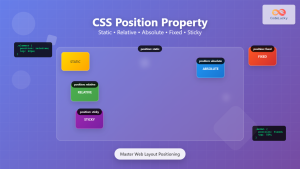
CSS Position Property: Complete Guide to Static, Relative, Absolute, Fixed & Sticky Positioning
The CSS position property is one of the most powerful tools for controlling element layout and creating sophisticated web designs....
CSS display Property: CSS Display
Understanding the CSS display Property: A Comprehensive Guide The display property in CSS is a cornerstone for controlling the layout...


