
Understanding the CSS right Property
The CSS right property plays a crucial role in positioning elements within a web page. It specifies the horizontal offset of a positioned element from the right edge of its containing block. This property is essential for creating precise and dynamic layouts, especially when combined with other positioning properties.
Purpose of the right Property
The primary purpose of the right property is to:
- Precisely control the horizontal positioning of elements.
- Create dynamic layouts that adjust to different screen sizes.
- Implement advanced positioning techniques in conjunction with
positionproperty.
Syntax and Values
The right property accepts a variety of values, each influencing the element’s positioning differently.
right: auto | length | percentage | inherit | initial | unset;
Here’s a breakdown of the possible values:
| Value | Description |
|---|---|
| `auto` | The browser calculates the position. This is the default value. |
| `length` | Specifies a fixed distance from the right edge, using units like `px`, `em`, `rem`, etc. Negative values are allowed. |
| `percentage` | Specifies a percentage of the containing block’s width. Negative values are allowed. |
| `inherit` | The property inherits its value from its parent element. |
| `initial` | Sets the property to its default value (`auto`). |
| `unset` | Resets the property to its inherited value if it inherits from its parent or to its initial value if not. |
How right Works with Different position Values
The behavior of the right property depends heavily on the position property of the element.
position: relative;:
The element is positioned relative to its normal position. Settingrightmoves the element to the left from its original right edge.position: absolute;:
The element is positioned relative to its nearest positioned ancestor (an ancestor with apositionvalue other thanstatic). If no such ancestor exists, it’s positioned relative to the initial containing block (the viewport).rightspecifies the distance from the right edge of the containing block.position: fixed;:
The element is positioned relative to the viewport, meaning it stays in the same place even when the page is scrolled.rightspecifies the distance from the right edge of the viewport.position: sticky;:
The element is positioned based on the user’s scroll position. It behaves likerelativeuntil it reaches a specified threshold, at which point it becomesfixed.rightdefines the offset from the right edge when the element becomes sticky.
Note: The right property has no effect on elements with position: static;, which is the default value. ⚠️
Basic Examples of the right Property
Let’s explore the practical usage of the right property with different positioning schemes through examples.
position: relative; Example
In this example, we’ll position an element relative to its normal position using the right property.
<div style="position: relative; width: 300px; height: 100px; border: 1px solid black;">
  <div id="relativeBox" style="position: relative; right: 50px; top: 20px; width: 100px; height: 50px; background-color: lightblue;">
    Relative
  </div>
</div>
The inner div is moved 50 pixels to the left from its original right edge, and 20px from the top.
position: absolute; Example
Here, we’ll position an element absolutely within a relatively positioned container.
<div style="position: relative; width: 300px; height: 200px; border: 1px solid black;">
  <div id="absoluteBox" style="position: absolute; right: 20px; top: 20px; width: 100px; height: 50px; background-color: lightcoral;">
    Absolute
  </div>
</div>
The inner div is positioned 20 pixels from the right and top edges of its containing block (the outer div).
position: fixed; Example
In this example, we’ll create a fixed element that stays in the same position relative to the viewport, even when scrolling.
<div style="height: 500px; overflow: auto; border: 1px solid black;">
  <div id="fixedBox" style="position: fixed; right: 20px; top: 20px; width: 100px; height: 50px; background-color: lightgreen;">
    Fixed
  </div>
  <p>Scroll down to see the fixed element remain in place.</p>
  <p>...</p> <!-- Add more content to enable scrolling -->
  <p>...</p>
  <p>...</p>
  <p>...</p>
  <p>...</p>
</div>
As you scroll, the div remains fixed at 20 pixels from the right and top edges of the viewport.
position: sticky; Example
Finally, we’ll demonstrate the sticky positioning, where an element behaves relatively until a scroll threshold is met, then becomes fixed.
<div style="height: 200px; overflow: auto; border: 1px solid black; position: relative;">
  <div id="stickyBox" style="position: sticky; top: 10px; right: 20px; width: 100px; height: 50px; background-color: lightseagreen;">
    Sticky
  </div>
  <p>Scroll down to see the sticky element become fixed.</p>
  <p>...</p>
  <p>...</p>
</div>
The div scrolls with the content until it is 10 pixels from the top of its containing block, at which point it becomes fixed.
Advanced Techniques and Use Cases
Creating Overlapping Elements
The right property, combined with position: relative or position: absolute, can be used to create overlapping elements for visual effects.
<div style="position: relative; width: 200px; height: 100px;">
  <div style="position: absolute; top: 0; left: 0; width: 100px; height: 50px; background-color: lightblue;"></div>
  <div style="position: absolute; top: 25px; right: 0; width: 100px; height: 50px; background-color: lightcoral; z-index: 1;"></div>
</div>
In this example, two div elements overlap, with the second div having a higher z-index to ensure it’s rendered on top.
Building Responsive Navigation
Using right to position navigation elements can create responsive designs that adapt to different screen sizes.
<nav style="position: relative; height: 50px; background-color: #f0f0f0;">
  <ul style="list-style-type: none; margin: 0; padding: 0; position: absolute; right: 10px; top: 0;">
    <li style="display: inline; margin-left: 20px;"><a href="#">Home</a></li>
    <li style="display: inline; margin-left: 20px;"><a href="#">About</a></li>
    <li style="display: inline; margin-left: 20px;"><a href="#">Services</a></li>
    <li style="display: inline; margin-left: 20px;"><a href="#">Contact</a></li>
  </ul>
</nav>
The navigation links are positioned to the right of the navigation bar using position: absolute and right: 10px;.
Creating Dynamic Animations
The right property can be dynamically adjusted using JavaScript to create animations and interactive effects.
<div id="animatedBox" style="position: relative; width: 100px; height: 100px; background-color: lightseagreen;"></div>

<script>
  const animatedBoxElem = document.getElementById('animatedBox');
  let pos = 0;
  const intervalIdAnimateRight = setInterval(frame, 20);

  function frame() {
    if (pos == 300) {
      clearInterval(intervalIdAnimateRight);
    } else {
      pos++;
      animatedBoxElem.style.right = pos + 'px';
    }
  }
</script>
This script gradually increases the right property of the div, creating a simple animation.
Tips and Best Practices
- Always specify a
positionvalue other thanstaticfor therightproperty to have an effect. - Use
rightin conjunction withleft,top, andbottomto precisely control element placement. - Consider the containing block when using
position: absoluteto avoid unexpected positioning. - Test your layouts on different screen sizes and devices to ensure responsiveness.
- Use
z-indexto manage the stacking order of overlapping elements.
Browser Support
The right property is widely supported across all modern web browsers, ensuring consistent behavior across different platforms.
Conclusion
The CSS right property is an essential tool for web developers, offering precise control over element positioning and enabling the creation of dynamic and responsive layouts. By understanding how right interacts with different position values and applying advanced techniques, you can build sophisticated web designs that enhance the user experience.
Related Posts

CSS Style left Property: CSS Left
CSS left Property: A Comprehensive Guide The CSS left property is a fundamental tool for web developers, enabling precise horizontal...
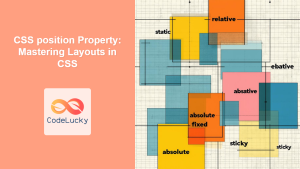
CSS position Property: Mastering Layouts in CSS
Understanding the CSS position Property: A Comprehensive Guide The position property in CSS is a fundamental tool for controlling the...
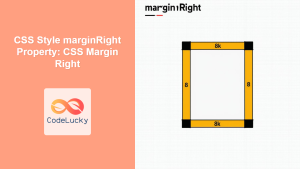
CSS Style marginRight Property: CSS Margin Right
Understanding the CSS marginRight Property The marginRight property in CSS is used to set the right margin of an element....
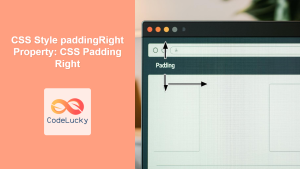
CSS Style paddingRight Property: CSS Padding Right
Understanding the CSS padding-right Property The padding-right property in CSS is used to set the amount of space between the...
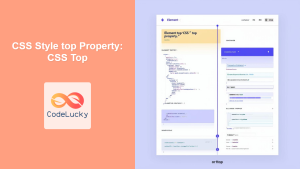
CSS Style top Property: CSS Top
Understanding the CSS top Property: A Comprehensive Guide The top property in CSS is used to specify the vertical position...
CSS display Property: CSS Display
Understanding the CSS display Property: A Comprehensive Guide The display property in CSS is a cornerstone for controlling the layout...
CSS Style marginLeft Property: CSS Margin Left
CSS marginLeft Property: Mastering the Left Margin The CSS marginLeft property is a fundamental tool for controlling the spacing around...
CSS Position Property: Complete Guide to Static, Relative, Absolute, Fixed & Sticky Positioning
The CSS position property is one of the most powerful tools for controlling element layout and creating sophisticated web designs....

CSS Style float Property: CSS Float
CSS float Property: A Comprehensive Guide The CSS float property is a fundamental tool for controlling the layout of elements...
CSS Display Property: Complete Guide to Block, Inline, and Inline-Block Elements
The CSS display property is one of the most fundamental concepts in web development, controlling how elements are rendered and...
CSS Style height Property: CSS Height
Understanding the CSS height Property: A Comprehensive Guide The height property in CSS specifies the height of an element's content...
CSS Style borderLeft Property: CSS Border Left
CSS border-left Property: A Comprehensive Guide The border-left property in CSS is a shorthand property used to set the width,...


