
CSS padding-left Property: A Comprehensive Guide
The padding-left property in CSS is used to set the amount of padding space on the left side of an element. Padding is the space between the element’s content and its border. This property is essential for controlling the visual spacing and layout of your web pages.
Purpose of the padding-left Property
The primary purpose of the padding-left property is to:
- Add space between the content and the left border of an element.
- Improve the readability and visual appeal of text and other content.
- Create a more balanced layout by controlling the spacing around elements.
Syntax
The padding-left property is specified as follows:
selector {
  padding-left: length | auto | initial | inherit;
}
Values
| Value | Description |
|---|---|
| `length` | Specifies a fixed padding in px, pt, cm, em, etc. Negative values are not allowed. |
| `auto` | The browser calculates the padding. Not typically useful for `padding-left`. |
| `initial` | Sets the property to its default value (0). |
| `inherit` | The element inherits the `padding-left` value from its parent element. |
Examples
Let’s explore various examples of how to use the padding-left property.
Example 1: Basic Usage with Pixel Values
This example demonstrates how to add a fixed amount of padding to the left side of a div element using pixel values.
<!DOCTYPE html>
<html>
<head>
<style>
#paddingLeftDiv1 {
  padding-left: 50px;
  border: 1px solid black;
  width: 200px;
}
</style>
</head>
<body>

<div id="paddingLeftDiv1">
  This div has a left padding of 50 pixels.
</div>

</body>
</html>
The output will show a div element with 50 pixels of space between the content and the left border.
Example 2: Using em Units
In this example, we use em units to define the padding-left. The em unit is relative to the font size of the element.
<!DOCTYPE html>
<html>
<head>
<style>
#paddingLeftDiv2 {
  padding-left: 2em;
  border: 1px solid black;
  width: 200px;
  font-size: 16px; /* Base font size */
}
</style>
</head>
<body>

<div id="paddingLeftDiv2">
  This div has a left padding of 2em (32 pixels).
</div>

</body>
</html>
The output will show a div element with a left padding of 32 pixels (2em * 16px).
Example 3: Inheriting padding-left from Parent
This example demonstrates how to inherit the padding-left value from the parent element.
<!DOCTYPE html>
<html>
<head>
<style>
#paddingLeftParent {
  padding-left: 30px;
  border: 1px solid black;
  width: 300px;
}

#paddingLeftChild {
  padding-left: inherit;
  border: 1px dashed red;
  width: 200px;
}
</style>
</head>
<body>

<div id="paddingLeftParent">
  Parent div
  <div id="paddingLeftChild">
    Child div (inherits padding-left from parent)
  </div>
</div>

</body>
</html>
The child div inherits the padding-left value of 30 pixels from its parent.
Example 4: Using padding-left with Text
This example shows how padding-left can be used to improve the readability of text within a p element.
<!DOCTYPE html>
<html>
<head>
<style>
#paddingLeftPara {
  padding-left: 20px;
  border: 1px solid black;
  width: 400px;
}
</style>
</head>
<body>

<p id="paddingLeftPara">
  This paragraph has a left padding of 20 pixels, which improves readability by adding space between the text and the left border.
</p>

</body>
</html>
The output will display a paragraph with a left padding of 20 pixels, making the text more visually appealing.
Example 5: Combining padding-left with Other Padding Properties
You can combine padding-left with other padding properties (padding-top, padding-right, padding-bottom) to control padding on all sides of an element.
<!DOCTYPE html>
<html>
<head>
<style>
#paddingLeftCombined {
  padding-top: 10px;
  padding-right: 20px;
  padding-bottom: 10px;
  padding-left: 30px;
  border: 1px solid black;
  width: 300px;
}
</style>
</head>
<body>

<div id="paddingLeftCombined">
  This div has different padding values for each side.
</div>

</body>
</html>
The output will show a div with different padding values for each side, demonstrating how to control padding individually.
Example 6: Using padding-left in Navigation Menus
padding-left can be used to space out items in a navigation menu, making it more readable and user-friendly.
<!DOCTYPE html>
<html>
<head>
<style>
#paddingLeftNav ul {
  list-style-type: none;
  margin: 0;
  padding: 0;
  overflow: hidden;
  background-color: #f0f0f0;
}

#paddingLeftNav li {
  float: left;
}

#paddingLeftNav li a {
  display: block;
  color: #333;
  text-align: center;
  padding: 14px 16px;
  text-decoration: none;
  padding-left: 25px; /* Add left padding for spacing */
}
</style>
</head>
<body>

<div id="paddingLeftNav">
  <ul>
    <li><a href="#">Home</a></li>
    <li><a href="#">About</a></li>
    <li><a href="#">Services</a></li>
    <li><a href="#">Contact</a></li>
  </ul>
</div>

</body>
</html>
The navigation links will have a left padding of 25 pixels, spacing them out for better readability.
Tips and Best Practices
- Use consistent units: Stick to a consistent unit type (e.g., pixels, ems) throughout your stylesheet to maintain visual consistency.
- Consider responsiveness: Use relative units (e.g., em, rem, %) for padding to ensure your layout adapts well to different screen sizes.
- Avoid negative values: Negative padding values are not allowed and can lead to unexpected results.
- Use shorthand property: Use the
paddingshorthand property when setting padding on all sides of an element for brevity. - Inspect with browser tools: Use your browser’s developer tools to inspect and adjust padding values in real-time for precise control. 🛠️
Conclusion
The padding-left property is a fundamental tool in CSS for controlling the spacing between an element’s content and its left border. By understanding its syntax, values, and practical applications, you can effectively manage the layout and visual appeal of your web pages. Use the examples and tips provided in this guide to enhance your CSS skills and create more engaging user experiences. Happy styling! 🎨
Related Posts
CSS Style paddingRight Property: CSS Padding Right
Understanding the CSS padding-right Property The padding-right property in CSS is used to set the amount of space between the...
CSS Style padding Property: CSS Padding
CSS Padding Property: A Comprehensive Guide The CSS padding property is a fundamental tool in web development, allowing you to...
CSS paddingBottom Property: CSS Padding Bottom
CSS paddingBottom Property: Mastering Bottom Padding The paddingBottom property in CSS is used to set the amount of padding space...
CSS Style paddingTop Property: CSS Padding Top
Understanding the CSS padding-top Property The padding-top property in CSS defines the amount of space between the top edge of...
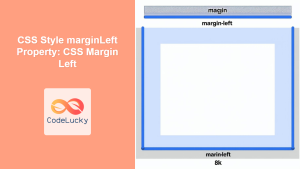
CSS Style marginLeft Property: CSS Margin Left
CSS marginLeft Property: Mastering the Left Margin The CSS marginLeft property is a fundamental tool for controlling the spacing around...
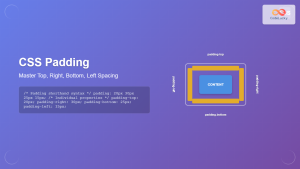
CSS Padding: Complete Guide to Top, Right, Bottom, Left Spacing Properties
CSS padding is one of the most fundamental properties for controlling spacing in web design. It creates space between an...
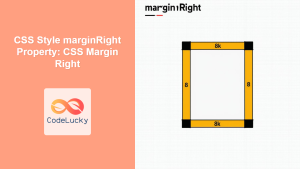
CSS Style marginRight Property: CSS Margin Right
Understanding the CSS marginRight Property The marginRight property in CSS is used to set the right margin of an element....

CSS Margin: Mastering Spacing in Web Design
CSS Margin: Mastering Spacing in Web Design In CSS, the margin property is fundamental for controlling the space around HTML...
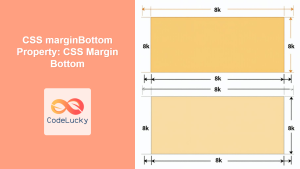
CSS marginBottom Property: CSS Margin Bottom
Understanding the CSS margin-bottom Property The margin-bottom property in CSS defines the space below an element. This margin is added...

CSS Style left Property: CSS Left
CSS left Property: A Comprehensive Guide The CSS left property is a fundamental tool for web developers, enabling precise horizontal...

CSS Margin: Complete Guide to Element Spacing and Margin Collapse
Understanding CSS Margin: The Foundation of Element Spacing CSS margin is one of the most fundamental properties for controlling spacing...
CSS borderRight Property: CSS Border Right
CSS border-right Property: A Comprehensive Guide The border-right property in CSS is used to set all the properties of an...


