
Understanding the CSS marginRight Property
The marginRight property in CSS is used to set the right margin of an element. Margins create space around elements, outside of any defined borders. Adjusting the marginRight allows you to control the spacing between an element’s right edge and the adjacent elements.
Purpose of marginRight
- Spacing: Adds space to the right side of an element, separating it from other elements or the edge of its container.
- Layout Control: Influences the horizontal layout of elements, ensuring proper spacing and alignment.
- Visual Hierarchy: Helps create visual balance and hierarchy by controlling the whitespace around elements.
Syntax
The marginRight property accepts several types of values:
/* Keyword values */
margin-right: auto;

/* <length> values */
margin-right: 10px;
margin-right: 2em;

/* <percentage> values */
margin-right: 5%;

/* Global values */
margin-right: inherit;
margin-right: initial;
margin-right: unset;
Values
| Value | Description |
|---|---|
| `auto` | The browser calculates the margin. This is often used to horizontally center block-level elements. |
| ` |
Specifies a fixed size for the margin. Positive, negative, and zero values are allowed. Examples: `10px`, `2em`, `0`. |
| ` |
Specifies the margin as a percentage of the width of the containing block. Examples: `5%`, `10%`. |
| `inherit` | The property inherits its value from its parent element. |
| `initial` | Sets the property to its default value (usually `0`). |
| `unset` | Resets the property to its inherited value if it inherits from its parent or to its initial value if not. |
Practical Examples
Let’s explore how to use the marginRight property with clear and concise examples.
Example 1: Basic Usage with Pixels
This example demonstrates setting a fixed margin on the right side of a div using pixel values.
<!DOCTYPE html>
<html>
<head>
  <title>marginRight Example 1</title>
  <style>
    .box_margin_right_1 {
      width: 100px;
      height: 100px;
      background-color: lightblue;
      margin-right: 20px;
      display: inline-block; /* Ensure elements are placed side by side */
    }

    .neighbor_margin_right_1 {
      width: 100px;
      height: 100px;
      background-color: lightcoral;
      display: inline-block; /* Ensure elements are placed side by side */
    }
  </style>
</head>
<body>
  <div class="box_margin_right_1">Box with Right Margin</div>
  <div class="neighbor_margin_right_1">Neighboring Box</div>
</body>
</html>
The box_margin_right_1 class applies a 20px margin to the right, creating space between the blue box and the coral box.
Example 2: Using Percentage Values
In this example, the marginRight is set as a percentage of the parent element’s width.
<!DOCTYPE html>
<html>
<head>
  <title>marginRight Example 2</title>
  <style>
    .container_margin_right_2 {
      width: 500px; /* Set a specific width for the container */
      border: 1px solid #000;
      padding: 10px;
    }

    .box_margin_right_2 {
      width: 100px;
      height: 100px;
      background-color: lightgreen;
      margin-right: 10%; /* 10% of the container's width */
      display: inline-block; /* Ensure elements are placed side by side */
    }

    .neighbor_margin_right_2 {
      width: 100px;
      height: 100px;
      background-color: lightsalmon;
      display: inline-block; /* Ensure elements are placed side by side */
    }
  </style>
</head>
<body>
  <div class="container_margin_right_2">
    <div class="box_margin_right_2">Box with Right Margin</div>
    <div class="neighbor_margin_right_2">Neighboring Box</div>
  </div>
</body>
</html>
Here, the box_margin_right_2 class has a marginRight of 10%, which is calculated based on the width of the container_margin_right_2 class (500px), resulting in a 50px right margin.
Example 3: Using auto to Push Element to the Left
The auto value can be used to automatically distribute available space. When used with marginRight, it can help push an element to the left within its container.
<!DOCTYPE html>
<html>
<head>
  <title>marginRight Example 3</title>
  <style>
    .container_margin_right_3 {
      width: 500px;
      border: 1px solid #000;
      padding: 10px;
    }

    .box_margin_right_3 {
      width: 100px;
      height: 100px;
      background-color: lightseagreen;
      margin-right: auto; /* Push the box to the left */
    }
  </style>
</head>
<body>
  <div class="container_margin_right_3">
    <div class="box_margin_right_3">Box with Auto Right Margin</div>
  </div>
</body>
</html>
In this case, marginRight: auto; makes the right margin take up all available space, effectively pushing the box to the left side of the container.
Example 4: Negative marginRight
Negative values can be used to overlap elements or reduce the space between them.
<!DOCTYPE html>
<html>
<head>
  <title>marginRight Example 4</title>
  <style>
    .box_margin_right_4 {
      width: 100px;
      height: 100px;
      background-color: lightcoral;
      margin-right: -30px; /* Negative margin to overlap */
      display: inline-block; /* Ensure elements are placed side by side */
    }

    .neighbor_margin_right_4 {
      width: 100px;
      height: 100px;
      background-color: lightgoldenrodyellow;
      display: inline-block; /* Ensure elements are placed side by side */
    }
  </style>
</head>
<body>
  <div class="box_margin_right_4">Box with Negative Right Margin</div>
  <div class="neighbor_margin_right_4">Neighboring Box</div>
</body>
</html>
The box_margin_right_4 class has a negative marginRight of -30px, causing it to overlap the neighbor_margin_right_4 box by 30 pixels.
Example 5: Using marginRight with Flexbox
Flexbox offers powerful layout capabilities. Here’s how marginRight works within a flex container.
<!DOCTYPE html>
<html>
<head>
  <title>marginRight Example 5</title>
  <style>
    .container_margin_right_5 {
      display: flex;
      width: 500px;
      border: 1px solid #000;
      padding: 10px;
    }

    .box_margin_right_5 {
      width: 100px;
      height: 100px;
      background-color: lightseagreen;
      margin-right: auto; /* Push the box to the left */
    }
  </style>
</head>
<body>
  <div class="container_margin_right_5">
    <div class="box_margin_right_5">Box with Auto Right Margin</div>
    <div>Another Box</div>
  </div>
</body>
</html>
In this Flexbox example, marginRight: auto; on the box_margin_right_5 div pushes it to the start of the flex container, with the remaining space distributed to the right.
Example 6: Real-World Layout Example
Creating a navigation bar with spacing using marginRight.
<!DOCTYPE html>
<html>
<head>
  <title>marginRight Example 6</title>
  <style>
    .nav_margin_right_6 ul {
      list-style: none;
      padding: 0;
      margin: 0;
    }

    .nav_margin_right_6 li {
      display: inline-block;
      margin-right: 20px;
    }

    .nav_margin_right_6 a {
      text-decoration: none;
      color: #333;
      font-weight: bold;
    }

    /* Remove margin from the last item */
    .nav_margin_right_6 li:last-child {
      margin-right: 0;
    }
  </style>
</head>
<body>
  <nav class="nav_margin_right_6">
    <ul>
      <li><a href="#">Home</a></li>
      <li><a href="#">About</a></li>
      <li><a href="#">Services</a></li>
      <li><a href="#">Contact</a></li>
    </ul>
  </nav>
</body>
</html>
This code creates a horizontal navigation bar with spacing between the links, achieved using marginRight on the li elements. The :last-child selector removes the margin from the last item to prevent extra space at the end.
Tips and Best Practices
- Resetting Styles: Browsers have default styles that can affect margins. Use a CSS reset (like Normalize.css) to ensure consistent styling across browsers.
- Box Model Awareness: Be mindful of the CSS box model, which includes content, padding, border, and margin. Margins add space outside the border.
- Specificity: Ensure your
marginRightstyles are not overridden by more specific CSS rules. - Mobile Responsiveness: Use percentage values or media queries to adjust margins for different screen sizes.
- Combining with other Margin Properties: You can use
margin-rightwith other margin properties such asmargin-top,margin-bottom, andmargin-leftto control the spacing around an element. - Use shorthand property
margin: It’s efficient to use shorthandmarginproperty. For example,margin: 10px 20px 30px 40px;sets top, right, bottom, and left margins respectively. If you want to set only the right margin and let other margins default, usemargin: 0; margin-right: 20px;.
Browser Support
The marginRight property is supported by all major browsers, including:
- Chrome
- Firefox
- Safari
- Edge
- Opera
- Internet Explorer (IE9+)
Conclusion
The marginRight property is a fundamental tool for controlling the spacing and layout of elements in CSS. By understanding its syntax, values, and practical applications, you can create well-structured and visually appealing web pages. This guide provides a comprehensive overview of how to effectively use marginRight to enhance your web development projects.
Related Posts
CSS Style marginLeft Property: CSS Margin Left
CSS marginLeft Property: Mastering the Left Margin The CSS marginLeft property is a fundamental tool for controlling the spacing around...
CSS Style paddingRight Property: CSS Padding Right
Understanding the CSS padding-right Property The padding-right property in CSS is used to set the amount of space between the...
CSS Style right Property: CSS Right
Understanding the CSS right Property The CSS right property plays a crucial role in positioning elements within a web page....

CSS Margin: Mastering Spacing in Web Design
CSS Margin: Mastering Spacing in Web Design In CSS, the margin property is fundamental for controlling the space around HTML...

CSS Style left Property: CSS Left
CSS left Property: A Comprehensive Guide The CSS left property is a fundamental tool for web developers, enabling precise horizontal...
CSS marginBottom Property: CSS Margin Bottom
Understanding the CSS margin-bottom Property The margin-bottom property in CSS defines the space below an element. This margin is added...
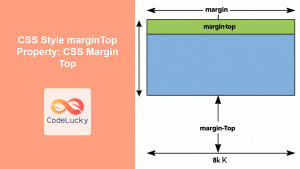
CSS Style marginTop Property: CSS Margin Top
Understanding the CSS marginTop Property: A Comprehensive Guide The marginTop property in CSS is used to set the top margin...

CSS borderRight Property: CSS Border Right
CSS border-right Property: A Comprehensive Guide The border-right property in CSS is used to set all the properties of an...
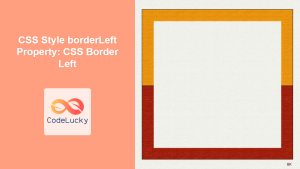
CSS Style borderLeft Property: CSS Border Left
CSS border-left Property: A Comprehensive Guide The border-left property in CSS is a shorthand property used to set the width,...
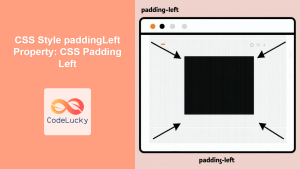
CSS Style paddingLeft Property: CSS Padding Left
CSS padding-left Property: A Comprehensive Guide The padding-left property in CSS is used to set the amount of padding space...
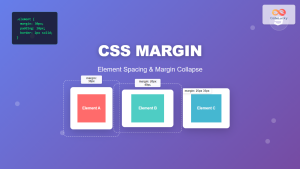
CSS Margin: Complete Guide to Element Spacing and Margin Collapse
Understanding CSS Margin: The Foundation of Element Spacing CSS margin is one of the most fundamental properties for controlling spacing...

CSS borderRightColor Property: CSS Border Right Color
Understanding the borderRightColor Property in CSS The borderRightColor property in CSS is used to set the color of the right...


