
Understanding the CSS padding-top Property
The padding-top property in CSS defines the amount of space between the top edge of an element’s content and its top border. This property is crucial for controlling the visual spacing and layout of elements on a webpage, ensuring content isn’t cramped against the edges of its container. It accepts various length and percentage values, providing flexibility in design.
Purpose of the padding-top Property
The padding-top property serves the following primary purposes:
- Spacing: Adds space above the content inside an element.
- Layout Control: Helps in creating balanced and visually appealing layouts.
- Readability: Improves the readability of text by providing whitespace around it.
- Aesthetics: Enhances the overall aesthetic appeal of a webpage by controlling element spacing.
Syntax of padding-top
The padding-top property is specified as follows:
padding-top: value;
Possible Values for padding-top
| Value | Description |
|---|---|
| `length` | Specifies a fixed amount of padding. Possible units are `px`, `em`, `rem`, `pt`, `cm`, etc. |
| `percentage` | Specifies the padding as a percentage of the width of the containing block. |
| `auto` | Not applicable. The `auto` value has no effect on the `padding-top` property. |
| `inherit` | Specifies that the `padding-top` should be inherited from its parent element. |
| `initial` | Sets the property to its default value (0). |
| `unset` | Resets the property to its inherited value if it inherits from its parent or to its initial value if not. |
Practical Examples of padding-top
Let’s explore some practical examples to understand how the padding-top property works.
Example 1: Using Pixel Values
This example demonstrates setting a fixed padding-top of 20px to a <div> element.
<!DOCTYPE html>
<html>
  <head>
    <title>padding-top Example (Pixels)</title>
    <style>
      #box1 {
        width: 200px;
        height: 100px;
        background-color: #f0f0f0;
        border: 1px solid #333;
        padding-top: 20px;
      }
    </style>
  </head>
  <body>
    <div id="box1">This is a box with 20px padding on top.</div>
  </body>
</html>
Output:
The content inside the div will have a 20-pixel space above it.
Example 2: Using Percentage Values
This example shows setting a padding-top of 10% to a <div> element. The padding is calculated as 10% of the width of the containing block.
<!DOCTYPE html>
<html>
  <head>
    <title>padding-top Example (Percentage)</title>
    <style>
      #container2 {
        width: 400px;
        border: 1px solid #333;
      }

      #box2 {
        width: 100%;
        height: 100px;
        background-color: #f0f0f0;
        border: 1px solid #333;
        padding-top: 10%; /* 10% of the container's width (400px) */
      }
    </style>
  </head>
  <body>
    <div id="container2">
      <div id="box2">This box has a padding-top of 10%.</div>
    </div>
  </body>
</html>
Output:
The padding-top will be 40px (10% of 400px).
Example 3: Using inherit Value
This example demonstrates inheriting the padding-top value from the parent element.
<!DOCTYPE html>
<html>
  <head>
    <title>padding-top Example (Inherit)</title>
    <style>
      #parent3 {
        padding-top: 30px;
        border: 1px solid #333;
        width: 300px;
      }

      #child3 {
        background-color: #f0f0f0;
        border: 1px solid #333;
        padding-top: inherit; /* Inherits 30px from parent */
      }
    </style>
  </head>
  <body>
    <div id="parent3">
      <div id="child3">This box inherits its padding-top from the parent.</div>
    </div>
  </body>
</html>
Output:
The child div will have a padding-top of 30px, inherited from the parent div.
Example 4: Applying padding-top to Text Elements
Applying padding-top to text elements like <p> or <h1> can improve readability by adding space above the text.
<!DOCTYPE html>
<html>
  <head>
    <title>padding-top Example (Text)</title>
    <style>
      #text4 {
        width: 300px;
        border: 1px solid #333;
        padding-top: 15px;
        background-color: #f0f0f0;
      }
    </style>
  </head>
  <body>
    <p id="text4">
      This paragraph has a padding-top of 15px to add space above the text.
    </p>
  </body>
</html>
Output:
The paragraph will have a 15-pixel space above the text.
Example 5: Using padding-top in Navigation Menus
padding-top can be used to vertically align navigation menu items.
<!DOCTYPE html>
<html>
  <head>
    <title>padding-top Example (Navigation)</title>
    <style>
      #nav5 {
        background-color: #f0f0f0;
        border: 1px solid #333;
        width: 300px;
      }

      #nav5 ul {
        list-style-type: none;
        margin: 0;
        padding: 0;
      }

      #nav5 li {
        display: inline;
        padding-top: 10px;
        padding-bottom: 10px;
        padding-left: 15px;
        padding-right: 15px;
      }
    </style>
  </head>
  <body>
    <nav id="nav5">
      <ul>
        <li><a href="#">Home</a></li>
        <li><a href="#">About</a></li>
        <li><a href="#">Services</a></li>
        <li><a href="#">Contact</a></li>
      </ul>
    </nav>
  </body>
</html>
Output:
The navigation items will have 10px padding on top and bottom.
Real-World Applications of padding-top
The padding-top property is used in various real-world scenarios:
- Websites and Layouts: Creating visually balanced website layouts.
- Form Design: Adding space above form fields for better user experience.
- Content Blocks: Controlling spacing in content blocks to enhance readability.
- Navigation Menus: Aligning navigation items vertically within the menu.
- UI Elements: Spacing elements in user interfaces for aesthetic appeal.
Important Considerations
- Box Model: Understand how
padding-topaffects the overall size of an element according to the CSS box model. - Percentage Values: Be aware that percentage values are calculated based on the width of the containing block.
- Inheritance: When using
inherit, ensure the parent element has a definedpadding-topvalue. - Responsiveness: Use relative units like
emor percentages for responsive designs.
Browser Support
The padding-top property is supported by all modern web browsers, ensuring consistent rendering across different platforms.
Conclusion
The padding-top property in CSS is a fundamental tool for controlling the spacing above an element’s content. By understanding its syntax, possible values, and practical applications, you can create visually appealing and well-structured web pages. From basic spacing to complex layout designs, mastering padding-top is essential for any web developer.
Related Posts
CSS Style marginTop Property: CSS Margin Top
Understanding the CSS marginTop Property: A Comprehensive Guide The marginTop property in CSS is used to set the top margin...
CSS Style padding Property: CSS Padding
CSS Padding Property: A Comprehensive Guide The CSS padding property is a fundamental tool in web development, allowing you to...
CSS Style paddingRight Property: CSS Padding Right
Understanding the CSS padding-right Property The padding-right property in CSS is used to set the amount of space between the...
CSS paddingBottom Property: CSS Padding Bottom
CSS paddingBottom Property: Mastering Bottom Padding The paddingBottom property in CSS is used to set the amount of padding space...
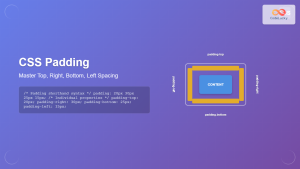
CSS Padding: Complete Guide to Top, Right, Bottom, Left Spacing Properties
CSS padding is one of the most fundamental properties for controlling spacing in web design. It creates space between an...

CSS Margin: Mastering Spacing in Web Design
CSS Margin: Mastering Spacing in Web Design In CSS, the margin property is fundamental for controlling the space around HTML...
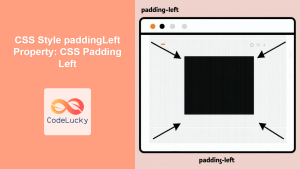
CSS Style paddingLeft Property: CSS Padding Left
CSS padding-left Property: A Comprehensive Guide The padding-left property in CSS is used to set the amount of padding space...
CSS Style height Property: CSS Height
Understanding the CSS height Property: A Comprehensive Guide The height property in CSS specifies the height of an element's content...
CSS Style top Property: CSS Top
Understanding the CSS top Property: A Comprehensive Guide The top property in CSS is used to specify the vertical position...
CSS borderTop Property: CSS Border Top Style Guide
Understanding the CSS borderTop Property The borderTop property in CSS is a shorthand property used to set the width, style,...
CSS marginBottom Property: CSS Margin Bottom
Understanding the CSS margin-bottom Property The margin-bottom property in CSS defines the space below an element. This margin is added...
CSS borderSpacing Property: CSS Border Spacing
Understanding the CSS border-spacing Property The CSS border-spacing property specifies the distance between the borders of adjacent table cells in...


