
Understanding the CSS padding-right Property
The padding-right property in CSS is used to set the amount of space between the content of an element and its right border. This property is an integral part of the CSS box model, allowing precise control over the spacing inside an element. Understanding padding-right is crucial for creating visually appealing and well-structured web layouts.
Purpose of the padding-right Property
The primary purpose of the padding-right property is to:
- Control the spacing between an element’s content and its right border.
- Enhance the visual appearance of elements by adding whitespace.
- Improve the readability and aesthetics of text and other content within elements.
- Ensure consistent spacing and alignment across different elements and layouts.
Syntax
The padding-right property accepts several types of values:
padding-right: length | auto | initial | inherit;
| Value | Description |
|---|---|
| `length` | Specifies a fixed padding in px, em, rem, pt, cm, etc. Negative values are invalid. |
| `auto` | The browser calculates the padding. This has no effect on padding right. |
| `initial` | Sets the property to its default value (usually `0`). |
| `inherit` | Inherits the `padding-right` value from its parent element. |
Practical Examples of padding-right
Let’s explore some practical examples to understand how the padding-right property works.
Example 1: Basic padding-right with Pixel Values
This example demonstrates how to set a fixed padding-right using pixel values.
<!DOCTYPE html>
<html>
<head>
<style>
#paddingRightBox1 {
  padding-right: 20px;
  border: 1px solid black;
  width: 200px;
}
</style>
</head>
<body>

<div id="paddingRightBox1">
  This box has a padding-right of 20px.
</div>

</body>
</html>
The right side of the text has 20px padding.
Example 2: Using padding-right with em Units
This example sets the padding-right using em units, which are relative to the element’s font size.
<!DOCTYPE html>
<html>
<head>
<style>
#paddingRightBox2 {
  padding-right: 1em;
  border: 1px solid black;
  width: 200px;
  font-size: 16px;
}
</style>
</head>
<body>

<div id="paddingRightBox2">
  This box has a padding-right of 1em.
</div>

</body>
</html>
The right side of the text has padding relative to the font size.
Example 3: padding-right with inherit Value
This example shows how to inherit the padding-right value from the parent element.
<!DOCTYPE html>
<html>
<head>
<style>
#parentBox {
  padding-right: 30px;
  border: 1px solid black;
  width: 300px;
}

#childBox {
  padding-right: inherit;
  border: 1px dashed red;
  width: 200px;
}
</style>
</head>
<body>

<div id="parentBox">
  This is the parent box with padding-right of 30px.
  <div id="childBox">
    This is the child box inheriting padding-right from the parent.
  </div>
</div>

</body>
</html>
The child box inherits the padding from the parent.
Example 4: Combining padding-right with Other Padding Properties
This example demonstrates how padding-right can be combined with other padding properties for comprehensive control.
<!DOCTYPE html>
<html>
<head>
<style>
#combinedPaddingBox {
  padding-top: 10px;
  padding-right: 20px;
  padding-bottom: 10px;
  padding-left: 15px;
  border: 1px solid black;
  width: 200px;
}
</style>
</head>
<body>

<div id="combinedPaddingBox">
  This box has different padding values for each side.
</div>

</body>
</html>
Each side of the box has different padding.
Example 5: Using padding-right to Align Text in an Input Field
This example demonstrates using padding-right to adjust the text alignment in an input field.
<!DOCTYPE html>
<html>
<head>
<style>
#inputField {
  padding-right: 10px;
  text-align: right;
  width: 150px;
}
</style>
</head>
<body>

<input type="text" id="inputField" value="Align Right">

</body>
</html>
The text is aligned to the right with some padding.
Example 6: Creating Visual Hierarchy with padding-right
Here’s an example demonstrating how to use padding-right to create visual hierarchy and spacing between elements.
<!DOCTYPE html>
<html>
<head>
<style>
.container {
  width: 400px;
  border: 1px solid #ccc;
  padding: 20px;
}

.item {
  background-color: #f0f0f0;
  margin-bottom: 10px;
  padding: 10px;
  padding-right: 30px; /* Add padding to create space */
}

.item:last-child {
  margin-bottom: 0;
}
</style>
</head>
<body>

<div class="container">
  <div class="item">Item 1</div>
  <div class="item">Item 2</div>
  <div class="item">Item 3</div>
</div>

</body>
</html>
The items in the container have padding on the right side, creating visual space.
Real-World Applications of padding-right
The padding-right property is used in various real-world scenarios, including:
- Form Design: Adding space between form labels and input fields.
- Navigation Menus: Creating spacing between menu items.
- Content Layout: Enhancing the visual structure of articles and blog posts.
- Button Design: Providing visual breathing room around button text.
- UI Components: Improving the aesthetics and usability of custom UI elements.
Browser Support
The padding-right property is supported by all modern web browsers.
Conclusion
The padding-right property is an essential CSS tool for controlling the spacing on the right side of an element. By understanding its syntax and practical applications, you can create visually appealing, well-structured, and user-friendly web layouts. From basic spacing adjustments to complex design implementations, padding-right is a key property for any web developer.
Related Posts
CSS Style padding Property: CSS Padding
CSS Padding Property: A Comprehensive Guide The CSS padding property is a fundamental tool in web development, allowing you to...
CSS Style paddingLeft Property: CSS Padding Left
CSS padding-left Property: A Comprehensive Guide The padding-left property in CSS is used to set the amount of padding space...
CSS Style marginRight Property: CSS Margin Right
Understanding the CSS marginRight Property The marginRight property in CSS is used to set the right margin of an element....
CSS Style paddingTop Property: CSS Padding Top
Understanding the CSS padding-top Property The padding-top property in CSS defines the amount of space between the top edge of...
CSS borderRight Property: CSS Border Right
CSS border-right Property: A Comprehensive Guide The border-right property in CSS is used to set all the properties of an...
CSS paddingBottom Property: CSS Padding Bottom
CSS paddingBottom Property: Mastering Bottom Padding The paddingBottom property in CSS is used to set the amount of padding space...
CSS Style right Property: CSS Right
Understanding the CSS right Property The CSS right property plays a crucial role in positioning elements within a web page....

CSS Style left Property: CSS Left
CSS left Property: A Comprehensive Guide The CSS left property is a fundamental tool for web developers, enabling precise horizontal...
CSS Style borderLeft Property: CSS Border Left
CSS border-left Property: A Comprehensive Guide The border-left property in CSS is a shorthand property used to set the width,...
CSS Style marginLeft Property: CSS Margin Left
CSS marginLeft Property: Mastering the Left Margin The CSS marginLeft property is a fundamental tool for controlling the spacing around...

CSS Margin: Mastering Spacing in Web Design
CSS Margin: Mastering Spacing in Web Design In CSS, the margin property is fundamental for controlling the space around HTML...
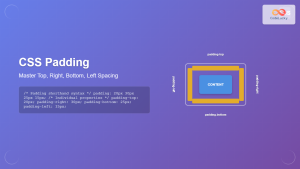
CSS Padding: Complete Guide to Top, Right, Bottom, Left Spacing Properties
CSS padding is one of the most fundamental properties for controlling spacing in web design. It creates space between an...


