
Understanding the CSS bottom Property
The CSS bottom property is a fundamental tool for controlling the vertical positioning of elements in web layouts. It specifies the distance between the bottom edge of an element and the bottom edge of its containing block. This property is particularly useful when working with positioned elements, allowing you to precisely anchor elements to the bottom of their containers.
Purpose of the bottom Property
The primary purpose of the bottom property is to:
- Vertically position elements relative to the bottom edge of their containing block.
- Create fixed footers that always stay at the bottom of the viewport.
- Implement overlapping effects and dynamic layouts.
- Precisely control the placement of absolutely positioned elements.
Syntax
The bottom property accepts various values to define the distance from the bottom edge.
selector {
  bottom: auto | length | percentage | initial | inherit;
}
Values
| Value | Description |
|---|---|
| `auto` | The browser calculates the position of the element. This is the default value. |
| `length` | Specifies a fixed distance from the bottom edge using CSS units like `px`, `em`, `rem`, etc. Negative values are allowed. |
| `percentage` | Specifies a percentage of the containing block’s height. Negative values are allowed. |
| `initial` | Sets the property to its default value (`auto`). |
| `inherit` | Inherits the value from its parent element. |
Note: The bottom property only works when the position property is set to absolute, fixed, relative, or sticky. 💡
Practical Examples
Let’s explore the bottom property with a series of examples. Each example includes the HTML and CSS code to demonstrate the property’s usage.
Example 1: Absolute Positioning
This example demonstrates how to use the bottom property with absolute positioning to place an element a certain distance from the bottom of its containing block.
<div
  style="position: relative; width: 300px; height: 200px; border: 1px solid black;"
>
  <div
    style="position: absolute; bottom: 20px; left: 20px; background-color: lightblue; padding: 10px;"
  >
    Bottom Element
  </div>
</div>
This will position the “Bottom Element” 20 pixels from the bottom and 20 pixels from the left of its containing block.
Example 2: Fixed Footer
Create a fixed footer that sticks to the bottom of the viewport, even when the content is shorter than the screen height.
<div
  style="min-height: 150px; margin-bottom: 50px; border: 1px solid black;"
>
  Content here
</div>
<div
  style="position: fixed; bottom: 0; left: 0; width: 100%; background-color: #f0f0f0; text-align: center; padding: 10px;"
>
  Footer
</div>
This positions the “Footer” at the bottom of the viewport, ensuring it remains visible regardless of the content above.
Example 3: Relative Positioning
Use bottom with relative positioning to adjust an element’s position from its normal location in the document flow.
<div style="border: 1px solid black; padding: 10px;">
  Normal Element
  <div style="position: relative; bottom: -10px; background-color: lightgreen;">
    Moved Element
  </div>
</div>
This shifts the “Moved Element” 10 pixels upwards from its original position within the containing block.
Example 4: Percentage Value
Specify the bottom value as a percentage of the containing block’s height.
<div
  style="position: relative; width: 300px; height: 300px; border: 1px solid black;"
>
  <div
    style="position: absolute; bottom: 10%; left: 10%; background-color: lightcoral; padding: 10px;"
  >
    Percentage Bottom
  </div>
</div>
The “Percentage Bottom” element is positioned 10% of the containing block’s height from the bottom edge.
Example 5: Dynamic Adjustment with JavaScript
Adjust the bottom property dynamically using JavaScript to create interactive effects.
<div
  style="position: relative; width: 200px; height: 200px; border: 1px solid black;"
>
  <div
    id="dynamicElement"
    style="position: absolute; bottom: 0; left: 0; background-color: orange; width: 50px; height: 50px;"
  ></div>
</div>
<button id="moveButton">Move Up</button>

<script>
  const dynamicElementJs = document.getElementById("dynamicElement");
  const moveButtonJs = document.getElementById("moveButton");
  let bottomValueJs = 0;

  moveButtonJs.addEventListener("click", () => {
    bottomValueJs += 10;
    dynamicElementJs.style.bottom = bottomValueJs + "px";
  });
</script>
Clicking the “Move Up” button will increase the bottom value of the orange square, moving it upwards within its containing block.
Real-World Applications of the bottom Property
The bottom property is used in various scenarios:
- Fixed Navigation: Keeping navigation bars at the bottom of the screen.
- Chat Interfaces: Anchoring chat input boxes to the bottom of the chat window.
- Image Galleries: Positioning captions at the bottom of images.
- Modal Windows: Dynamically positioning modal windows relative to the viewport.
Tips and Best Practices
- Always ensure the element has a
positionproperty set toabsolute,fixed,relative, orstickyfor thebottomproperty to take effect. - Use
z-indexto control the stacking order of elements when using absolute or fixed positioning. - Test your layouts on different screen sizes and devices to ensure responsiveness.
- Consider using
calc()to combine different units for precise positioning.
Browser Support
The bottom property is widely supported across all modern browsers, ensuring consistent rendering across different platforms.
Note: While the bottom property is well-supported, always test your layouts in various browsers to ensure compatibility and a consistent user experience. 🧐
Conclusion
The CSS bottom property is a powerful tool for controlling the vertical positioning of elements, enabling the creation of dynamic and visually appealing web layouts. By understanding its syntax, values, and practical applications, you can effectively leverage the bottom property to enhance the user experience and design sophisticated web interfaces. Happy styling!
Related Posts
CSS border-bottom Property: CSS Border Bottom
Understanding the CSS border-bottom Property The border-bottom property in CSS is used to set the style, color, and width of...
CSS marginBottom Property: CSS Margin Bottom
Understanding the CSS margin-bottom Property The margin-bottom property in CSS defines the space below an element. This margin is added...
CSS Style top Property: CSS Top
Understanding the CSS top Property: A Comprehensive Guide The top property in CSS is used to specify the vertical position...
CSS Style height Property: CSS Height
Understanding the CSS height Property: A Comprehensive Guide The height property in CSS specifies the height of an element's content...
CSS Style right Property: CSS Right
Understanding the CSS right Property The CSS right property plays a crucial role in positioning elements within a web page....
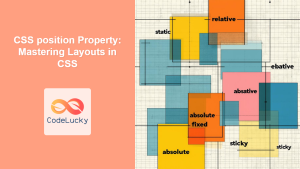
CSS position Property: Mastering Layouts in CSS
Understanding the CSS position Property: A Comprehensive Guide The position property in CSS is a fundamental tool for controlling the...
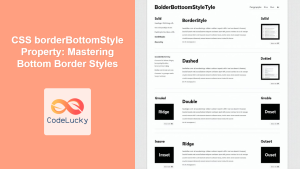
CSS borderBottomStyle Property: Mastering Bottom Border Styles
CSS borderBottomStyle Property: Mastering Bottom Border Styles The borderBottomStyle property in CSS is used to set the style of the...
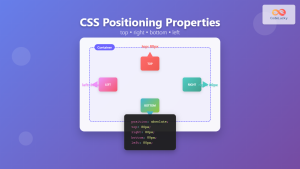
CSS Top, Right, Bottom, Left: Complete Guide to Positioning Offset Properties
CSS positioning offset properties—top, right, bottom, and left—are fundamental tools for precisely controlling element placement on web pages. These properties...
CSS vertical-align Property: CSS Vertical Align
CSS vertical-align Property: Mastering Vertical Alignment The CSS vertical-align property specifies the vertical alignment of an inline or table-cell box....

CSS Style left Property: CSS Left
CSS left Property: A Comprehensive Guide The CSS left property is a fundamental tool for web developers, enabling precise horizontal...
CSS Position Property: Complete Guide to Static, Relative, Absolute, Fixed & Sticky Positioning
The CSS position property is one of the most powerful tools for controlling element layout and creating sophisticated web designs....

CSS Margin: Mastering Spacing in Web Design
CSS Margin: Mastering Spacing in Web Design In CSS, the margin property is fundamental for controlling the space around HTML...


