
CSS border-image Property: A Comprehensive Guide
The CSS border-image property allows you to use an image as the border of an HTML element, providing a flexible and visually appealing alternative to solid or dashed borders. This property offers a range of customization options, enabling you to create intricate and unique borders that enhance the overall design of your web page. This guide covers the syntax, values, and practical applications of the border-image property.
What is the border-image Property?
The border-image property is a shorthand property that sets all the border-image-* properties at once. These properties include:
border-image-source: Specifies the image to be used as the border.border-image-slice: Specifies how to slice the image into regions.border-image-width: Specifies the width of the border image.border-image-outset: Specifies how far the border image extends beyond the element.border-image-repeat: Specifies how the edge regions of the source image are adjusted to fit the dimensions of the border image.
Purpose of the border-image Property
The primary purpose of the border-image property is to:
- Use images as borders to create visually rich and custom designs.
- Provide control over how the image is sliced and applied to the element’s border.
- Enhance the aesthetic appeal of web elements with unique border styles.
- Simplify the process of creating complex border designs with a single property.
Syntax of the border-image Property
The border-image property can be defined using a shorthand or individual properties. Here’s the general syntax:
border-image: source slice width outset repeat;
Values
| Value | Description |
|---|---|
| `source` | Specifies the path to the image file. Use `url()` or `none`. |
| `slice` | Specifies the offsets to divide the image into nine regions: four corners, four edges, and a middle region. Values can be numbers or percentages. |
| `width` | Specifies the width of the border image. Values can be `auto`, ` |
| `outset` | Specifies the amount by which the border image area extends beyond the border box. Values can be ` |
| `repeat` | Specifies how the edge regions of the source image are adjusted to fit the dimensions of the border image. Values can be `stretch`, `repeat`, or `round`. |
| `initial` | Sets the property to its default value. |
| `inherit` | Inherits this property from its parent element. |
Examples of Using the border-image Property
Let’s explore several examples demonstrating how to use the border-image property to create various border styles.
Basic Usage
This example demonstrates the basic usage of the border-image property with a simple image.
<!DOCTYPE html>
<html>
  <head>
    <title>Basic Border Image</title>
    <style>
      #borderImageExample1 {
        border: 20px solid transparent;
        width: 300px;
        height: 150px;
        padding: 20px;
        border-image: url("https://www.w3schools.com/cssref/border.png") 30
          round;
      }
    </style>
  </head>
  <body>
    <div id="borderImageExample1">
      This is a div with a border image.
    </div>
  </body>
</html>
This code applies a border image from a specified URL, slices the image, and sets the repeat style.
Using Different Repeat Values
This example shows how different repeat values (stretch, repeat, and round) affect the border image.
<!DOCTYPE html>
<html>
  <head>
    <title>Border Image Repeat</title>
    <style>
      .borderImageContainer {
        border: 20px solid transparent;
        width: 200px;
        height: 100px;
        padding: 20px;
        margin: 20px;
        display: inline-block;
      }

      #borderImageExample2Stretch {
        border-image: url("https://www.w3schools.com/cssref/border.png") 30
          stretch;
      }

      #borderImageExample2Repeat {
        border-image: url("https://www.w3schools.com/cssref/border.png") 30
          repeat;
      }

      #borderImageExample2Round {
        border-image: url("https://www.w3schools.com/cssref/border.png") 30
          round;
      }
    </style>
  </head>
  <body>
    <div
      class="borderImageContainer"
      id="borderImageExample2Stretch"
    >
      Stretch
    </div>
    <div
      class="borderImageContainer"
      id="borderImageExample2Repeat"
    >
      Repeat
    </div>
    <div
      class="borderImageContainer"
      id="borderImageExample2Round"
    >
      Round
    </div>
  </body>
</html>
This code demonstrates the visual differences between stretch, repeat, and round repeat values.
Adjusting the Slice Value
This example demonstrates how adjusting the slice value changes the appearance of the border image.
<!DOCTYPE html>
<html>
  <head>
    <title>Border Image Slice</title>
    <style>
      .borderImageContainer {
        border: 20px solid transparent;
        width: 200px;
        height: 100px;
        padding: 20px;
        margin: 20px;
        display: inline-block;
      }

      #borderImageExample3Slice1 {
        border-image: url("https://www.w3schools.com/cssref/border.png") 10
          round;
      }

      #borderImageExample3Slice2 {
        border-image: url("https://www.w3schools.com/cssref/border.png") 30
          round;
      }

      #borderImageExample3Slice3 {
        border-image: url("https://www.w3schools.com/cssref/border.png") 50
          round;
      }
    </style>
  </head>
  <body>
    <div
      class="borderImageContainer"
      id="borderImageExample3Slice1"
    >
      Slice 10
    </div>
    <div
      class="borderImageContainer"
      id="borderImageExample3Slice2"
    >
      Slice 30
    </div>
    <div
      class="borderImageContainer"
      id="borderImageExample3Slice3"
    >
      Slice 50
    </div>
  </body>
</html>
This code demonstrates the impact of different slice values on the border image.
Using border-image-width and border-image-outset
This example demonstrates how to use border-image-width and border-image-outset to control the size and position of the border image.
<!DOCTYPE html>
<html>
  <head>
    <title>Border Image Width and Outset</title>
    <style>
      #borderImageExample4 {
        border: 20px solid transparent;
        width: 300px;
        height: 150px;
        padding: 20px;
        border-image: url("https://www.w3schools.com/cssref/border.png") 30;
        border-image-width: 30px;
        border-image-outset: 20px;
      }
    </style>
  </head>
  <body>
    <div id="borderImageExample4">
      This is a div with adjusted border image width and outset.
    </div>
  </body>
</html>
This code sets the width and outset of the border image, providing more control over its appearance.
Shorthand vs. Longhand Properties
This example demonstrates the difference between using the shorthand border-image property and the longhand properties.
<!DOCTYPE html>
<html>
  <head>
    <title>Shorthand vs Longhand</title>
    <style>
      #borderImageExample5Shorthand {
        border: 20px solid transparent;
        width: 300px;
        height: 150px;
        padding: 20px;
        border-image: url("https://www.w3schools.com/cssref/border.png") 30
          round;
      }

      #borderImageExample5Longhand {
        border: 20px solid transparent;
        width: 300px;
        height: 150px;
        padding: 20px;
        border-image-source: url("https://www.w3schools.com/cssref/border.png");
        border-image-slice: 30;
        border-image-repeat: round;
      }
    </style>
  </head>
  <body>
    <h2>Shorthand</h2>
    <div id="borderImageExample5Shorthand">
      This is a div with a border image using shorthand property.
    </div>

    <h2>Longhand</h2>
    <div id="borderImageExample5Longhand">
      This is a div with a border image using longhand properties.
    </div>
  </body>
</html>
This code shows how to achieve the same result using both shorthand and longhand properties.
Real-World Applications of the border-image Property
The border-image property is used in various scenarios to enhance the visual appeal of web elements:
- Custom UI Elements: Creating unique borders for buttons, panels, and other UI components.
- Decorative Borders: Adding decorative borders to sections, articles, and other content areas.
- Themed Designs: Implementing themed designs with custom border images that match the overall aesthetic.
- Highlighting Elements: Using border images to highlight important elements or call-to-action sections.
Use Case Example: Creating a Decorative Navigation Menu
Let’s create a practical example that demonstrates how to use the border-image property to style a navigation menu. This example shows how to combine various CSS features to create a visually appealing navigation bar.
<!DOCTYPE html>
<html>
  <head>
    <title>Decorative Navigation Menu</title>
    <style>
      nav {
        width: 80%;
        margin: 20px auto;
        background-color: #f0f0f0;
        border: 25px solid transparent;
        border-image: url("https://www.w3schools.com/cssref/border.png") 40
          round;
        padding: 10px;
      }

      nav ul {
        list-style: none;
        padding: 0;
        margin: 0;
        display: flex;
        justify-content: space-around;
      }

      nav a {
        text-decoration: none;
        color: #333;
        font-weight: bold;
        padding: 10px 15px;
        border-radius: 5px;
        transition: background-color 0.3s ease;
      }

      nav a:hover {
        background-color: #ddd;
      }
    </style>
  </head>
  <body>
    <nav>
      <ul>
        <li><a href="#">Home</a></li>
        <li><a href="#">About</a></li>
        <li><a href="#">Services</a></li>
        <li><a href="#">Contact</a></li>
      </ul>
    </nav>
  </body>
</html>
This example demonstrates several important concepts:
- Applying border-image to nav: Uses the
border-imageproperty to add an image as a border. - Styling navigation links: Styles the navigation links for better visual appearance.
- Creating a visually appealing navigation bar: Combines CSS properties to create a decorative and functional navigation menu.
Browser Support
The border-image property enjoys excellent support across all modern web browsers, ensuring that your designs will render consistently across various platforms.
Note: Always test your implementations across different browsers to ensure a consistent user experience. 🧐
Conclusion
The border-image property is a versatile and powerful tool for web developers, providing the means to create unique and visually appealing borders for web elements. This comprehensive guide should equip you with the foundational knowledge and skills necessary to harness the power of the border-image property for your projects. From basic usage to advanced customization, the possibilities are limited only by your imagination. Happy coding!
Related Posts
CSS border Property: Comprehensive Guide to Styling Element Borders
CSS border Property: A Comprehensive Guide to Styling Element Borders The border property in CSS is a shorthand property that...
CSS Style borderLeft Property: CSS Border Left
CSS border-left Property: A Comprehensive Guide The border-left property in CSS is a shorthand property used to set the width,...
CSS Style borderColor Property: CSS Border Color
Understanding the CSS borderColor Property The borderColor property in CSS is used to set the color of an element's border....
CSS borderStyle Property: Comprehensive Guide to CSS Border Styles
CSS borderStyle Property: A Comprehensive Guide The borderStyle property in CSS is used to define the appearance of an element's...

CSS borderRightStyle Property: CSS Border Right Style
Understanding the borderRightStyle Property in CSS The borderRightStyle property in CSS is used to set the style of the right...
CSS borderTop Property: CSS Border Top Style Guide
Understanding the CSS borderTop Property The borderTop property in CSS is a shorthand property used to set the width, style,...
CSS borderRightColor Property: CSS Border Right Color
Understanding the borderRightColor Property in CSS The borderRightColor property in CSS is used to set the color of the right...
CSS Style borderWidth Property: CSS Border Width
CSS borderWidth Property: A Comprehensive Guide The borderWidth property in CSS is used to set the width of an element's...
CSS borderRight Property: CSS Border Right
CSS border-right Property: A Comprehensive Guide The border-right property in CSS is used to set all the properties of an...
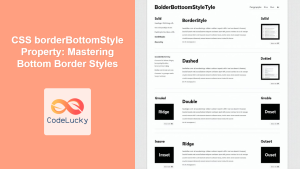
CSS borderBottomStyle Property: Mastering Bottom Border Styles
CSS borderBottomStyle Property: Mastering Bottom Border Styles The borderBottomStyle property in CSS is used to set the style of the...
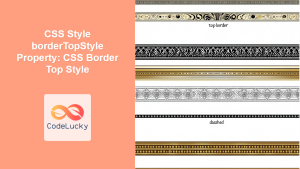
CSS Style borderTopStyle Property: CSS Border Top Style
CSS border-top-style Property: Styling the Top Border The border-top-style property in CSS is used to set the style of the...
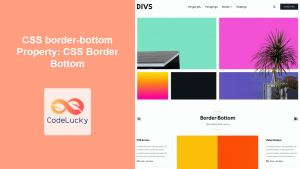
CSS border-bottom Property: CSS Border Bottom
Understanding the CSS border-bottom Property The border-bottom property in CSS is used to set the style, color, and width of...


