
CSS animationName Property: A Comprehensive Guide
The CSS animationName property specifies the name of the @keyframes at-rule that defines the animation’s keyframes. This property links a CSS animation to a set of keyframes, enabling elements to transition smoothly between different styles over a specified duration. Without animationName, animations defined using @keyframes will not be applied to any element.
Purpose of the animationName Property
The primary purpose of the animationName property is to:
- Connect a CSS animation to a specific set of keyframes defined using the
@keyframesrule. - Allow developers to apply multiple animations to a single element by specifying a comma-separated list of animation names.
- Enable dynamic control over which animations are active on an element through JavaScript or other scripting languages.
Syntax
The animationName property accepts one or more names of @keyframes at-rules, separated by commas.
animation-name: none | identifier[, identifier]*;
Values
| Value | Description |
|---|---|
| `none` | Specifies that no animation should be applied. This is the default value. |
| `identifier` | The name of the `@keyframes` at-rule to be used for the animation. This name must match the identifier defined in the `@keyframes` rule. |
Basic Examples
Let’s start with a basic example to illustrate how the animationName property works.
Example 1: Basic Animation
In this example, we define a simple animation called slideIn that moves an element from the left to its original position.
<!DOCTYPE html>
<html>
  <head>
    <title>Basic animationName Example</title>
    <style>
      .box_ani_name_1 {
        width: 100px;
        height: 100px;
        background-color: blue;
        position: relative;
        animation-name: slideIn;
        animation-duration: 2s;
      }

      @keyframes slideIn {
        from {
          left: -100px;
        }
        to {
          left: 0;
        }
      }
    </style>
  </head>
  <body>
    <div class="box_ani_name_1"></div>
  </body>
</html>
In this code:
.box_ani_name_1is the element to be animated.animation-name: slideIn;specifies that theslideInkeyframes should be used for the animation.animation-duration: 2s;sets the duration of the animation to 2 seconds.@keyframes slideIndefines the animation, moving the element from the left (-100px) to its original position (0).
Output
The blue box will slide in from the left over a duration of 2 seconds.
Using Multiple Animations
You can apply multiple animations to the same element by providing a comma-separated list of animation names to the animationName property.
Example 2: Multiple Animations
In this example, we apply two animations to the same element: slideIn and fadeIn.
<!DOCTYPE html>
<html>
  <head>
    <title>Multiple Animations Example</title>
    <style>
      .box_ani_name_2 {
        width: 100px;
        height: 100px;
        background-color: blue;
        position: relative;
        animation-name: slideIn, fadeIn;
        animation-duration: 2s, 3s;
      }

      @keyframes slideIn {
        from {
          left: -100px;
        }
        to {
          left: 0;
        }
      }

      @keyframes fadeIn {
        from {
          opacity: 0;
        }
        to {
          opacity: 1;
        }
      }
    </style>
  </head>
  <body>
    <div class="box_ani_name_2"></div>
  </body>
</html>
In this code:
.box_ani_name_2is the element to be animated.animation-name: slideIn, fadeIn;specifies that both theslideInandfadeInkeyframes should be used for the animation.animation-duration: 2s, 3s;sets the duration of theslideInanimation to 2 seconds and thefadeInanimation to 3 seconds.@keyframes slideIndefines the animation, moving the element from the left (-100px) to its original position (0).@keyframes fadeIndefines the animation, changing the opacity from 0 to 1.
Output
The blue box will slide in from the left while simultaneously fading in.
Real-World Applications
The animationName property is widely used in web development for creating engaging user interfaces and enhancing user experience.
Example 3: Animated Button
In this example, we create an animated button that changes color when hovered over.
<!DOCTYPE html>
<html>
  <head>
    <title>Animated Button Example</title>
    <style>
      .button_ani_name_3 {
        background-color: #4caf50; /* Green */
        border: none;
        color: white;
        padding: 15px 32px;
        text-align: center;
        text-decoration: none;
        display: inline-block;
        font-size: 16px;
        cursor: pointer;
        transition: background-color 0.3s;
      }

      .button_ani_name_3:hover {
        animation-name: colorChange;
        animation-duration: 0.5s;
        animation-fill-mode: forwards;
      }

      @keyframes colorChange {
        from {
          background-color: #4caf50;
        }
        to {
          background-color: #3e8e41;
        }
      }
    </style>
  </head>
  <body>
    <button class="button_ani_name_3">Hover Over Me</button>
  </body>
</html>
In this code:
.button_ani_name_3is the class applied to the button element.:hoveris a pseudo-class that applies styles when the button is hovered over.animation-name: colorChange;specifies that thecolorChangekeyframes should be used for the animation when the button is hovered over.animation-duration: 0.5s;sets the duration of the animation to 0.5 seconds.animation-fill-mode: forwards;ensures that the final state of the animation is maintained.@keyframes colorChangedefines the animation, changing the background color from green to a darker green.
Output
When you hover over the button, its background color will smoothly transition to a darker green.
Dynamic Control with JavaScript
The animationName property can be dynamically controlled using JavaScript to start, stop, or change animations based on user interactions or other events.
Example 4: Toggle Animation with JavaScript
In this example, we use JavaScript to toggle an animation on and off when a button is clicked.
<!DOCTYPE html>
<html>
  <head>
    <title>Toggle Animation Example</title>
    <style>
      .box_ani_name_4 {
        width: 100px;
        height: 100px;
        background-color: blue;
        position: relative;
      }

      .animate_ani_name_4 {
        animation-name: slideIn;
        animation-duration: 2s;
        animation-fill-mode: forwards;
      }

      @keyframes slideIn {
        from {
          left: -100px;
        }
        to {
          left: 0;
        }
      }
    </style>
  </head>
  <body>
    <div id="box_ani_name_4" class="box_ani_name_4"></div>
    <button id="toggleButton_ani_name_4">Toggle Animation</button>

    <script>
      const box_ani_name_4 = document.getElementById("box_ani_name_4");
      const toggleButton_ani_name_4 = document.getElementById(
        "toggleButton_ani_name_4"
      );

      toggleButton_ani_name_4.addEventListener("click", function () {
        box_ani_name_4.classList.toggle("animate_ani_name_4");
      });
    </script>
  </body>
</html>
In this code:
.box_ani_name_4is the element to be animated..animate_ani_name_4contains the animation properties.document.getElementByIdis used to select the box and the buttontoggleButton_ani_name_4.addEventListeneris used to listen for theclickeventbox_ani_name_4.classList.toggleadds or removes theanimate_ani_name_4class, which toggles the animation on or off.
Output
Clicking the “Toggle Animation” button will start or stop the animation on the blue box, causing it to slide in or out.
Tips and Best Practices
- Use Meaningful Names: Choose descriptive names for your
@keyframesat-rules to improve code readability and maintainability. - Combine with Other Animation Properties: Use
animationNamein conjunction with other animation properties likeanimationDuration,animationTimingFunction, andanimationIterationCountfor complete control over your animations. - Test Across Browsers: Ensure that your animations work consistently across different browsers to provide a seamless user experience.
- Consider Performance: Complex animations can impact performance. Optimize your animations by using hardware acceleration techniques and minimizing the number of elements being animated.
- Use
animationFillMode: This ensures that the element maintains the styles from the last keyframe when the animation is complete.
Browser Support
The animationName property is widely supported across modern web browsers, including Chrome, Firefox, Safari, and Edge. It is also supported in older versions of these browsers, making it a reliable choice for creating web animations.
Note: Always test your animations across different browsers and devices to ensure a consistent user experience. 🧐
Conclusion
The animationName property is a fundamental aspect of CSS animations, allowing developers to link animations to specific keyframes and control their behavior. By understanding the syntax, values, and practical examples outlined in this guide, you can effectively use the animationName property to create dynamic and engaging web animations. Happy coding!
Related Posts
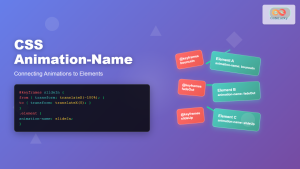
CSS Animation-Name: Complete Guide to Connecting Animations to Elements
The animation-name property is the bridge that connects your carefully crafted keyframe animations to HTML elements. Without this crucial CSS...
CSS Style animationDuration Property: CSS Animation Duration
Understanding the animationDuration Property in CSS The animationDuration property in CSS specifies the length of time that an animation should...
CSS Style animation Property: CSS Animation
CSS animation Property: A Comprehensive Guide to CSS Animations The animation property in CSS is a shorthand property used to...
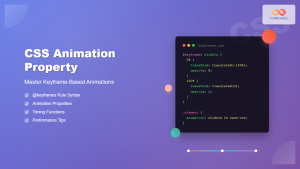
CSS Animation Property: Complete Guide to Keyframe-Based Animations
CSS animations bring life to web pages by allowing elements to transition smoothly between different states over time. The animation...
CSS Style transition Property: CSS Transition
CSS transition Property: A Comprehensive Guide The CSS transition property is a powerful tool for creating smooth animations when CSS...
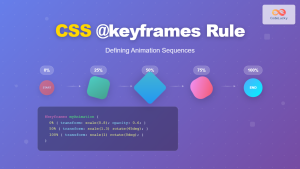
CSS @keyframes Rule: Complete Guide to Creating Smooth Animation Sequences
CSS animations bring life to web interfaces, and the @keyframes rule is the foundation that makes complex animation sequences possible....
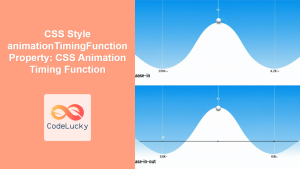
CSS Style animationTimingFunction Property: CSS Animation Timing Function
CSS Style animationTimingFunction Property: A Comprehensive Guide The animation-timing-function property in CSS is a crucial component for controlling the pace...

CSS Style animationDelay Property: CSS Animation Delay
Understanding the CSS animationDelay Property The CSS animationDelay property specifies the amount of time to wait from when the element...

JavaScript AnimationEvent animationName Property: Getting Animation Names
JavaScript AnimationEvent animationName Property: Retrieving Animation Names The animationName property of the JavaScript AnimationEvent interface is a crucial tool for...
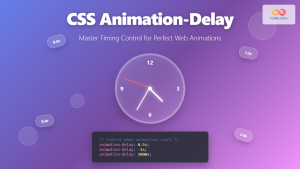
CSS Animation-Delay: Master Timing Control for Perfect Web Animations
What is CSS Animation-Delay? The animation-delay property in CSS controls when an animation starts after it's been applied to an...
CSS Transition-Duration: Complete Guide to Animation Timing Control
What is CSS Transition-Duration? The transition-duration property in CSS defines how long a transition animation should take to complete. It's...
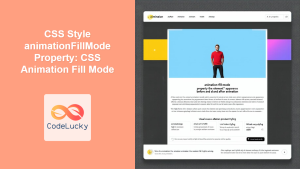
CSS Style animationFillMode Property: CSS Animation Fill Mode
CSS animation-fill-mode: Controlling Styles Before and After Animation The animation-fill-mode property in CSS specifies how a CSS animation should apply...


