Welcome back to our “DevOps from Scratch” series! In our previous posts, we explored the fundamentals of DevOps and dove deep into Git workflows. Today, we’re taking a crucial step forward in our DevOps journey by diving into Continuous Integration (CI). We’ll explore what CI is, why it’s essential, and how to set up a robust CI pipeline that will supercharge your development process.
Understanding Continuous Integration
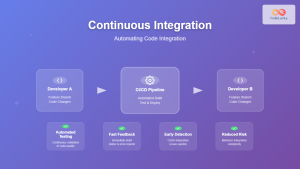
Continuous Integration is a DevOps practice where developers frequently integrate their code changes into a central repository, after which automated builds and tests are run. The primary goals of CI are to find and address bugs quicker, improve software quality, and reduce the time it takes to validate and release new software updates.
Key Benefits of CI:
- Early Bug Detection: By integrating regularly, you can detect errors quickly and locate them more easily.
- Reduced Integration Problems: Frequent integration reduces big bang merges.
- Improved Code Quality: Automated testing ensures that code quality is maintained.
- Faster Release Cycle: CI makes your software development process more efficient, enabling quicker releases.
Essential Components of a CI Pipeline
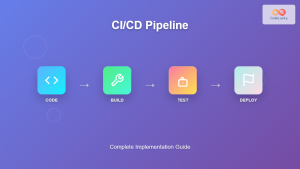
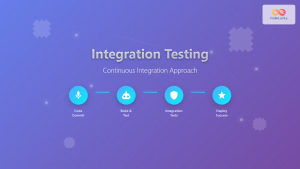
A typical CI pipeline consists of several stages:
- Code Commit: Developer pushes code to the repository.
- Build: The application is compiled if necessary.
- Unit Tests: Basic tests to ensure code functionality.
- Integration Tests: Tests to ensure different parts of the application work together.
- Code Analysis: Static code analysis to check code quality.
- Security Scan: Check for potential security vulnerabilities.
- Artifact Creation: Package the application for deployment.
Let’s look at how to implement these stages using popular CI tools.
Setting Up a CI Pipeline with Jenkins
Jenkins is one of the most popular open-source automation servers. Here’s how to set up a basic CI pipeline using Jenkins:
- Install Jenkins:
You can install Jenkins on various platforms. For Ubuntu:wget -q -O - https://pkg.jenkins.io/debian-stable/jenkins.io.key | sudo apt-key add - sudo sh -c 'echo deb http://pkg.jenkins.io/debian-stable binary/ > /etc/apt/sources.list.d/jenkins.list' sudo apt update sudo apt install jenkins - Create a Jenkinsfile:
In your project root, create a file namedJenkinsfile:pipeline { agent any stages { stage('Build') { steps { sh 'npm install' sh 'npm run build' } } stage('Test') { steps { sh 'npm test' } } stage('Code Analysis') { steps { sh 'npm run lint' } } stage('Security Scan') { steps { sh 'npm audit' } } stage('Deploy') { steps { sh 'echo "Deploying to staging..."' } } } } - Set up a Jenkins Job:
- In Jenkins, create a new Pipeline job.
- In the job configuration, specify the Git repository URL.
- Set the Script Path to “Jenkinsfile”.
- Run the Pipeline:
Jenkins will now run this pipeline every time changes are pushed to the repository.
Implementing CI with GitHub Actions
GitHub Actions is a CI/CD platform that’s directly integrated with GitHub. Here’s how to set it up:
- Create a Workflow File:
In your repository, create a file at.github/workflows/ci.yml:name: CI on: [push] jobs: build: runs-on: ubuntu-latest steps: - uses: actions/checkout@v2 - name: Use Node.js uses: actions/setup-node@v2 with: node-version: '14' - run: npm ci - run: npm run build --if-present - run: npm test - run: npm run lint - run: npm audit - Push the Workflow:
Commit and push this file to your repository. - View Results:
Go to the “Actions” tab in your GitHub repository to see your workflow runs.
Setting up GitLab CI/CD
GitLab comes with built-in CI/CD functionality. Here’s how to use it:
- Create a GitLab CI/CD Configuration File:
In your repository root, create a file named.gitlab-ci.yml:stages: - build - test - analyze - deploy build_job: stage: build script: - npm install - npm run build test_job: stage: test script: - npm test analyze_job: stage: analyze script: - npm run lint - npm audit deploy_job: stage: deploy script: - echo "Deploying to staging..." - Push the Configuration:
Commit and push this file to your GitLab repository. - View Pipeline:
Go to CI/CD > Pipelines in your GitLab project to see your pipeline runs.
Best Practices for CI Pipelines
- Keep it Fast: Optimize your pipeline to run as quickly as possible. Parallel execution of tests can help.
- Make it Reliable: Flaky tests can undermine confidence in your CI process. Invest time in making your tests reliable.
- Fail Fast: Structure your pipeline so that fast tests run first. This provides quicker feedback.
- Use Caching: Cache dependencies to speed up your build process.
- Secure Secrets: Never store sensitive information like API keys in your repository. Use your CI tool’s secrets management feature.
- Monitor and Optimize: Regularly review your CI pipeline’s performance and optimize as needed.
Advanced CI Techniques
As your CI pipeline matures, consider implementing these advanced techniques:
- Parallel Execution: Run multiple stages or jobs in parallel to speed up your pipeline.
Example in GitHub Actions:
jobs: test: runs-on: ubuntu-latest strategy: matrix: node-version: [12.x, 14.x, 16.x] steps: - uses: actions/checkout@v2 - name: Use Node.js ${{ matrix.node-version }} uses: actions/setup-node@v2 with: node-version: ${{ matrix.node-version }} - run: npm ci - run: npm test - Branch-Specific Workflows: Run different pipelines for different branches.
Example in GitLab CI:
deploy_staging: stage: deploy script: - echo "Deploy to staging server" only: - develop deploy_production: stage: deploy script: - echo "Deploy to production server" only: - main - Artifact Passing: Pass build artifacts between jobs.
Example in Jenkins:
stage('Build') { steps { sh 'npm run build' archiveArtifacts artifacts: 'dist/**/*', fingerprint: true } } stage('Deploy') { steps { unarchive mapping: ['dist/' : '.'] sh './deploy.sh' } } - Notifications: Set up notifications for pipeline status.
Example in GitHub Actions:
- name: Slack Notification
  uses: 8398a7/action-slack@v3
  with:
    status: ${{ job.status }}
    text: Deployment to production finished!
  env:
    GITHUB_TOKEN: ${{ secrets.GITHUB_TOKEN }}
    SLACK_WEBHOOK_URL: ${{ secrets.SLACK_WEBHOOK }}
Real-world CI Pipeline Example
Let’s look at a more comprehensive CI pipeline for a Node.js application:
name: CI
on: [push]
jobs:
  build:
    runs-on: ubuntu-latest
    steps:
    - uses: actions/checkout@v2
    - name: Use Node.js
      uses: actions/setup-node@v2
      with:
        node-version: '14'
    - name: Cache Node modules
      uses: actions/cache@v2
      with:
        path: ~/.npm
        key: ${{ runner.OS }}-node-${{ hashFiles('**/package-lock.json') }}
    - run: npm ci
    - run: npm run build
    - name: Archive production artifacts
      uses: actions/upload-artifact@v2
      with:
        name: dist
        path: dist
  test:
    needs: build
    runs-on: ubuntu-latest
    steps:
    - uses: actions/checkout@v2
    - name: Use Node.js
      uses: actions/setup-node@v2
      with:
        node-version: '14'
    - run: npm ci
    - run: npm test
  analyze:
    needs: test
    runs-on: ubuntu-latest
    steps:
    - uses: actions/checkout@v2
    - name: Use Node.js
      uses: actions/setup-node@v2
      with:
        node-version: '14'
    - run: npm ci
    - run: npm run lint
    - name: Run security audit
      run: npm audit
  deploy:
    needs: analyze
    runs-on: ubuntu-latest
    steps:
    - uses: actions/checkout@v2
    - name: Download artifacts
      uses: actions/download-artifact@v2
      with:
        name: dist
    - name: Deploy to staging
      run: |
        echo "Deploying to staging..."
        # Add your deployment script here
This pipeline demonstrates several advanced concepts:
- Caching of Node modules to speed up the build
- Artifact passing between jobs
- Job dependencies to ensure correct order of execution
- Separate jobs for different stages of the pipeline
Conclusion: CI as the Heartbeat of DevOps
Continuous Integration is more than just a set of tools or practices—it’s a fundamental shift in how we approach software development. By integrating code changes frequently and relying on automated tests and builds, we can detect problems early, improve code quality, and deliver value to our users more rapidly.
As you implement CI in your projects, remember that it’s an iterative process. Start small, perhaps with just automated builds and unit tests, and gradually expand your pipeline. Continuously refine your processes based on your team’s needs and the specific requirements of your projects.
In our next post, we’ll explore how to extend our CI pipeline into Continuous Deployment (CD), automating not just our testing but also our release process. We’ll look at strategies for safe, reliable deployments and how to implement them using the tools we’ve discussed. Stay tuned!
We’d love to hear about your experiences with CI! What challenges have you faced in setting up your pipelines? What tools have you found most effective? Share your stories and tips in the comments below!

