Ansible has revolutionized the way IT professionals manage infrastructure, making complex automation tasks simple and efficient. As an agentless automation platform, Ansible enables you to configure systems, deploy software, and orchestrate advanced IT tasks across multiple servers simultaneously.
What is Ansible?
Ansible is an open-source automation tool that simplifies configuration management, application deployment, and task automation. Unlike other automation tools, Ansible doesn’t require agents on target machines, using SSH for Linux/Unix systems and WinRM for Windows systems.
Key Features of Ansible
- Agentless Architecture: No need to install software on managed nodes
- Simple YAML Syntax: Easy-to-read playbooks written in YAML
- Idempotent Operations: Safe to run multiple times without side effects
- Extensive Module Library: 3000+ built-in modules for various tasks
- Push-based Model: Control node pushes configurations to managed nodes
Installing Ansible on Linux
Ubuntu/Debian Installation
# Update package index
sudo apt update

# Install Ansible
sudo apt install ansible -y

# Verify installation
ansible --version
CentOS/RHEL Installation
# Install EPEL repository
sudo yum install epel-release -y

# Install Ansible
sudo yum install ansible -y

# For RHEL 8/CentOS 8
sudo dnf install ansible -y
Installation via Pip
# Install pip if not available
sudo apt install python3-pip -y

# Install Ansible via pip
pip3 install ansible

# Verify installation
ansible --version
Ansible Architecture and Components
Control Node
The machine where Ansible is installed and from which all tasks and playbooks are executed. This is typically your local machine or a dedicated management server.
Managed Nodes
The target machines that Ansible manages. These don’t require Ansible installation, just SSH access and Python.
Inventory
A file listing all managed nodes, which can be static (INI or YAML format) or dynamic (scripts that generate inventory).
Modules
Units of code that Ansible executes on managed nodes. Each module performs a specific task like installing packages or copying files.
Playbooks
YAML files containing a series of tasks to be executed on managed nodes in a specific order.
Setting Up Your First Ansible Environment
Creating an Inventory File
Create a basic inventory file named hosts:
[webservers]
web1.example.com
web2.example.com
192.168.1.10

[databases]
db1.example.com
db2.example.com

[all:vars]
ansible_user=ubuntu
ansible_ssh_private_key_file=~/.ssh/id_rsa
Testing Connectivity
# Test connection to all hosts
ansible all -m ping -i hosts

# Expected output:
# web1.example.com | SUCCESS => {
#     "ansible_facts": {
#         "discovered_interpreter_python": "/usr/bin/python3"
#     },
#     "changed": false,
#     "ping": "pong"
# }
Ansible Ad-hoc Commands
Ad-hoc commands are one-liners for quick tasks without writing playbooks.
Basic Ad-hoc Command Structure
ansible [pattern] -m [module] -a "[module options]" -i [inventory]Common Ad-hoc Commands Examples
# Check disk space on all servers
ansible all -m shell -a "df -h" -i hosts

# Install a package on web servers
ansible webservers -m apt -a "name=nginx state=present" -i hosts --become

# Restart a service
ansible webservers -m service -a "name=nginx state=restarted" -i hosts --become

# Copy a file to all servers
ansible all -m copy -a "src=/tmp/file.txt dest=/tmp/file.txt" -i hosts

# Gather facts about systems
ansible all -m setup -i hosts
Writing Your First Ansible Playbook
Basic Playbook Structure
Create a file named webserver-setup.yml:
---
- name: Configure Web Servers
  hosts: webservers
  become: yes
  vars:
    http_port: 80
    domain_name: example.com

  tasks:
    - name: Update apt cache
      apt:
        update_cache: yes
        cache_valid_time: 3600

    - name: Install Nginx
      apt:
        name: nginx
        state: present

    - name: Start and enable Nginx
      service:
        name: nginx
        state: started
        enabled: yes

    - name: Create web directory
      file:
        path: /var/www/{{ domain_name }}
        state: directory
        owner: www-data
        group: www-data
        mode: '0755'

    - name: Copy index.html
      copy:
        content: |
          <html>
          <head><title>Welcome to {{ domain_name }}</title></head>
          <body>
          <h1>Hello from {{ inventory_hostname }}</h1>
          <p>This server is managed by Ansible</p>
          </body>
          </html>
        dest: /var/www/{{ domain_name }}/index.html
        owner: www-data
        group: www-data
        mode: '0644'
Running the Playbook
# Execute the playbook
ansible-playbook webserver-setup.yml -i hosts

# Run with verbose output
ansible-playbook webserver-setup.yml -i hosts -v

# Check what would change (dry run)
ansible-playbook webserver-setup.yml -i hosts --check
Essential Ansible Modules
System Modules
# Package management
- name: Install multiple packages
  apt:
    name:
      - git
      - curl
      - vim
    state: present

# Service management
- name: Manage services
  service:
    name: apache2
    state: started
    enabled: yes

# User management
- name: Create user
  user:
    name: developer
    shell: /bin/bash
    groups: sudo
    append: yes
File Operations
# Copy files
- name: Copy configuration file
  copy:
    src: /local/path/config.conf
    dest: /remote/path/config.conf
    backup: yes
    owner: root
    group: root
    mode: '0644'

# Template files
- name: Generate config from template
  template:
    src: nginx.conf.j2
    dest: /etc/nginx/nginx.conf
    backup: yes
  notify: restart nginx

# File operations
- name: Ensure directory exists
  file:
    path: /opt/myapp
    state: directory
    owner: app
    group: app
    mode: '0755'
Advanced Ansible Features
Using Variables
# Group variables file: group_vars/webservers.yml
nginx_port: 80
ssl_enabled: true
server_name: mywebsite.com

# Host variables file: host_vars/web1.example.com.yml
server_role: primary
backup_enabled: true
Handlers
---
- name: Configure Apache
  hosts: webservers
  become: yes

  tasks:
    - name: Update Apache configuration
      template:
        src: httpd.conf.j2
        dest: /etc/httpd/conf/httpd.conf
      notify:
        - restart apache
        - reload firewall

  handlers:
    - name: restart apache
      service:
        name: httpd
        state: restarted

    - name: reload firewall
      command: firewall-cmd --reload
Conditionals and Loops
# Conditionals
- name: Install package on Ubuntu only
  apt:
    name: nginx
    state: present
  when: ansible_distribution == "Ubuntu"

# Loops
- name: Create multiple users
  user:
    name: "{{ item }}"
    state: present
  loop:
    - alice
    - bob
    - charlie

# Complex loops
- name: Install packages with specific versions
  apt:
    name: "{{ item.name }}={{ item.version }}"
    state: present
  loop:
    - { name: nginx, version: "1.18*" }
    - { name: mysql-server, version: "8.0*" }
Ansible Vault for Security
Creating Encrypted Variables
# Create encrypted file
ansible-vault create secrets.yml

# Edit encrypted file
ansible-vault edit secrets.yml

# Encrypt existing file
ansible-vault encrypt vars.yml

# Decrypt file
ansible-vault decrypt vars.yml
Using Vault in Playbooks
# secrets.yml (encrypted)
database_password: supersecret123
api_key: abc123def456

# playbook using vault
---
- name: Deploy application
  hosts: app_servers
  vars_files:
    - secrets.yml

  tasks:
    - name: Configure database connection
      template:
        src: db_config.j2
        dest: /opt/app/config/database.yml
      vars:
        db_pass: "{{ database_password }}"
Running Playbooks with Vault
# Run with vault password prompt
ansible-playbook deploy.yml --ask-vault-pass

# Run with vault password file
ansible-playbook deploy.yml --vault-password-file ~/.vault_pass
Ansible Roles
Creating a Role Structure
# Generate role structure
ansible-galaxy init webserver

# Directory structure created:
webserver/
├── defaults/
│   └── main.yml
├── files/
├── handlers/
│   └── main.yml
├── meta/
│   └── main.yml
├── tasks/
│   └── main.yml
├── templates/
├── tests/
└── vars/
    └── main.yml
Example Role Implementation
# roles/webserver/tasks/main.yml
---
- name: Install web server packages
  package:
    name: "{{ web_packages }}"
    state: present

- name: Configure web server
  template:
    src: "{{ web_config_template }}"
    dest: "{{ web_config_path }}"
  notify: restart web service

- name: Ensure web service is running
  service:
    name: "{{ web_service_name }}"
    state: started
    enabled: yes

# roles/webserver/defaults/main.yml
---
web_packages:
  - nginx
web_service_name: nginx
web_config_template: nginx.conf.j2
web_config_path: /etc/nginx/nginx.conf
Using Roles in Playbooks
---
- name: Setup web infrastructure
  hosts: webservers
  become: yes

  roles:
    - common
    - webserver
    - { role: database, database_type: mysql }
    - role: monitoring
      vars:
        monitoring_enabled: true
Dynamic Inventories
AWS EC2 Dynamic Inventory
# Install boto3
pip install boto3

# Create aws_ec2.yml inventory plugin
plugin: aws_ec2
regions:
  - us-east-1
  - us-west-2
keyed_groups:
  - key: tags.Environment
    prefix: env
  - key: instance_type
    prefix: type
hostnames:
  - tag:Name
  - dns-name
Best Practices for Ansible
Directory Structure
ansible-project/
├── inventories/
│   ├── production/
│   │   ├── hosts.yml
│   │   └── group_vars/
│   └── staging/
│       ├── hosts.yml
│       └── group_vars/
├── roles/
├── playbooks/
├── group_vars/
├── host_vars/
└── ansible.cfg
Ansible Configuration
# ansible.cfg
[defaults]
inventory = inventories/production/hosts.yml
remote_user = ansible
host_key_checking = False
retry_files_enabled = False
gathering = smart
fact_caching = jsonfile
fact_caching_connection = /tmp/ansible_facts_cache
fact_caching_timeout = 86400

[ssh_connection]
ssh_args = -o ControlMaster=auto -o ControlPersist=60s -o UserKnownHostsFile=/dev/null
pipelining = True
Real-world Automation Examples
LAMP Stack Deployment
---
- name: Deploy LAMP Stack
  hosts: webservers
  become: yes
  vars:
    mysql_root_password: "{{ vault_mysql_root_password }}"

  tasks:
    - name: Update system packages
      apt:
        update_cache: yes
        upgrade: dist

    - name: Install LAMP packages
      apt:
        name:
          - apache2
          - mysql-server
          - php
          - php-mysql
          - libapache2-mod-php
        state: present

    - name: Configure MySQL root password
      mysql_user:
        name: root
        password: "{{ mysql_root_password }}"
        login_user: root
        login_password: "{{ mysql_root_password }}"
        check_implicit_admin: yes
        priv: "*.*:ALL,GRANT"
        host: "{{ item }}"
      loop:
        - "{{ inventory_hostname }}"
        - 127.0.0.1
        - ::1
        - localhost

    - name: Create application database
      mysql_db:
        name: webapp
        state: present
        login_user: root
        login_password: "{{ mysql_root_password }}"
Troubleshooting Common Issues
Debug and Verbose Output
# Debug playbook execution
ansible-playbook -vvv playbook.yml

# Debug specific tasks
- name: Debug variable content
  debug:
    var: ansible_facts
    verbosity: 2

# Register and display task output
- name: Check service status
  command: systemctl status nginx
  register: service_status

- name: Display service status
  debug:
    var: service_status.stdout_lines
Connection Testing
# Test SSH connectivity
ansible all -m ping -u ubuntu --private-key ~/.ssh/id_rsa

# Test with different connection methods
ansible all -m ping -c paramiko
ansible all -m ping -c ssh
Performance Optimization
Parallel Execution
# Increase parallelism in ansible.cfg
[defaults]
forks = 20

# Use strategy plugins
- name: Fast deployment
  hosts: all
  strategy: free

  tasks:
    - name: Quick task
      shell: echo "Done on {{ inventory_hostname }}"
Fact Caching
# Enable fact caching in ansible.cfg
[defaults]
gathering = smart
fact_caching = jsonfile
fact_caching_connection = /tmp/ansible_facts
fact_caching_timeout = 86400
Conclusion
Ansible has transformed infrastructure management by making automation accessible and reliable. Its agentless architecture, simple YAML syntax, and extensive module library make it an ideal choice for organizations of all sizes. Whether you’re managing a few servers or thousands of nodes, Ansible provides the tools and flexibility needed to automate complex IT operations efficiently.
Start with simple ad-hoc commands and gradually build complex playbooks and roles. Remember to follow best practices, use version control for your automation code, and always test in non-production environments first. With consistent practice and proper implementation, Ansible will become an invaluable tool in your Linux administration toolkit.
Related Posts

Chef Linux: Complete Infrastructure Automation Platform Guide for DevOps
Chef is a powerful infrastructure automation platform that transforms the way organizations manage their Linux environments. As a configuration management...
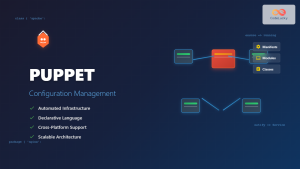
Puppet Linux: Complete Configuration Management Guide for System Administrators
Puppet is a powerful configuration management tool that revolutionizes how system administrators manage Linux infrastructure. By automating system configuration, software...
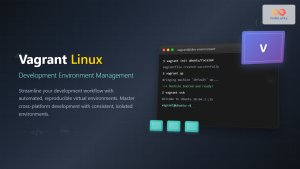
Vagrant Linux: Complete Guide to Development Environment Management
Vagrant revolutionizes development environment management by providing a consistent, reproducible way to create and manage virtual development environments. This comprehensive...

nomad Linux: Complete Guide to HashiCorp’s Workload Orchestrator
What is HashiCorp Nomad? HashiCorp Nomad is a simple yet powerful workload orchestrator that enables organizations to deploy and manage...

foreman Linux: Complete Lifecycle Management for Enterprise Infrastructure
Foreman is a powerful open-source lifecycle management tool that revolutionizes how system administrators handle infrastructure provisioning, configuration management, and monitoring....

SaltStack Linux: Complete Guide to Intelligent IT Automation and Configuration Management
SaltStack has revolutionized the way system administrators and DevOps engineers manage infrastructure at scale. As a powerful configuration management and...
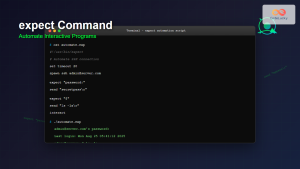
expect Command Linux: Complete Guide to Automate Interactive Programs
The expect command is a powerful automation tool in Linux that allows you to automate interactive programs that normally require...

Katello Linux: Complete Guide to Enterprise Content and Configuration Management
Introduction to Katello Linux Katello is a powerful open-source content and configuration management platform that serves as the upstream project...

herd Command Linux: Complete Guide to Managing Shepherd Services
The herd command in Linux is a powerful utility designed for managing Shepherd services, particularly in the context of Laravel...

OpenShift Linux: Complete Guide to Enterprise Kubernetes Platform Management
OpenShift represents Red Hat's enterprise-grade Kubernetes platform that revolutionizes how organizations deploy, manage, and scale containerized applications on Linux systems....
runit Linux: Complete Guide to Unix Init Scheme with Service Supervision
runit is a lightweight, cross-platform Unix init scheme with service supervision that provides a reliable alternative to traditional init systems....

check_mk Linux: Complete Guide to Nagios-Based System Monitoring
check_mk is a powerful monitoring system built on top of Nagios that simplifies infrastructure monitoring with automated service discovery and...